Let's just start with a typical disclaimer. Brakes are the amongst the most important parts of your car. If you're not sufficiently qualified to work on them, please step away and leave to a professional. It's not just your life you risk but other road users.
Before getting into the how to, there's LOTS that can be fixed without overhauling the calipers. On the fronts, new sliders and cleaning the pad mounting surfaces can improve performance. The same would apply to the rear, but I'm sure many people would be looking at this for the dreaded handbrake. The dreaded handbrake is often fixed by simply setting it up properly, which we've covered in a previous how to.
If you're contemplating this, then consider if buying replacement calipers or having someone else refurbish them, could be cheaper. Whilst the fronts are relatively simple to do, the rears do require some special tools. However, I should point out that if you are having your calipers refurbished, I'd absolutely make some form of permanent mark on the cap of the handbrake lever. As you'll see in the post, this cannot be removed without damage. Refurb kits also do not come with a replacement cap, meaning if your "refurbished" caliper returns with the mark you made in place, the cap has not been removed, which means the seal underneath the handbrake lever has not been replaced.
Brake caliper refurbishment
Moderators: jifflemon, coyote1980, Rachel
Re: Brake caliper refurbishment
Front Caliper:
Front calipers are relatively simple to do. You remove the Piston and replace the outer and inner seals, and the piston too.
Ok, a little more detail perhaps!
First thing to consider, is that if you intend painting the caliper, whilst its fitted to the car, it's a good opportunity to attack with a wire wheel, either on a drill or angle grinder. The caliper is well mounted and you can always do the more finer work when off the car.
Removing the piston? Well, If the caliper is still attached to the car, remove the pads, and slowly press the brake pedal to push the piston out. It will go with a bang, and will spew brake fluid everywhere, so is quite messy, but you're replacing that brake fluid anyway.
You could use Vice grips to grip the piston, then rotate the piston as you pull - Access is more restricted and if you're trying to save the piston (I wouldn't bother!) vice grips will damage it.
What does Jeff do? Well, given I've quite a few spare sets of calipers, I rigged up a tool to help me remove them. Nothing works better than hydraulic (believe me, I tried with Vice Grips and compressed air before settling on this!)

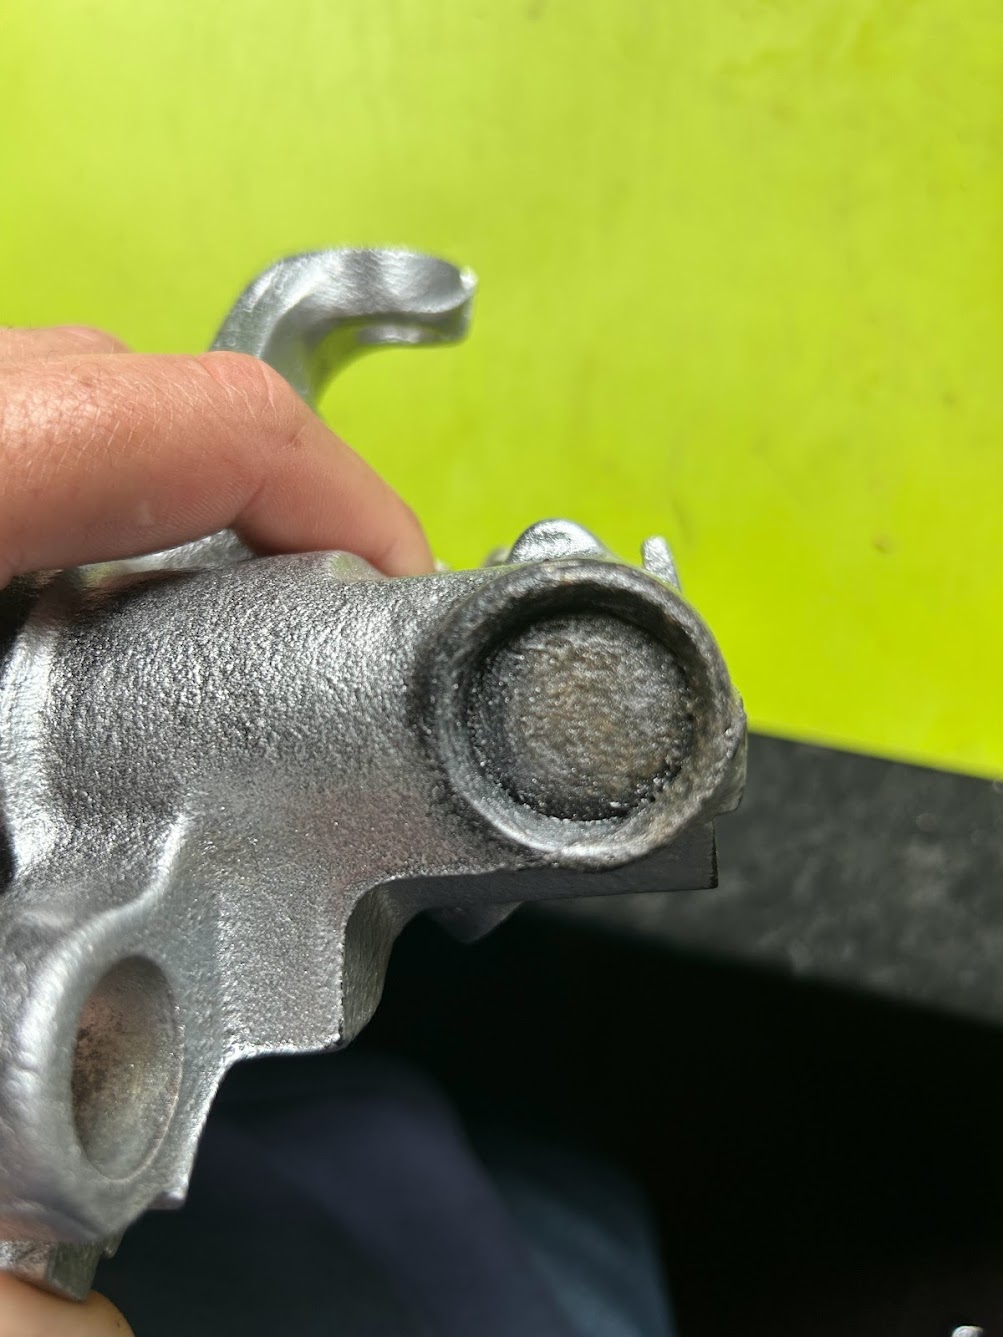
Removing the inner seal will require a pick tool - a very thin screwdriver will suffice. However, you need to be VERY careful not to scratch the inner bore of the caliper. Examine the inner bore - run a fingernail around it. If there's any kind of scoring on the inner bore that can be felt with a finger nail, then put the piston back in and order yourself a replacement caliper.
Now, you need to get that inner seal area and the area where the outer seal tucks in clean; like, surgically clean. I used very find scotch pads on plastic trim tools to scrub everything. Scotch pads are also good for getting into the areas that a wire wheel won't reach.
Now, if your not painting the calipers, feel free to skip ahead. Painting relies on good prep. Hopefully you've already tackled most of the dirty work whilst it was still attached to the car, but now is the time to really get it clean. Painting calipers is no different to painting panels - Preparation is everything and cleanliness is key. Clean as much surface rust off as possible, cleaning with brake cleaner or degreaser. I then like to stick them in the oven to really dry them off.

I then hit them with a coat of rust killer; My favourite is Vactan, which also acts as a primer. It goes without saying that you DO NOT want anything on the inner bore. I tend to use the old piston as handy bung. This then goes back in the overn to speed up curing

Then for overkill, I hit them with a proper primer, either red oxide or etch primer does the trick before once again, having some time in the oven

Finally, hit them with some colour - Many light coats are better than a single heavy one. For reference, a single 400ml can will easily do a pair of calipers and at a push, you could possibly do all 4 with a single can. Yes, they get baked again after the final coat before being left to air for at least 24 hours.
Front calipers are relatively simple to do. You remove the Piston and replace the outer and inner seals, and the piston too.
Ok, a little more detail perhaps!
First thing to consider, is that if you intend painting the caliper, whilst its fitted to the car, it's a good opportunity to attack with a wire wheel, either on a drill or angle grinder. The caliper is well mounted and you can always do the more finer work when off the car.
Removing the piston? Well, If the caliper is still attached to the car, remove the pads, and slowly press the brake pedal to push the piston out. It will go with a bang, and will spew brake fluid everywhere, so is quite messy, but you're replacing that brake fluid anyway.
You could use Vice grips to grip the piston, then rotate the piston as you pull - Access is more restricted and if you're trying to save the piston (I wouldn't bother!) vice grips will damage it.
What does Jeff do? Well, given I've quite a few spare sets of calipers, I rigged up a tool to help me remove them. Nothing works better than hydraulic (believe me, I tried with Vice Grips and compressed air before settling on this!)
Removing the inner seal will require a pick tool - a very thin screwdriver will suffice. However, you need to be VERY careful not to scratch the inner bore of the caliper. Examine the inner bore - run a fingernail around it. If there's any kind of scoring on the inner bore that can be felt with a finger nail, then put the piston back in and order yourself a replacement caliper.
Now, you need to get that inner seal area and the area where the outer seal tucks in clean; like, surgically clean. I used very find scotch pads on plastic trim tools to scrub everything. Scotch pads are also good for getting into the areas that a wire wheel won't reach.
Now, if your not painting the calipers, feel free to skip ahead. Painting relies on good prep. Hopefully you've already tackled most of the dirty work whilst it was still attached to the car, but now is the time to really get it clean. Painting calipers is no different to painting panels - Preparation is everything and cleanliness is key. Clean as much surface rust off as possible, cleaning with brake cleaner or degreaser. I then like to stick them in the oven to really dry them off.
I then hit them with a coat of rust killer; My favourite is Vactan, which also acts as a primer. It goes without saying that you DO NOT want anything on the inner bore. I tend to use the old piston as handy bung. This then goes back in the overn to speed up curing
Then for overkill, I hit them with a proper primer, either red oxide or etch primer does the trick before once again, having some time in the oven
Finally, hit them with some colour - Many light coats are better than a single heavy one. For reference, a single 400ml can will easily do a pair of calipers and at a push, you could possibly do all 4 with a single can. Yes, they get baked again after the final coat before being left to air for at least 24 hours.
Re: Brake caliper refurbishment
Reassembly
A rebuild kit typically comes with two seals (inner and outer), a new piston and bleed nipple and some red rubber grease. If you lay your parts out, it should look something like this:

Grease up the inner seal with the red rubber grease supplied in your rebuild kit. It's a little fiddly, but its important to get it seated squarely. Once in, rub a thin layer of red rubber grease in the bore of the caliper - don't worry, Red rubber grease is compatible with DOT3/4 and 5.1 brake fluids. No mineral oils or greases may be used in places that come into contact with brake fluid.
A rebuild kit typically comes with two seals (inner and outer), a new piston and bleed nipple and some red rubber grease. If you lay your parts out, it should look something like this:
Grease up the inner seal with the red rubber grease supplied in your rebuild kit. It's a little fiddly, but its important to get it seated squarely. Once in, rub a thin layer of red rubber grease in the bore of the caliper - don't worry, Red rubber grease is compatible with DOT3/4 and 5.1 brake fluids. No mineral oils or greases may be used in places that come into contact with brake fluid.
Re: Brake caliper refurbishment
Then its the outer seal and piston. I find the easiest way is to fit the seal to the piston about a third of the way down the piston like this
(trying to fix image)
You fit the lip of the seal into the caliper before pushing the piston squarely down into the bore. As you push the piston down the lip engages into the recess.

It's fiddly and may take a few attempts, but you should be able to push the piston all the way home with nothing more than hand pressure.

Once home, rotate the piston in the bore to ensure the seal is seated correctly everywhere (it looks a little off in that pic, but settled in after a turn).
Then fit your new bleed nipple, new sliders to the brackets, and in finest Haynes tradition, refitting is the reversal of removal.
(trying to fix image)
You fit the lip of the seal into the caliper before pushing the piston squarely down into the bore. As you push the piston down the lip engages into the recess.
It's fiddly and may take a few attempts, but you should be able to push the piston all the way home with nothing more than hand pressure.
Once home, rotate the piston in the bore to ensure the seal is seated correctly everywhere (it looks a little off in that pic, but settled in after a turn).
Then fit your new bleed nipple, new sliders to the brackets, and in finest Haynes tradition, refitting is the reversal of removal.
Re: Brake caliper refurbishment
Rear brakes
I've deliberated posting this one, as I'm fairly confident I'm probably the only person mad enough to take this on, but here we go anyway!
First lets cover the earlier statement I made -
If anyone else is refurbing your calipers, mark this by heavily scratching something in; It needs to be something that's not going to get removed. If your refurb caliper comes back with this mark still on it, it's not been refurbed. You'll see soon enough.
Much like the fronts, do as much cleaning as possibly on the car. Thankfully, the rear caliper piston can be popped out by working the handbrake lever - Although it's worth checking this whilst its ON the car, because if it doesn't, you can always use brake pressure to do it.
I've deliberated posting this one, as I'm fairly confident I'm probably the only person mad enough to take this on, but here we go anyway!
First lets cover the earlier statement I made -
Wheres this cap? Well, at the bottom of the lever is this.
If anyone else is refurbing your calipers, mark this by heavily scratching something in; It needs to be something that's not going to get removed. If your refurb caliper comes back with this mark still on it, it's not been refurbed. You'll see soon enough.
Much like the fronts, do as much cleaning as possibly on the car. Thankfully, the rear caliper piston can be popped out by working the handbrake lever - Although it's worth checking this whilst its ON the car, because if it doesn't, you can always use brake pressure to do it.
Re: Brake caliper refurbishment
Rear Brake Strip down
So, working the handbrake lever should be sufficient to push the piston out of the bore; otherwise you'll have to hydraulic it out.
Turned the piston over you'll be greeted by this
(another image to fix)
That's half of the handbrake adjuster mechanism. If you're looking at your rebuild kit, you'll see that that needs transferring over. Leading to the first puzzle - Just how the hell do you get it out? Looking down the bore of the caliper, you'll see a large screw - That's the second half of the handbrake mechanism as well as the second part of the puzzle! Finally, if you look at the arm, you'll see that this seal (between the arm and the caliper body) is included in the kit, but with no obvious way to replace it.

So.... first lets have the complete caliper breakdown picture.

So, working the handbrake lever should be sufficient to push the piston out of the bore; otherwise you'll have to hydraulic it out.
Turned the piston over you'll be greeted by this
(another image to fix)
That's half of the handbrake adjuster mechanism. If you're looking at your rebuild kit, you'll see that that needs transferring over. Leading to the first puzzle - Just how the hell do you get it out? Looking down the bore of the caliper, you'll see a large screw - That's the second half of the handbrake mechanism as well as the second part of the puzzle! Finally, if you look at the arm, you'll see that this seal (between the arm and the caliper body) is included in the kit, but with no obvious way to replace it.
So.... first lets have the complete caliper breakdown picture.
Re: Brake caliper refurbishment
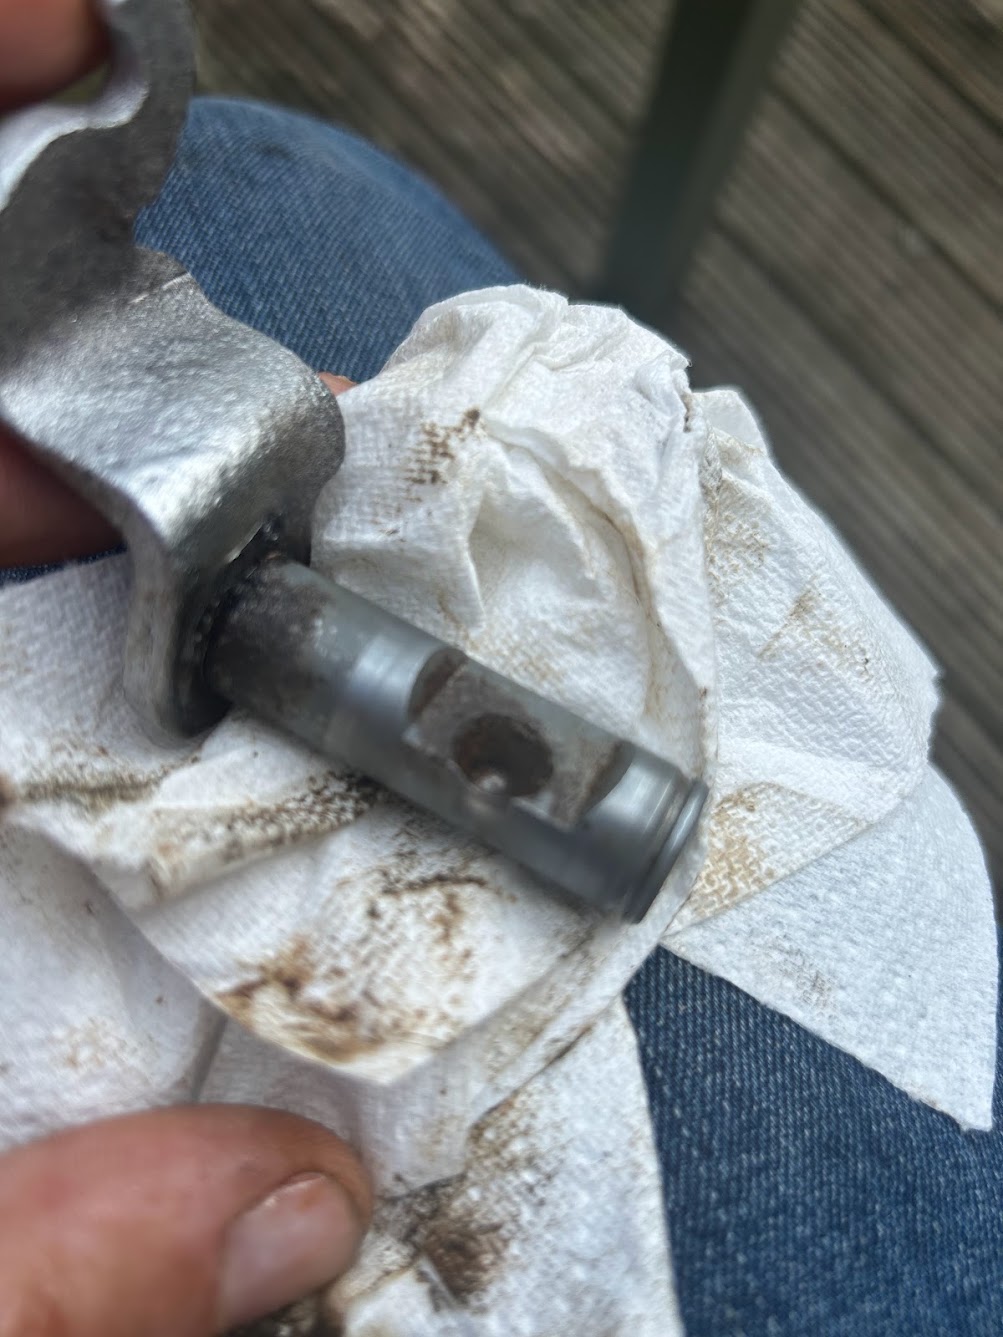
So, to remove the mechanism from the piston, its a simple as levering from both sides with a pair of stout screwdrivers. You don't have to dissassemble it to transfer it over but do ensure you give it a thorough cleaning. Fitting into the new piston is done by pressing in - A vice (fitted with soft jaws) is ideal.
The drive unit in the bore is secured in place by a circlip. Sound easy doesn't it? the first problem is that its a very small circlip; I went through 5 different sets of circlip pliers, including modifying some, before I finally found a pair that'd work. You need them to have a 90 degree bend in them, but be deep enough and slim enough to reach inside the bore. Even then you'll find that trying to get them into the circlip is done on pure blind faith, as the circlip pliers are now blocking any view of the clip you had - Wondered why there's no photo of this stage? Now you know!
With the circlip out, the pin can be pulled out - the o-ring may make it feel stuck, but it will come. Also watch for the handbrake pin if you're pulling it out inverted!
So.... the lever? Well, I spoke to three different refurbers who all drew a blank - one admitted they'd never changed the arm seal! What you have to do is drill through the cap a couple of times, so that you can then lever the cap out.

Which then reveals another circlip

Watch for the flat washer under the circlip as you pull the arm out too! et Voila, the arm is free.
The problem now, is that the rebuild kits don't come with a replacement cap (no idea why!). Thankfully my doing this coincided with my friend acquiring a lathe, so I ordered a some aluminium bar and turned up my own caps that get drifted back on during reassembly. See now why I think I'll be the only nutter doing this?
Reassembly, is of course, the reverse of removal. Much like the doing the fronts, cleanliness is the order of the day, along with copious amounts of red rubber grease.
The drive unit in the bore is secured in place by a circlip. Sound easy doesn't it? the first problem is that its a very small circlip; I went through 5 different sets of circlip pliers, including modifying some, before I finally found a pair that'd work. You need them to have a 90 degree bend in them, but be deep enough and slim enough to reach inside the bore. Even then you'll find that trying to get them into the circlip is done on pure blind faith, as the circlip pliers are now blocking any view of the clip you had - Wondered why there's no photo of this stage? Now you know!
With the circlip out, the pin can be pulled out - the o-ring may make it feel stuck, but it will come. Also watch for the handbrake pin if you're pulling it out inverted!
So.... the lever? Well, I spoke to three different refurbers who all drew a blank - one admitted they'd never changed the arm seal! What you have to do is drill through the cap a couple of times, so that you can then lever the cap out.
Which then reveals another circlip
Watch for the flat washer under the circlip as you pull the arm out too! et Voila, the arm is free.
The problem now, is that the rebuild kits don't come with a replacement cap (no idea why!). Thankfully my doing this coincided with my friend acquiring a lathe, so I ordered a some aluminium bar and turned up my own caps that get drifted back on during reassembly. See now why I think I'll be the only nutter doing this?
Reassembly, is of course, the reverse of removal. Much like the doing the fronts, cleanliness is the order of the day, along with copious amounts of red rubber grease.
Re: Brake caliper refurbishment
Excellent write up as usual,
TBH for the outer seal/dust cover I normally fit it after I've fitted the inner seal and pushed in the piston, I guess depends on clearance and how easy fiddly it is to flip it over?
TBH for the outer seal/dust cover I normally fit it after I've fitted the inner seal and pushed in the piston, I guess depends on clearance and how easy fiddly it is to flip it over?
Alan
480 ES 2litre 'Celebration' ? , C30 1.8ES, SS1
480 ES 2litre 'Celebration' ? , C30 1.8ES, SS1
Re: Brake caliper refurbishment
The problem is getting the out seal lip to tuck in - If google images was playing ball, you'd see the picture! No idea why some images are ok and others are problematic; Suspect it's something to do with the length of the URL. (posting gives a 403 Forbidden error)
Re: Brake caliper refurbishment
aye , i know fit ye mean..... the dust covers on the C30 are a real PITA as they just 'grip' the edge, not even a groove, so the ruddy thing slides off!jifflemon wrote: ↑Sun Nov 05, 2023 6:31 pmThe problem is getting the out seal lip to tuck in - If google images was playing ball, you'd see the picture! No idea why some images are ok and others are problematic; Suspect it's something to do with the length of the URL. (posting gives a 403 Forbidden error)
Alan
480 ES 2litre 'Celebration' ? , C30 1.8ES, SS1
480 ES 2litre 'Celebration' ? , C30 1.8ES, SS1