How to fashion a fix for the "clutch bulkhead breach"
Posted: Sun Jul 25, 2021 7:19 pm
It was a hot sunny day last saturday when I drove down to Amberley to meet with some fellow AutoShite forum members. The drive across the south downs there and back was amazing, but just as I finished the journey, and turned onto my road, I suddenly noticed my clutch no longer worked. I quickly messaged Jeff and it turned out it was the "classic bulkhead split" - something had to be done.
We knew off the bat that we had to make a new part to specially fit the hole that was now breaching the bulkhead

Here is how we did it (for the purposes of this guide, I am omitting the clutch cable removal and refit, which can be found Courtesy of our Lord and Tormentor, St. Haynes)
Step 1: Work out the measurements of the hole needed to thread the cable through.
In this case, it was around 19mm. Observe our technical* drawing of how the problem looks:
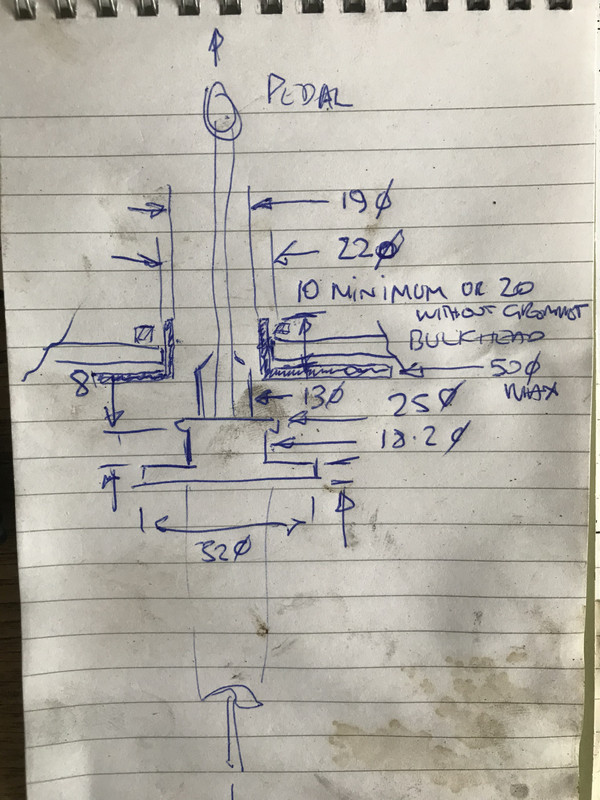
In order to mend this you will not only need a new hole, but also bracing around it to affix to the rest of the bulkhead
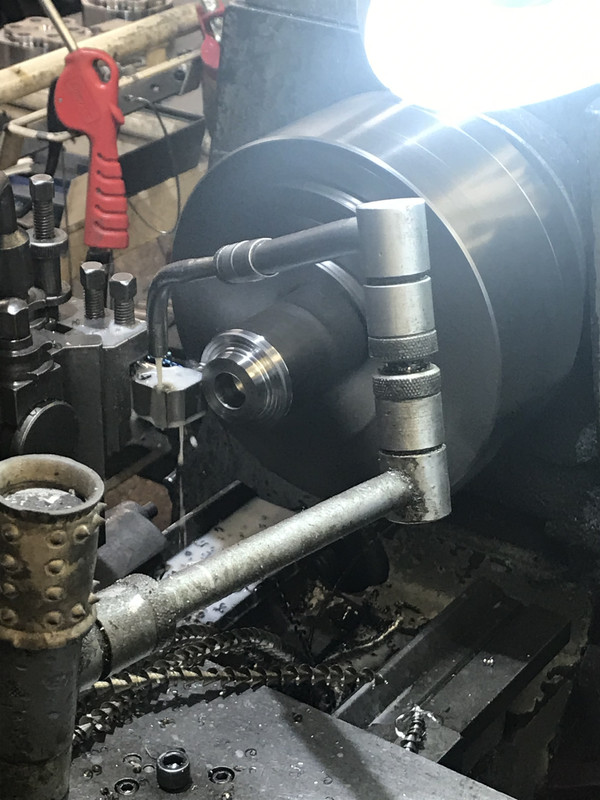
Step 2: Fashion the part
We used a lathe for this, turning some mild steel, however I reckon a similarly decent fix could be achieved using a 3D printer or Resin casting, provided the plastic is hard enough to take the strain
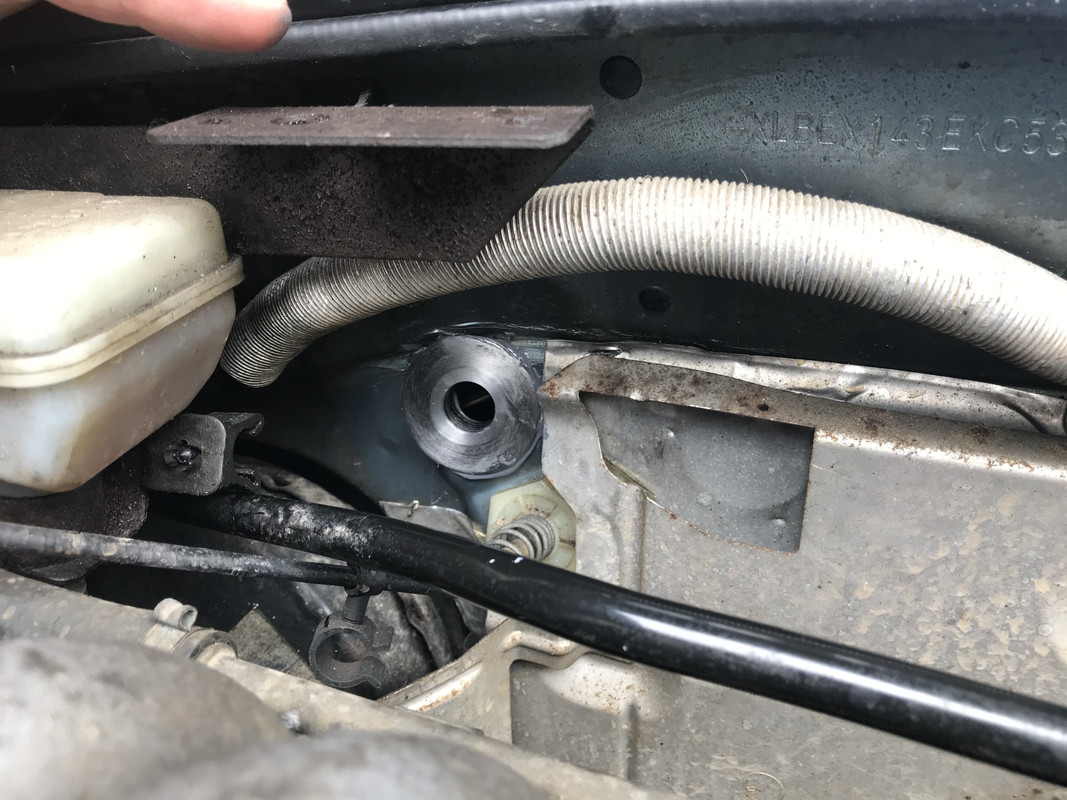
The end result should look something like this:

(this image is of an alternative design we didn't use, we used one with a slightly longer tunnel, the one pictured is available for less extreme cases)
Step 3: The fitting
This can be done using an Epoxy Resin, no welding needed. make sure you get a good coverage of resin to fill in any imperfections from the breach. make sure the area is clean (contact cleaner is very good) and dry, and leave to cure for about 4 hours before attempting to refit the clutch
Once this is all done, you can then refit and adjust the clutch as you so desire. We found it actually wasn't that difficult compared to some of the other innovative solutions found on this car
I hope this guide is sufficient for people to be able to confidently make a replica of this piece for their own car in either metal or hard plastic
We knew off the bat that we had to make a new part to specially fit the hole that was now breaching the bulkhead
Here is how we did it (for the purposes of this guide, I am omitting the clutch cable removal and refit, which can be found Courtesy of our Lord and Tormentor, St. Haynes)
Step 1: Work out the measurements of the hole needed to thread the cable through.
In this case, it was around 19mm. Observe our technical* drawing of how the problem looks:
In order to mend this you will not only need a new hole, but also bracing around it to affix to the rest of the bulkhead
Step 2: Fashion the part
We used a lathe for this, turning some mild steel, however I reckon a similarly decent fix could be achieved using a 3D printer or Resin casting, provided the plastic is hard enough to take the strain
The end result should look something like this:
(this image is of an alternative design we didn't use, we used one with a slightly longer tunnel, the one pictured is available for less extreme cases)
Step 3: The fitting
This can be done using an Epoxy Resin, no welding needed. make sure you get a good coverage of resin to fill in any imperfections from the breach. make sure the area is clean (contact cleaner is very good) and dry, and leave to cure for about 4 hours before attempting to refit the clutch
Once this is all done, you can then refit and adjust the clutch as you so desire. We found it actually wasn't that difficult compared to some of the other innovative solutions found on this car
I hope this guide is sufficient for people to be able to confidently make a replica of this piece for their own car in either metal or hard plastic