How to mount a towbar...
Posted: Thu Jul 26, 2007 1:49 pm
How I mounted my towbar…
1
Get the rear of your car in the air…
2
Remove the rear bumper, as described in Section 8 (LINK).
The first surprise I encountered, was the steel part of my rear bumper…
It looked like this
 :
:
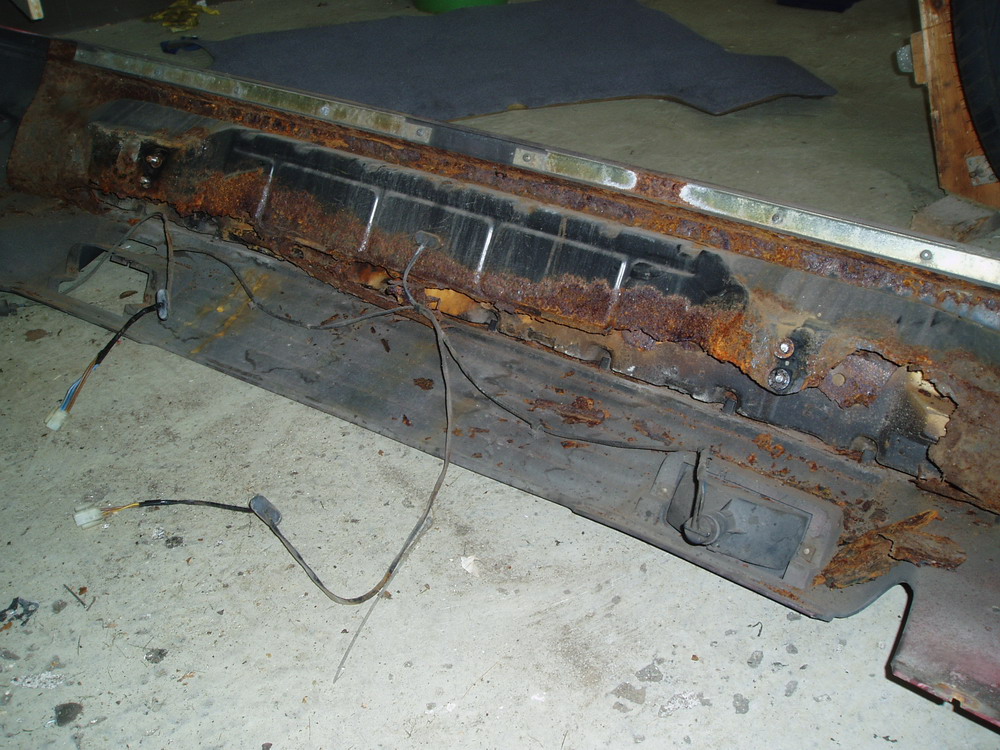
Two bolts broke when I removed the bumper, so beware when you ‘re planning to do this…
The towing eye was also in a bad condition:
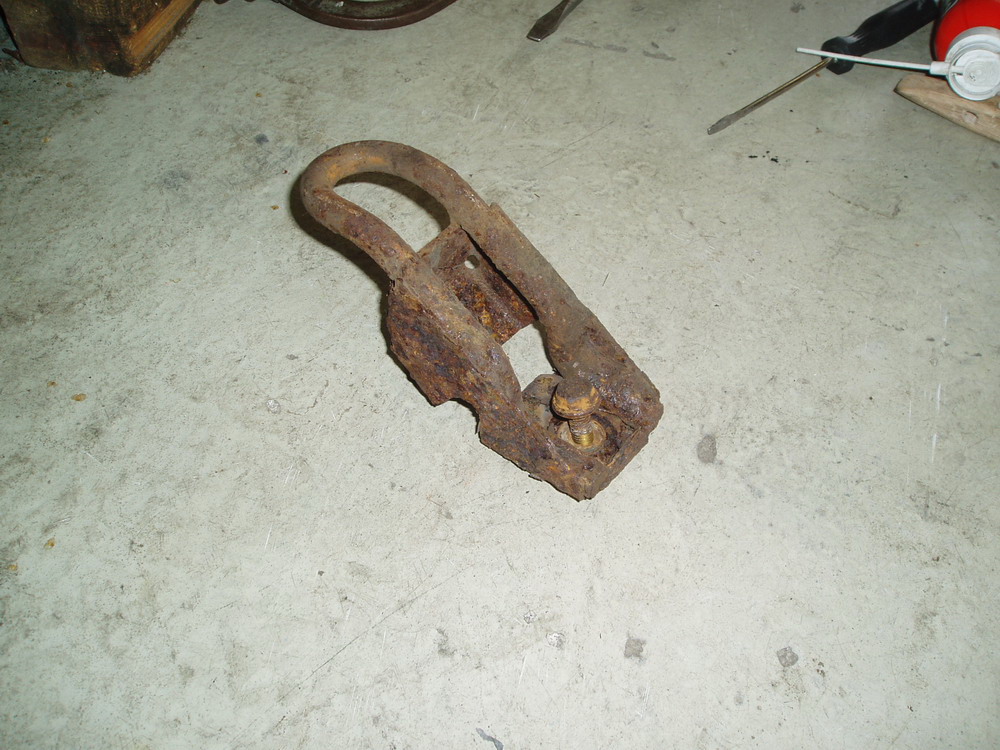
So I called my Volvo dealer to order some new parts and carried on…
3
This is what you need:
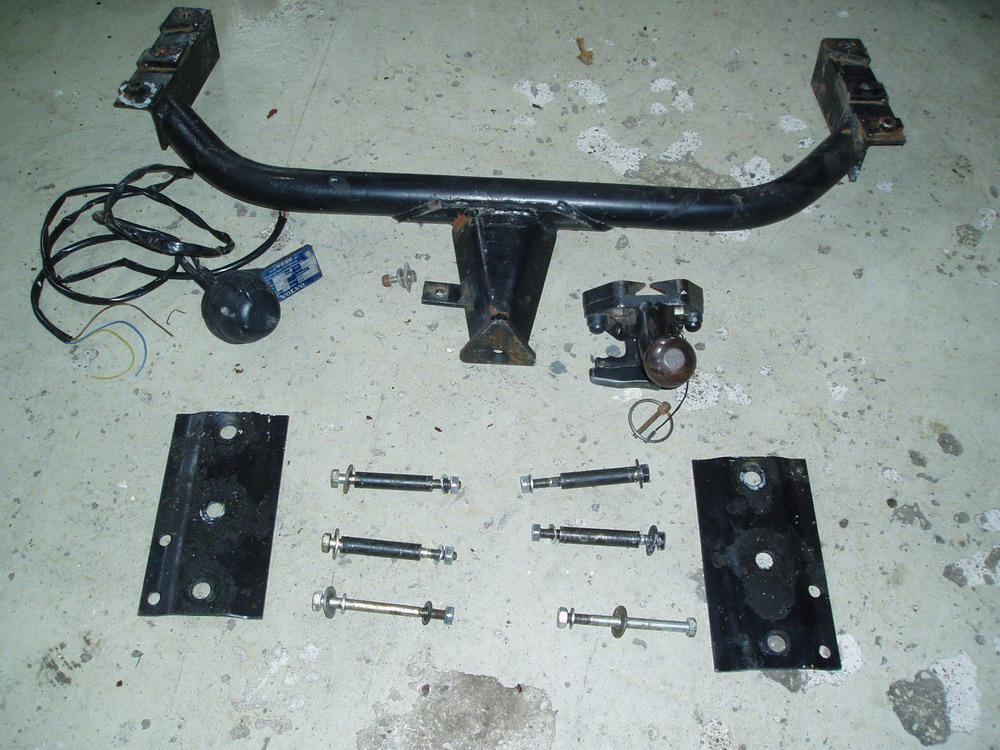
The towbar, 6 bolts, nuts and washers, 6 tubes (only 4 on the picture, the bolts are mounted inside them), the electrics and two mounting plates
4
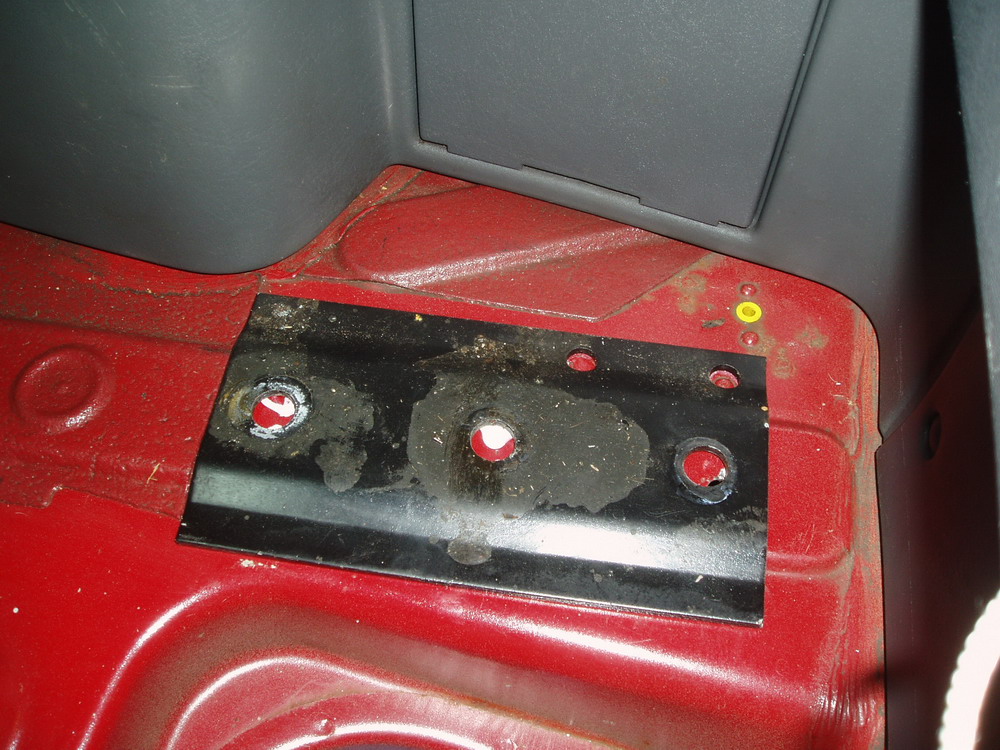
You have to drill 6 holes in the trunk of the car (inside). When you look at the picture, you can see that I ‘ve made some markings.
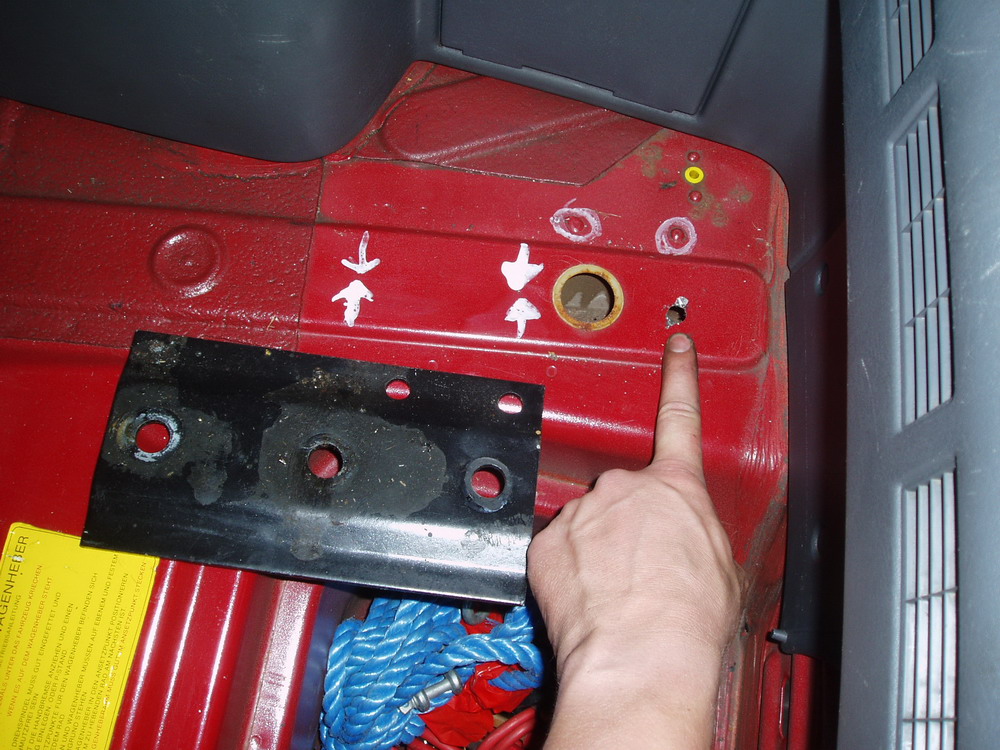
Between the arrows, there are ‘little dots’ marked in the trunk, which are created by Volvo. At these marks (three on the left side and three on the right side), you’ll need to drill a hole of 16 mm. I did it in two steps, first drilled the holes at 8 mm, then made them at 16 mm. In the picture, you can see that I already drilled the first hole, where my finger is (only 8 mm when I took the picture)…
The two white round circles in the picture, show two points which will help you hold the mounting plate in position. They fit in the two little holes of the mounting plate, as can be seen in the next picture, where the mounting plate is in place...
5
Take a look under the car. You can see a hole, marked white in the picture…
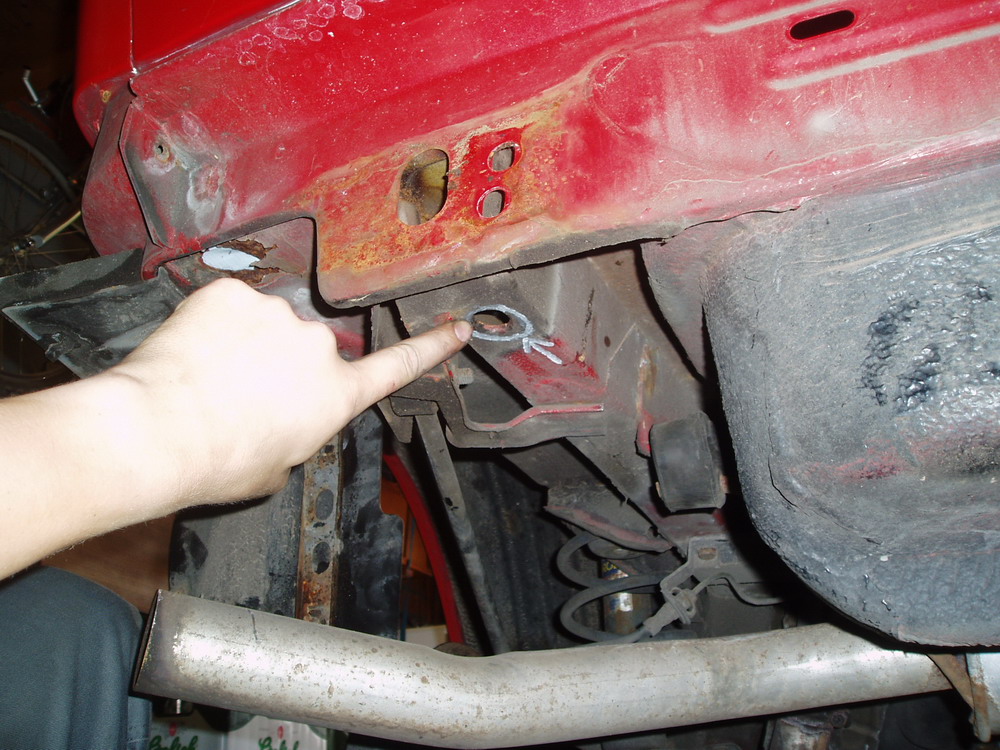
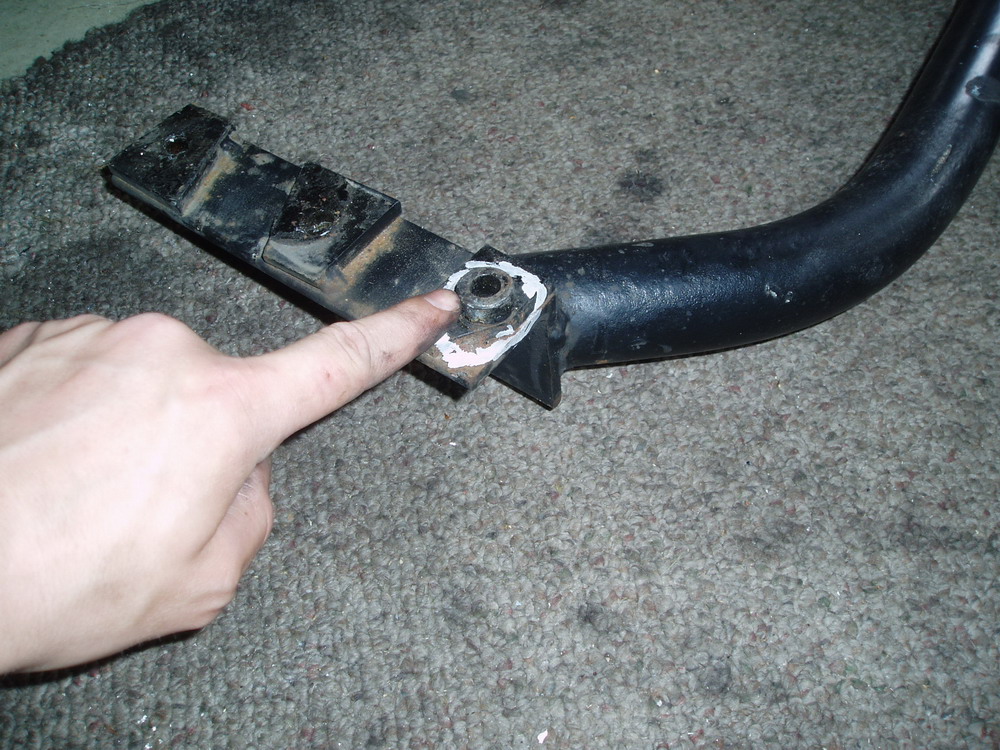
Now look at the towbar, in the following picture, I point at a little circular shaft , which fits exactly in the hole as seen on the previous picture.
Mount the towbar under the car by putting the little circular shaft into the hole. From the inside of the trunk, put a tube through the mounting plate, into the hole you’ve just drilled. This tube will prevent the car’s body work to deform (important, so don’t forget this!) Now put a bolt with a washer through the mounting plate, though the inserted tube, through the body work of the car and eventually through the towbar. In the end, add a washer and a nut. The result can be seen in the following picture, seen from the bottom of the car:
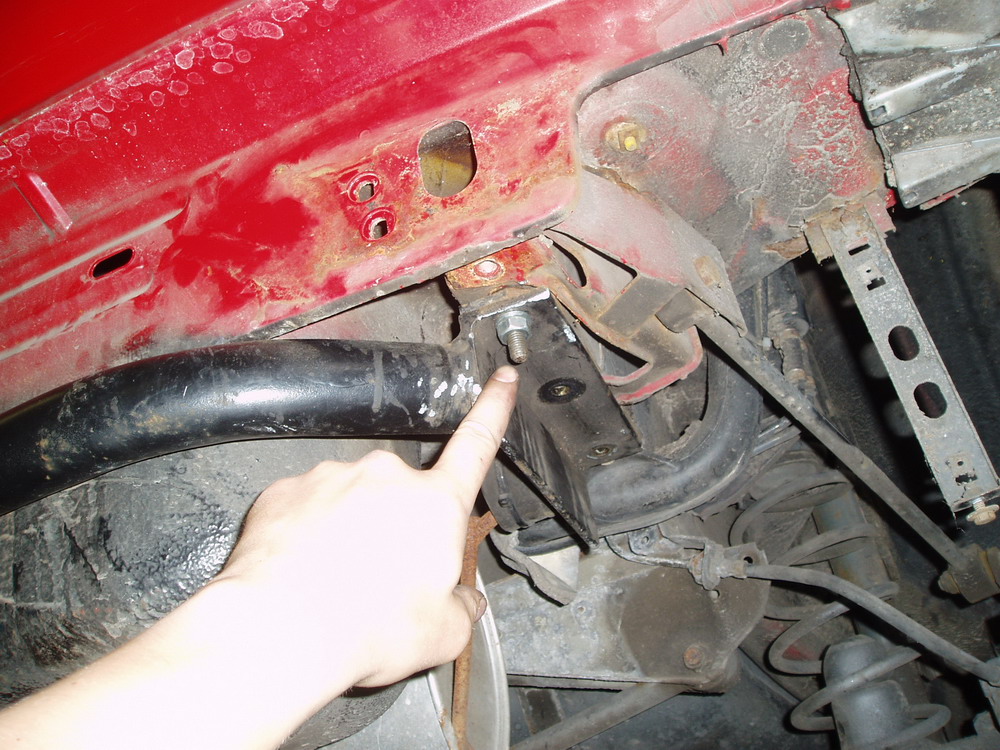
This has to be done at the left and the right side. The towbar is now hanging under your car with 2 of the 6 bolts…
6
Now you need to drill another 4 holes, in the bottom of the car.
When you look at the picture, you can see that I point with two fingers at the two holes which are left (per side).
Put a 10 mm drill inside the hole and drill through the body work of the car.
When you’re done, you have to put the tubes in from above, then again insert the bolt with a washer through the mounting plate, though the inserted tube, through the body work of the car and eventually through the towbar. In the end, add a washer and a nut.
Now, the towbar is mounted to the car!
7
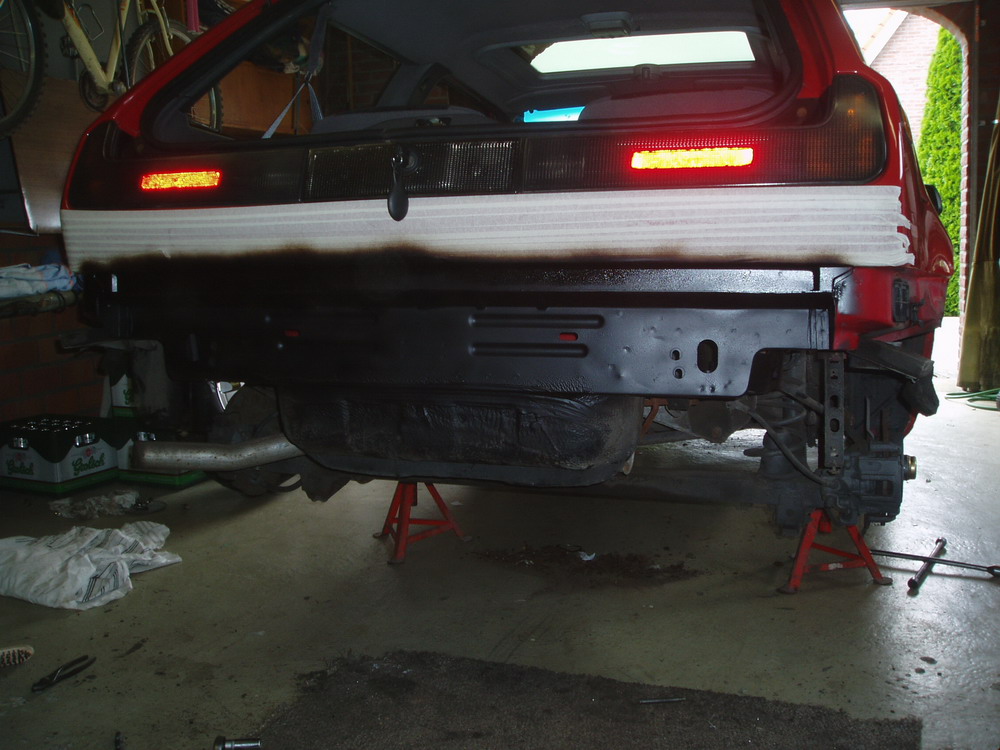
At this point, I took the towbar off again and protected some parts of the car against rust, especially the points where I drilled through the body work, but also some parts which are normally covered by the bumper, as can be seen in the following picture…
8
Here you can see the difference between the old steel bumper and a new one!
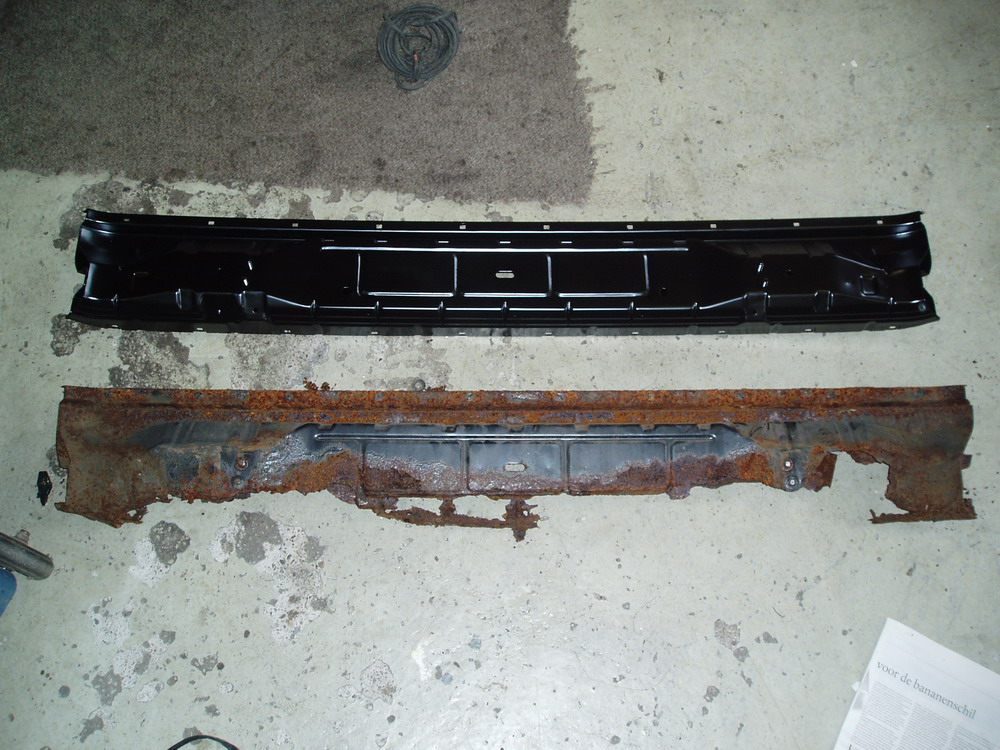
The following step, is the cut a piece out of the bumper. Volvo already marked the piece you have to cut with little dots on the inside of the bumper, I’ve drawn a white line to show where the dots are. (don’t mind the white line in the middle)

In my opinion, the marking Volvo made is rather small, so afterwards, I had to cut a bit more material away, to make the bumper fit again… I cut about one centimeter wider then the Volvo marking (only in the width, not in the height) .
9
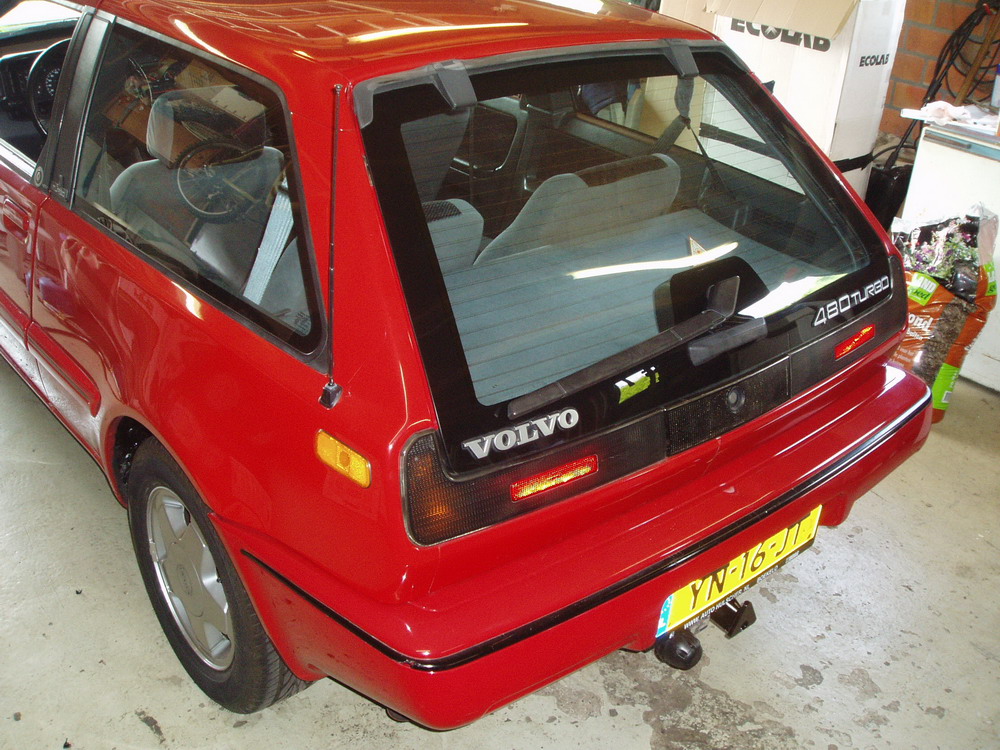
Now you can mount the bumper again. The best way to do this is with two persons. Watch the cables when you mount the bumper!
This is the result:
10
Now wire it up!
I used a connector with 7 pins. The indicator lights can directly be taken of the rear lights of the car, just as the fog lights. But the ‘normal lights’ and the brake lights not! Or else the ‘bulb failure’ indicator will keep on shining…
So these wires you have to adapt, before they go into the bulb failure system box, which is mounted in the trunk at the left side of your car. On this box, you can adapt wire number 57L for the left rear light, wire number 57R for the right rear light and wire number 54 for the brake light... This way, the bulb failure system won't notice the trailer lights...
Well, this is my ‘how to’…

I hope it’ll help someone! If there are any questions, just ask or PM me…
Disclaimer: When you try this, it’s all at your own risk, so don’t blame me if something doesn’t work…
1
Get the rear of your car in the air…
2
Remove the rear bumper, as described in Section 8 (LINK).
The first surprise I encountered, was the steel part of my rear bumper…
It looked like this
Two bolts broke when I removed the bumper, so beware when you ‘re planning to do this…
The towing eye was also in a bad condition:
So I called my Volvo dealer to order some new parts and carried on…
3
This is what you need:
The towbar, 6 bolts, nuts and washers, 6 tubes (only 4 on the picture, the bolts are mounted inside them), the electrics and two mounting plates
4
You have to drill 6 holes in the trunk of the car (inside). When you look at the picture, you can see that I ‘ve made some markings.
Between the arrows, there are ‘little dots’ marked in the trunk, which are created by Volvo. At these marks (three on the left side and three on the right side), you’ll need to drill a hole of 16 mm. I did it in two steps, first drilled the holes at 8 mm, then made them at 16 mm. In the picture, you can see that I already drilled the first hole, where my finger is (only 8 mm when I took the picture)…
The two white round circles in the picture, show two points which will help you hold the mounting plate in position. They fit in the two little holes of the mounting plate, as can be seen in the next picture, where the mounting plate is in place...
5
Take a look under the car. You can see a hole, marked white in the picture…
Now look at the towbar, in the following picture, I point at a little circular shaft , which fits exactly in the hole as seen on the previous picture.
Mount the towbar under the car by putting the little circular shaft into the hole. From the inside of the trunk, put a tube through the mounting plate, into the hole you’ve just drilled. This tube will prevent the car’s body work to deform (important, so don’t forget this!) Now put a bolt with a washer through the mounting plate, though the inserted tube, through the body work of the car and eventually through the towbar. In the end, add a washer and a nut. The result can be seen in the following picture, seen from the bottom of the car:
This has to be done at the left and the right side. The towbar is now hanging under your car with 2 of the 6 bolts…
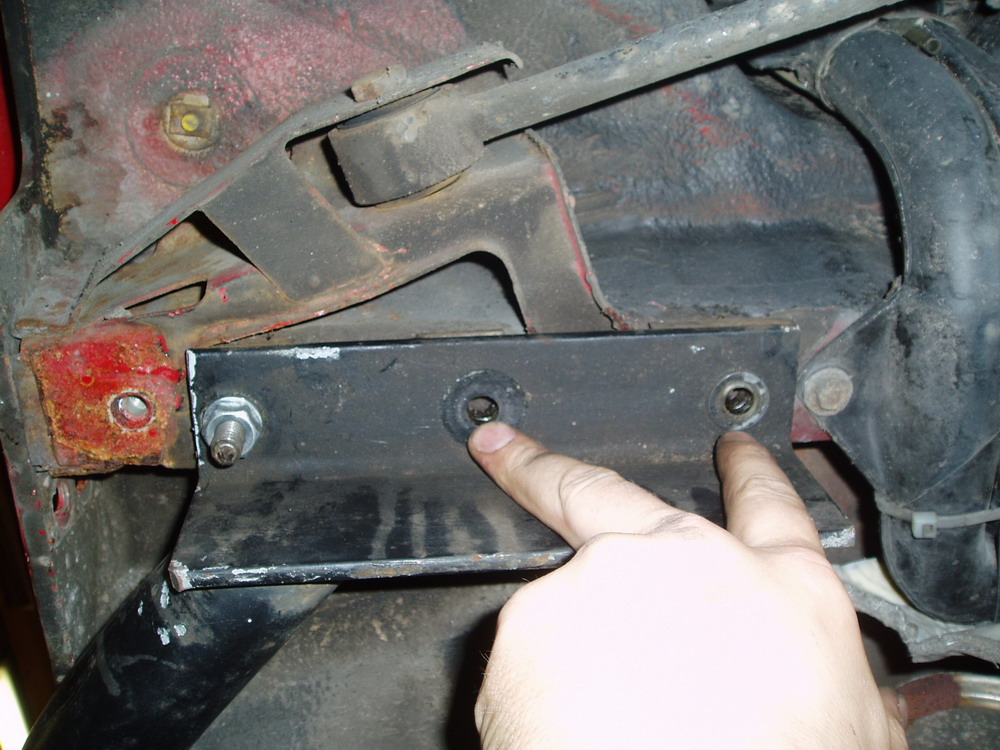
6
Now you need to drill another 4 holes, in the bottom of the car.
When you look at the picture, you can see that I point with two fingers at the two holes which are left (per side).
Put a 10 mm drill inside the hole and drill through the body work of the car.
When you’re done, you have to put the tubes in from above, then again insert the bolt with a washer through the mounting plate, though the inserted tube, through the body work of the car and eventually through the towbar. In the end, add a washer and a nut.
Now, the towbar is mounted to the car!
7
At this point, I took the towbar off again and protected some parts of the car against rust, especially the points where I drilled through the body work, but also some parts which are normally covered by the bumper, as can be seen in the following picture…
8
Here you can see the difference between the old steel bumper and a new one!
The following step, is the cut a piece out of the bumper. Volvo already marked the piece you have to cut with little dots on the inside of the bumper, I’ve drawn a white line to show where the dots are. (don’t mind the white line in the middle)
In my opinion, the marking Volvo made is rather small, so afterwards, I had to cut a bit more material away, to make the bumper fit again… I cut about one centimeter wider then the Volvo marking (only in the width, not in the height) .
9
Now you can mount the bumper again. The best way to do this is with two persons. Watch the cables when you mount the bumper!
This is the result:
10
Now wire it up!
I used a connector with 7 pins. The indicator lights can directly be taken of the rear lights of the car, just as the fog lights. But the ‘normal lights’ and the brake lights not! Or else the ‘bulb failure’ indicator will keep on shining…
So these wires you have to adapt, before they go into the bulb failure system box, which is mounted in the trunk at the left side of your car. On this box, you can adapt wire number 57L for the left rear light, wire number 57R for the right rear light and wire number 54 for the brake light... This way, the bulb failure system won't notice the trailer lights...
Well, this is my ‘how to’…
I hope it’ll help someone! If there are any questions, just ask or PM me…
Disclaimer: When you try this, it’s all at your own risk, so don’t blame me if something doesn’t work…