Page 12 of 13

Re: So, today was the day...

Posted: Sun Apr 05, 2020 5:26 pm
by Alan 480
Water pump is not that bad, :wink:

had to do it twice, first time not enough 'hylomar' :-(

Re: So, today was the day...

Posted: Mon Apr 13, 2020 6:24 pm
by jifflemon
Alan 480 wrote:
Sun Apr 05, 2020 5:26 pm
Water pump is not that bad, :wink:
IF you don't have A/C it probably is....

So Powersteering pump out, Alternator out...

Image

Means you can actually get to some of the bolts.

Also means that I can swap out the alternator for an 80 Amp version (just because!)

Image

Water pump out

Image

and clean up the mounting face....

Image

But no more. Despite ordering over a week ago from a UK supplier, the water pump hasn't turned up! :angry:

The timing belt kit, ordered at the same time and coming from Europe, arrived 2 days later!

Re: So, today was the day...

Posted: Mon Apr 13, 2020 7:13 pm
by jifflemon
So onwards with the timing belt.....

after getting the belt to TDC , Remove the bolt under the engine number plate and lock into place with a 8mm drill bit. To get the cover off is a couple of bolts, and slacken off the Steady shocker to allow it clearance to come out. Then I could get to the bolts that held one of the tensioners in place.

Image

2 6mm allen headed bolts and an 10mm bolt, and the tensioner is out.

16mm spanner for the second tensioner and the belt is out.

Old belt wasn't too bad, but always better safe than sorry!

Image

Important bits on re-assembly, is to make sure your tensioner is located on the peg (seen just below the bolt)

Image

and the timing belt is lined up on the marks.

Image

Image

The HBOL talks about making up a special tool to tension the belt - well a big screwdriver is quicker and easier! Apply pressure and slowly start to tighten the bolt down.

Image

remove the twist bit thats locking the engine, turn over BY HAND a couple of turns, and make sure timing marks still line up. As long as they do, place the cover back on. However, as I'm still awaiting a pump, I've got all this still to do...

Re: So, today was the day...

Posted: Mon Apr 13, 2020 7:28 pm
by jamescarruthers
Which company didn't deliver in time, so we can avoid them?

Re: So, today was the day...

Posted: Mon Apr 13, 2020 8:28 pm
by jifflemon
Seller goes by the name of dusty789blue

99.5% positive feedback.

Genuine Valeo pump, Ordered Saturday 4th, was expected 9th (although the advert says the 8th!)

Tracking number provided isn't bringing any Joy either.... :badmood:

Re: So, today was the day...

Posted: Mon Apr 13, 2020 8:50 pm
by jamescarruthers
Ah, eBay sellers I can forgive!

Re: So, today was the day...

Posted: Tue Apr 14, 2020 6:32 pm
by Alan 480
Alan 480 wrote: ↑Sun Apr 05, 2020 5:26 pm
Water pump is not that bad, :wink: :wink:

IF you don't have A/C it probably is....

apologies, EVA is non-air-con, NORA has fitted for & with but not working . . .

just to add a wee comment, I used an 8mm section of round steel bar to locate in the crank-shaft

AND make sure it is in the 'lock-postion' not one of the balance holes . . . . .


that water pump is nothing like either of the two I have, one was plastic impellor and other brass, traditional looking both believed originals

Re: So, today was the day...

Posted: Tue Apr 14, 2020 7:19 pm
by jifflemon
Alan 480 wrote:
Tue Apr 14, 2020 6:32 pm
that water pump is nothing like either of the two I have, one was plastic impellor and other brass, traditional looking both believed originals
wierdest one I've ever seen....

Image

Re: So, today was the day...

Posted: Wed Apr 15, 2020 6:08 pm
by Alan 480
yep that's wierd . . .. . . . :rofl:

Re: So, today was the day...

Posted: Sun Apr 19, 2020 5:41 pm
by jifflemon
Firstly, thought I'd better start with a little bit of an apology; My last post was a tad blasé on the subject of timing belt changes, so I thought I'd better add the following:

When putting the belt on, you want all the slack of the belt on the tensioner side; the Right hand side of the belt as you're looking at it, should be as tight as possible.
When turning the engine over, its a bit of pain - Plugs out will help, but you either have the option of Continually adding and removing the pulley (you can't see the marks with the pulley on, its hard to turn the engine over with the pulley off....) or you can add 2 5 mm bolts to the lower sprocket and assuming you've got the plugs out, a screwdriver between them will turn the engine over.
remember its the timing marks on the pulley you want to line up - the marks on the belt, despite you lining them up perfectly, will not line up for several hundred turns (and even then, only briefly!). DO NOT PANIC! As long as your pulley marks are correct after turning over by hand (and I tend to do 4 full rotations - force of habit!), life is good.
Before you fasten everything back up, put the plugs in, make sure it starts. Nothing more soul destroying that stripping it all back down again!

OK..... onward we go! The pump arrived!

Image

Went with valeo as it's a decent brand, although the gasket left a little to be desired.....

Image

Thankfully the bolts help pull it square. Everything went back together, fluids all topped up, coolant bled and held 1.5 bar of pressure for an hour with no leaks. I'm calling that a success.

Image

Just in case any one is doing the virtual meet..... Standards have been set! :rofl:

Re: So, today was the day...

Posted: Sun Apr 19, 2020 7:14 pm
by Alan 480
good reminder about the white marks not lining up until a load of revs later.

a point to note is that the alignment mark on the bottom sproket does NOT match the key way!!

never seen that before , usually the key way matches the timing mark??

top key/timing mark one does!!


but do we have to meet the same standard, or can i pinch a photo of somebody elses car engine bay? :wink:

Re: So, today was the day...

Posted: Sun Apr 19, 2020 9:01 pm
by jifflemon
Alan 480 wrote:
Sun Apr 19, 2020 7:14 pm
but do we have to meet the same standard, or can i pinch a photo of somebody elses car engine bay? :wink:
Oh my is FAR from where it should be! Trying to get a replacement engine cover sticker (found someone on facebook who said they reprint them, but they've gone quiet - possible a language barrier). Need to get the replacement power wires wrapped in some convoluted tubing, Spark plug leads need re-routing... The lists go on and on!

Re: So, today was the day...

Posted: Sun Jun 07, 2020 6:46 pm
by jifflemon
So a bit of an update on the blue car....

If you were following the virtual car meet thread, some of these will be no surprise to you. For everyone else, well, I like to keep myself busy! :shock:

You'd think, that after the changing the timing belt, I'd be out enjoying the car eh?

Well, I had other plans.... They started with the removal of the dashboard! :shock:

The VEM had been doing it's classic acting up - Fan not working on anything other than AC MAX, or randomly starting working after hitting a bump in the road... Classic Dry joint symptoms. So out it came

Image

Cleaned and resoldered the lot - That was "fun" :angry:

Then whilst it was apart, it gave me the opportunity to fit this:

Image

Yup, LED illuminated, made by one of our clever Dutch members.

Whilst it was out, I also got to do this (sorry it's a clickable link, but its a very short movie!

That's a BLUE bulb, instead of the lazer like white one that you get on full beam.

Then, there was this little Mod.

Image

Image

Image

Basically, I'm reflecting more of the light where it needs to go (up the prism) rather than illuminating random bits of the dashboard!

and then finally, added some (patent pending) dashboard anti vibration pads....

Image

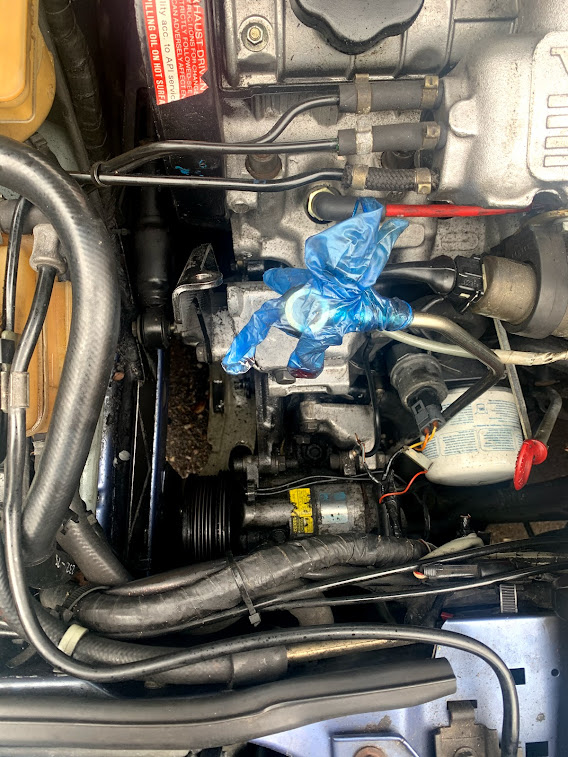
Then whilst the dash was apart, it made sense (in my head at least) to have the door panel off..... I was rattle hunting you see.... This is what I found.

Image

That cable should NOT be flapping around...

Heres a view looking inside the door, towards the door lock

Image

I'm guessing that the car has had a replacement regulator, and they did half the job; If you look just below the 12 oclock position, you can see the plastic clip on the harness that should be fastened to the inside of the door.

So, loosen regulator, slice hands apart working through tiny gaps, get all cables secured.

Next to come out was the passenger seat.... :crazy: You see, the plan was to do the classic footwell lighting (which hooks into the Ignition key illumination). As the dash was out, all that was nice and accsessible.

So why remove the passenger seat? Well, we're having "footwell lighting 2" (patent pending)

Image

Image

The rear seats also came out too.... So by now, the spare room is looking like this:

Image

Why the rear seats? Well, I needed to get at the belts, or rather more specifically, the belt holders. It's all James's fault that this happened:

Image

Image

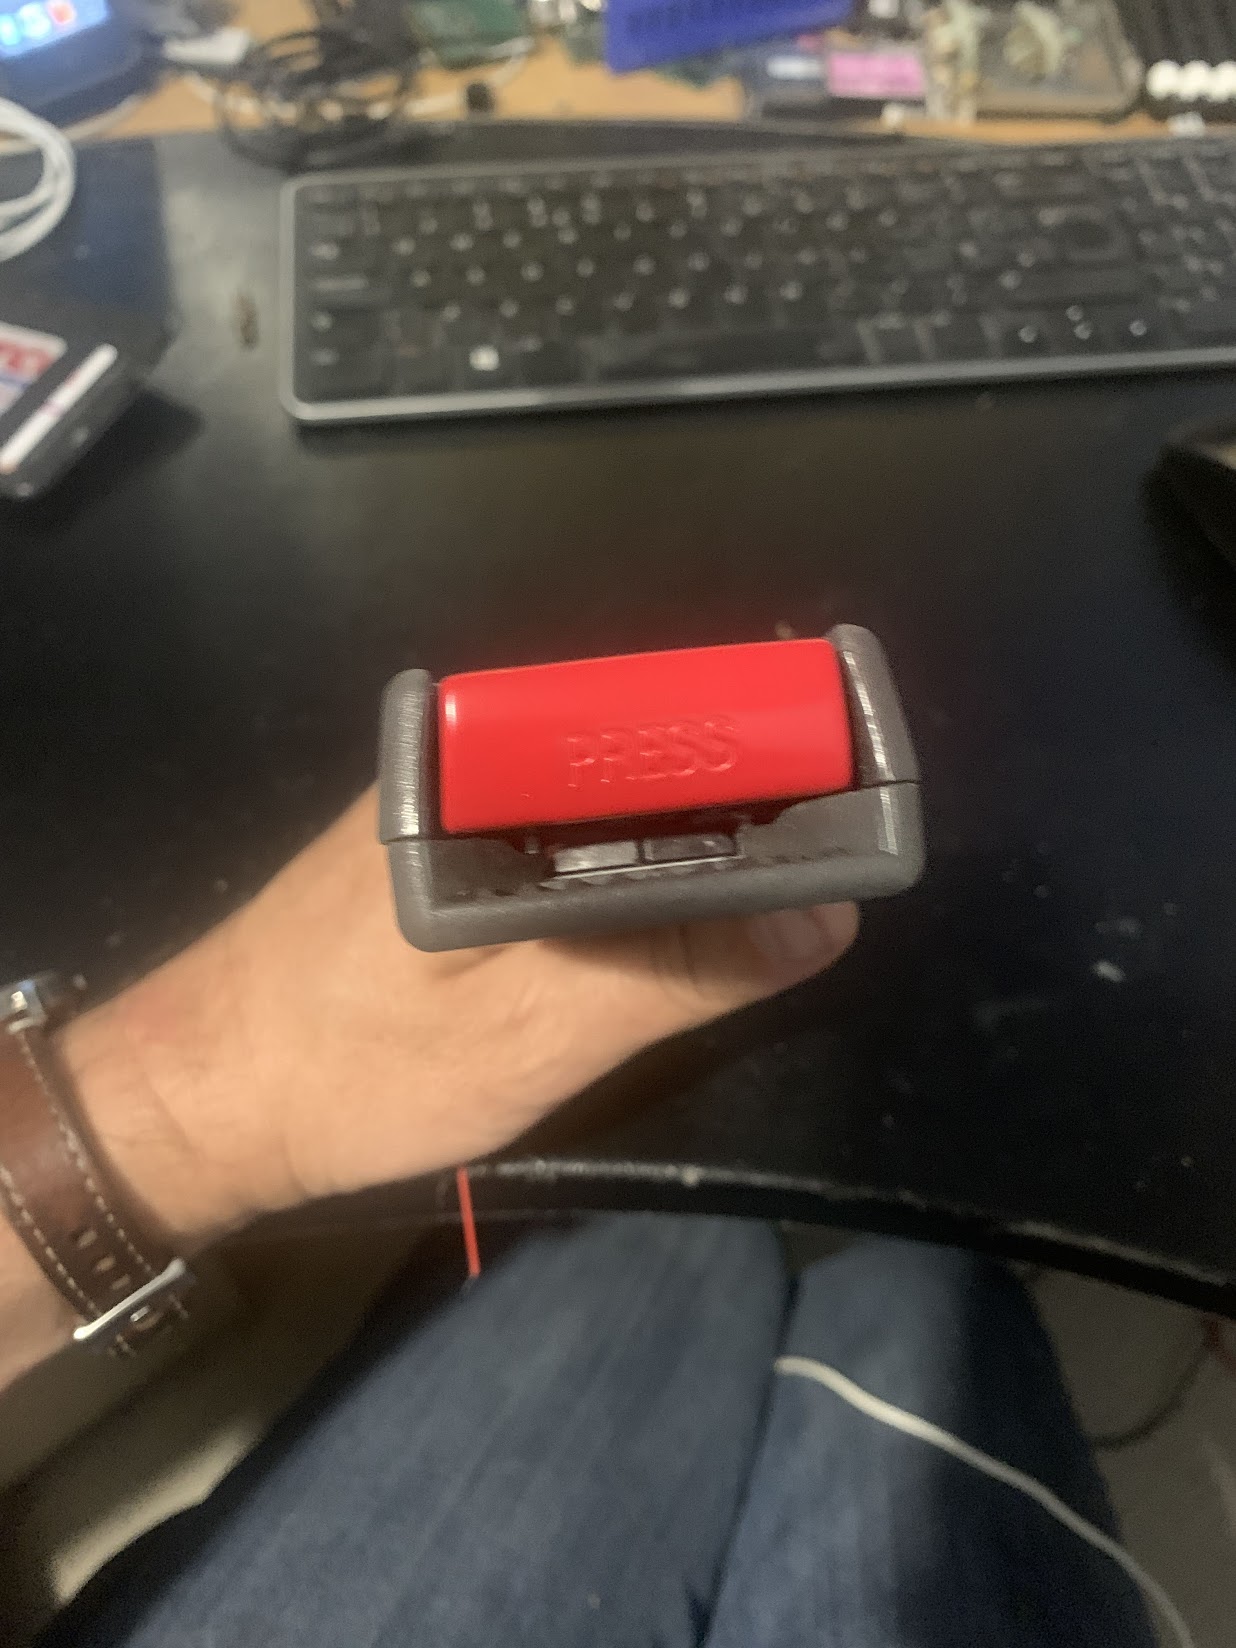
Yes, do not adjust your sets, I've now got illuminated seat belt clips.... Both front and rear!

Anyone whos been following this thread for a while may remember this mod, which I had to undo, as Sat nav's use their charger cables to pick up traffic info, and that doesn't work when you use a standard USB to charge them....

Anyway, never one to waste stuff, I've found it a new home!
Image

Image

Re: So, today was the day...

Posted: Sun Jun 07, 2020 6:47 pm
by jifflemon
This is the point where I had to split the post into two posts as I've noticed the server will crash and lock you out if you try to post too many URL links (it thinks you're a spammer!)

You remember those wheels? Well....

Image

Image

Just need the printers to come out of lockdown so I can get the centre cap logos!

And speaking of labels... Engine detail nerds, be warned, I'm about to go next level, as these have finally arrived:

Image

WHAT ABOUT THE OTHER WHEELS JIFF!!!

The other set??? Oh those wheels....

Image

Image

Just for reference, both sets were painted in VW Aluminum Silver Metallic (paint code: Ly7m) not because it's was a match to the originals, but because it's just a nice silver colour! :D

And finally.... the mod I said I was going to do in 2017 is finally done! I can thank Toni Gili Comas from Facbook for his method, which I shall expand upon here...

Remove your switches (Not the cunning Haynes style approach, which mentions nothing of having to wrestle the bloody handbrake cover off, whilst trying not to shatter either the plastic surround or flappy rear bit of the cover)

Disassemble the 440/480 switch
Image

Break the copper connection and remove the pin

Image

Remove a pin from the 480 switch

Image


There's 4 usuable pins in there, any will do! Drift in new pin, re-assembly is the reversal of removal :rofl:

Now, removing the pins it an interesting task, I balanced the switch on a deep 5.5mm socket, then drifted it out using a 1/4 inch extension bar and BFH.
Drifting them back in required a tad more skill, balancing it the 5.5mm socket and using a 4mm one to both hold and drift the pin back in.

My final thought now, is.....

Have I beaten Jay-Kay Em for length of an update?!? :rofl:

Re: So, today was the day...

Posted: Fri Jun 19, 2020 12:29 pm
by Alan 480
you have way tooooooooooo much time on your hands . . ..

looking good though :wink:

Re: So, today was the day...

Posted: Fri Jun 19, 2020 6:15 pm
by jifflemon
Alan 480 wrote:
Fri Jun 19, 2020 12:29 pm
you have way tooooooooooo much time on your hands . . ..

looking good though :wink:
With 3 480's and 2 other project cars, I have a LOT less time than you think! Retirement can't come soon enough!

Re: So, today was the day...

Posted: Fri Jun 19, 2020 6:35 pm
by doingitsideways
Think I may be the only person in he world who likes Taurus wheels without the centre cap. :nuts:

Think they'd look quite smart with a normal Volvo centre bore cap

Re: So, today was the day...

Posted: Sat Jun 20, 2020 10:07 am
by jifflemon
Just because I love a sticker, thought I'd share these ones:

Image

Image

Image

Re: So, today was the day...

Posted: Mon Jun 21, 2021 8:48 pm
by jifflemon
Wow..... Almost a year since the last update! :shock:

So what's been going on? Well, I've been waiting for a slot in the bodyshop, and anyone who's been there, knows what it's like.
If you can't remember, or CBA to read the entire thread (and you should, it's a cracker!), The car's only panel that didn't need paint was the tailgate. (Although, on reflection, that could probably do with the black bits re-glossing.....). And whilst battered and bruised, she is remarkably rot free.

So on friday, I got the text: "Want to strip your Volvo so I can start it next week?"

:hopping:

Except I was meant to be doing actual work work this weekend. Unable to move, scheduled with the company, once in a blue moon maintenance type stuff. :angry:

So..... thankfully I'm now pretty well rehearsed in stripping 480's, which means by Sunday evening I'd got it to this stage.

Image

Image

Now, because I'd worked the weekend, I was due some time back, so I popped over today to finish the last few bits, to find my friend already blasting his way through the multitude of dents!

Image

Image

Image

Image

Image

See those tiny round dots in the last two pics? Want to know what they're from?

Image

Its a dent puller - it welds itself in place, allowing a dent to be pulled out, then you snap off the weld.

Image

Image

Image

Image

As you can see, all the glass is out - Well, except the windscreen, but that's coming out soon too! Do it once, do it right!

I've now got a mound of black plastic bits that I'm going to try and restore to super clean condition.....

Re: So, today was the day...

Posted: Tue Jun 22, 2021 7:20 am
by Jay-Kay-Em
jifflemon wrote:
Mon Jun 21, 2021 8:48 pm
The car's only panel that didn't need paint was the tailgate.
:rofl:

Be interested to see under that windscreen. Fingers crossed its not too bad - but its at the right place if it is.

Good luck with the paint. That's two late turbo's off to paint now. Exciting times!