July 2020 - Engine Update
Hi all!
May-July 2020 progress report...
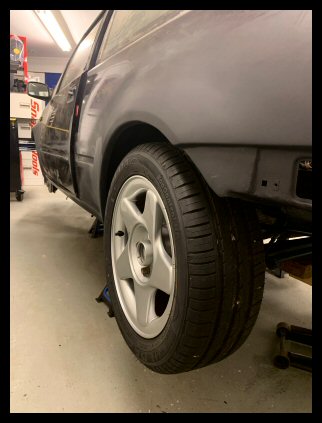
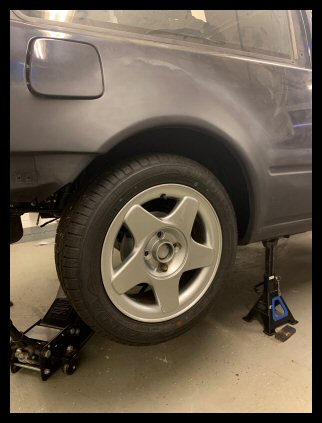
For the 300 miles in total ownership I have driven the car - collection from Wales and juggling storage only - nothing has appeared wrong. No smoke, no coolant consumption, no noises. The car always drove nicely.
Two objectives really...
i) to make the powertrain assembly 'presentable'
ii) to capitalise on the engine being removed - for the improved access and to change anything that'll i'll kick myself for not having done!
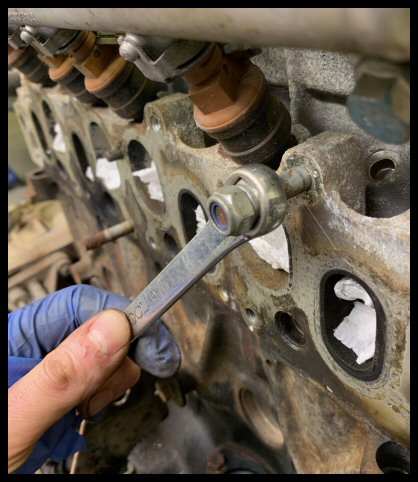
For example... inlet/exhaust manifold nuts... struggle in the car some time in future, or address now with all the access in the world...
For the ones that remain anyway...


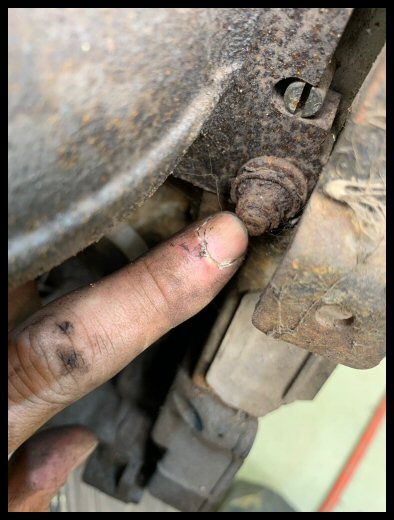
It was also alarming the amount of missing/loose transmission fixings...
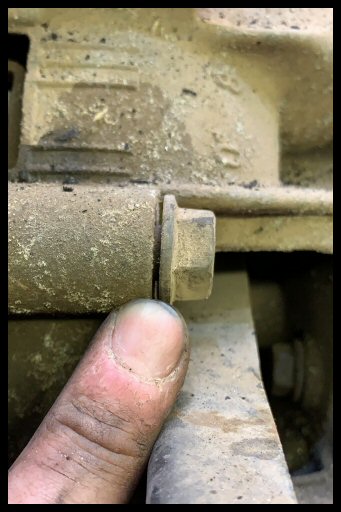
For example, this transmission bolt appeared loose. So first job, tighten. But you can't... there are a collection of bolt lengths around the bell housing, some only 5mm difference. Sadly at some point in it's life, these have been mixed up and some bolts have 'bottomed-out'. This has resulted in bolt thread damage...
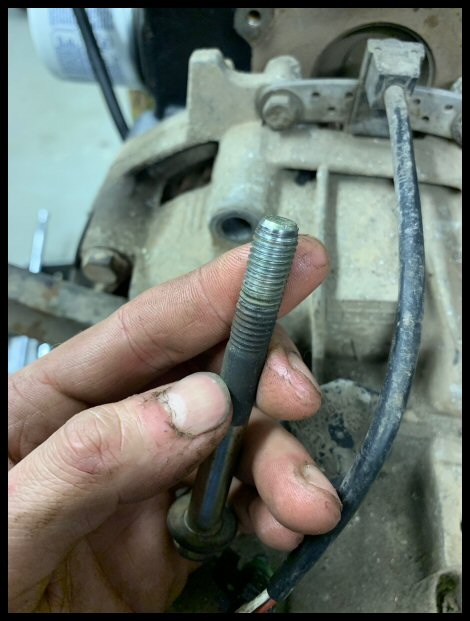
Bolt threads repaired (tidied with a metric thread file) and/or renewed. Correct locations established.
That's what you get unfortunately for a car 'professionally maintained' for 26 years. My TVR was just the same despite an amazing history folder. I shan't name & shame the clutch
specialist in the 480 history folder. The only benefit is a clutch disc with plenty of thickness visible.
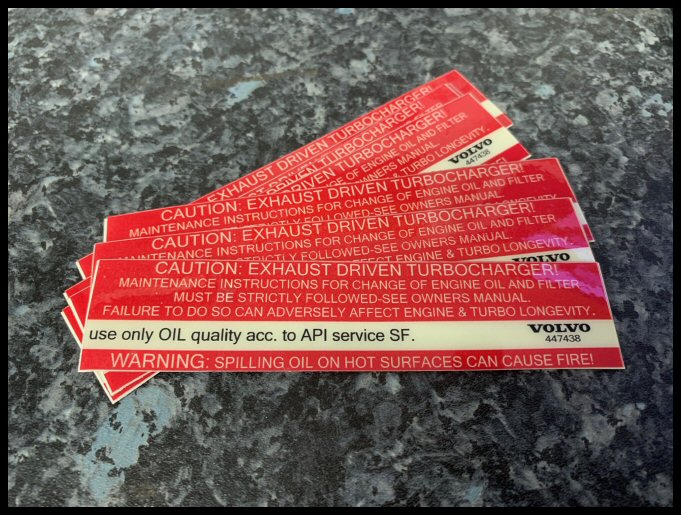
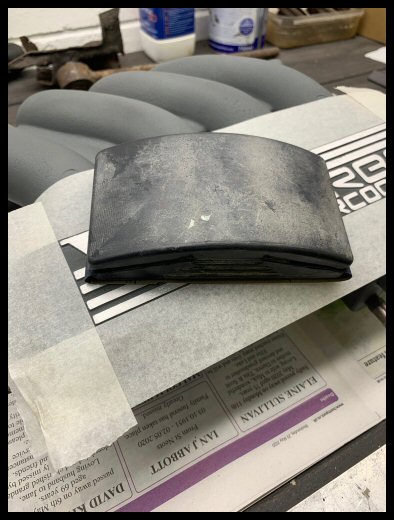
So, first things first... the rather tired looking warning sticker on the cambelt cover...
My best
Paint Shop Pro efforts ready for printing...
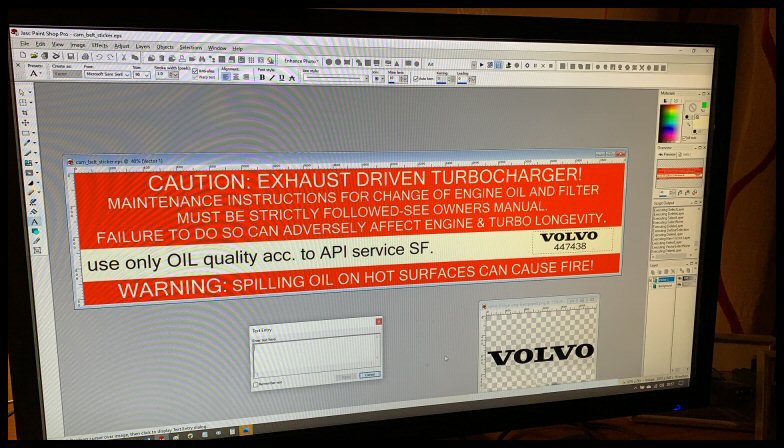
Sent off to the printers in the first instance.
 Engine Timing
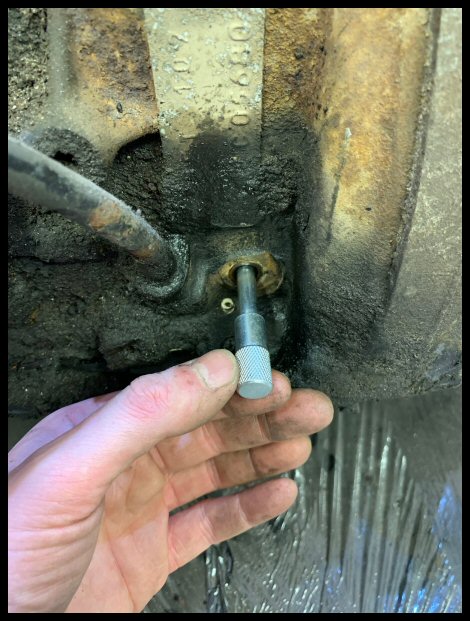
Trying to find the timing pin bolt under 26 years of grime... of which no-one has used for 26 years i'm sure!
Timing pin installed...
To be fair it's no surprise this hadn't been used. It’s very easy to drop the pin in to other holes - such as balance weight holes. It's also rather pointless as the flywheel has its own timing mark at 0 degrees...
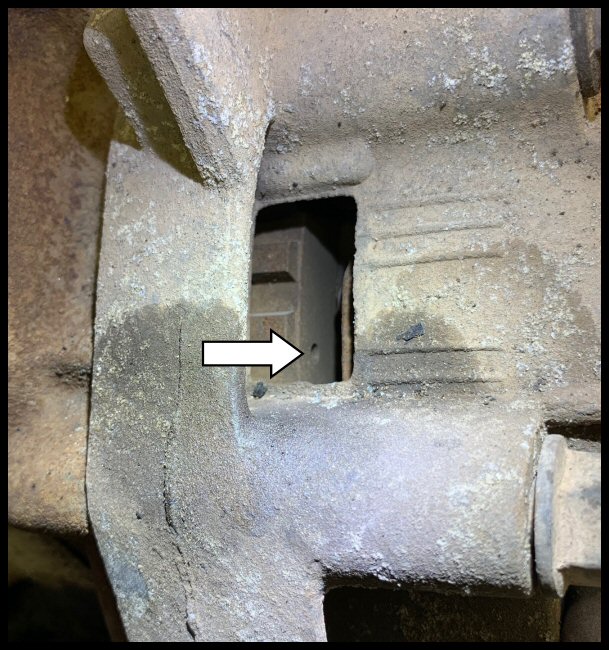
What does annoy me is that the camshaft pulley timing mark is only checkable through a hole on the outer cover... which is no good when the job requires cover removal! Anyway, checked via the cover and my own timing mark made for future ease...
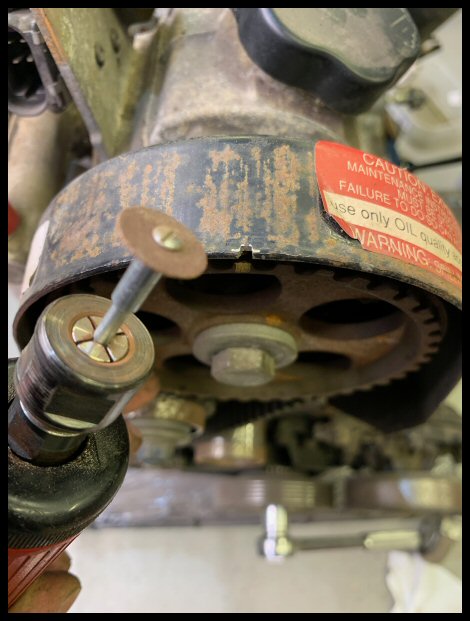
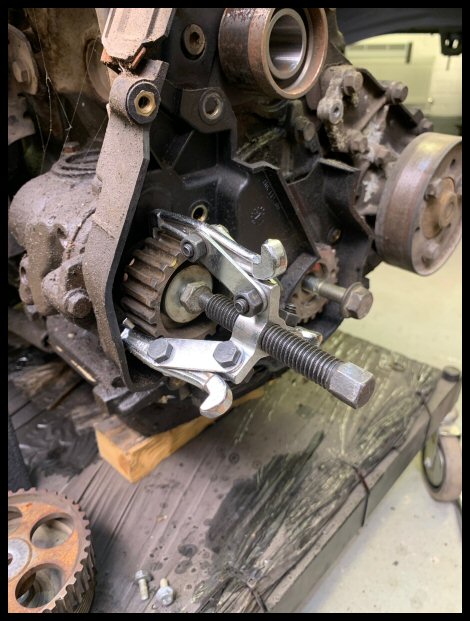
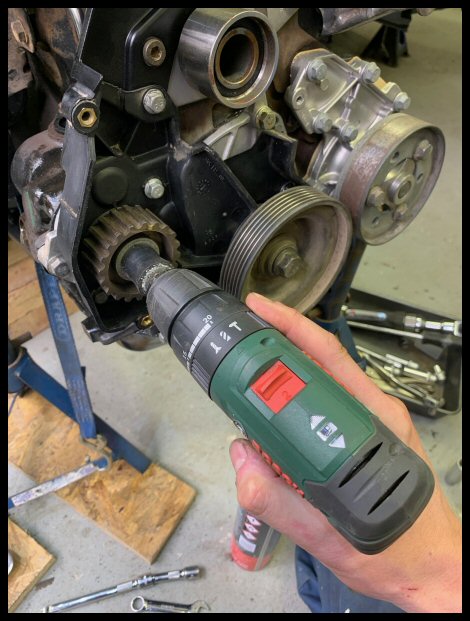
Timing belt off and removing pulleys & sprockets...
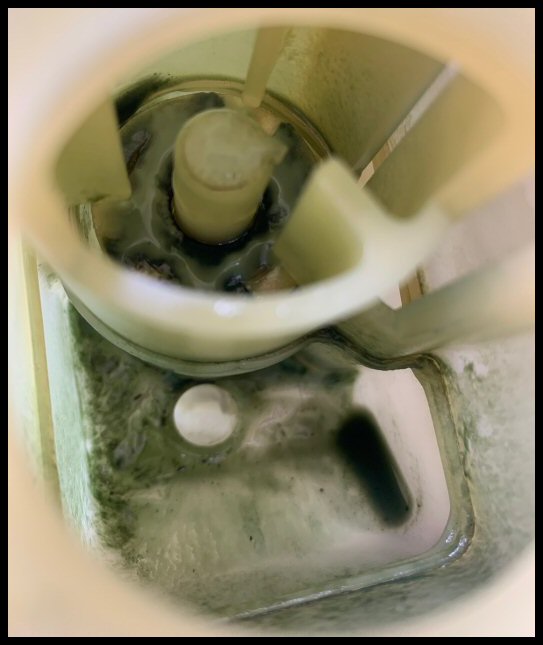
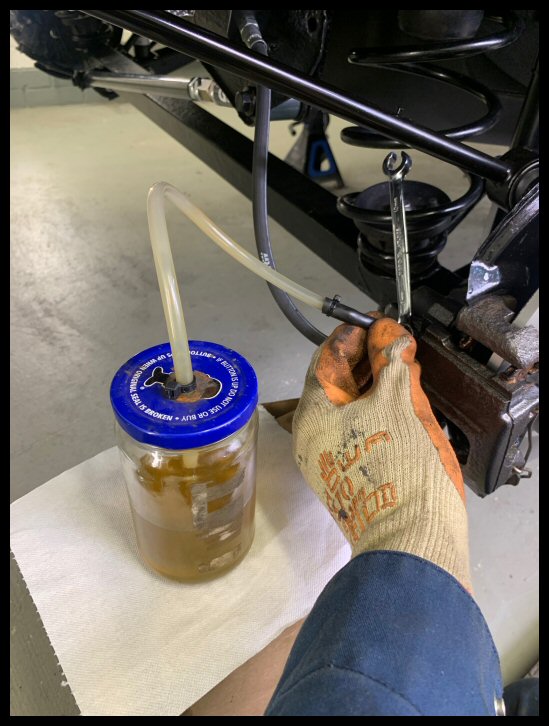
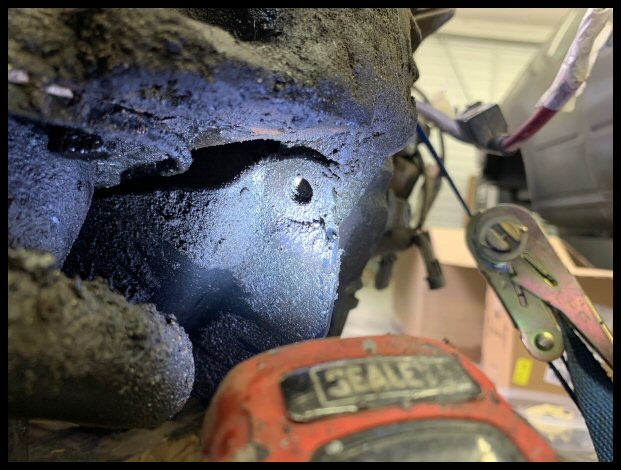
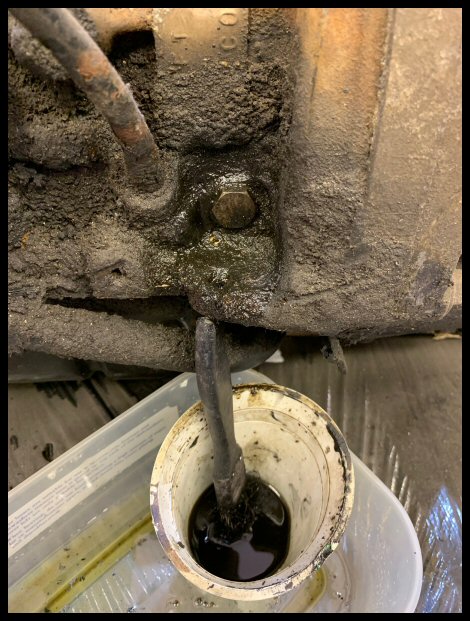
We have an oil leak...
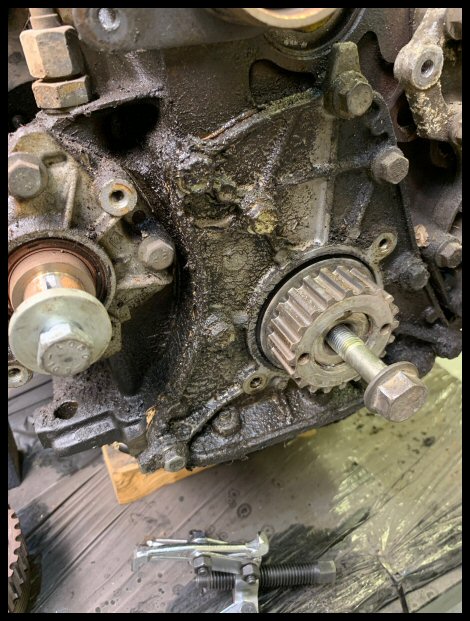
Probably not that big of a deal considering this is 100k miles plus. I think the biggest culprit is open bolt holes that need thread sealant as they are a portal to the crank case / oil galleries.
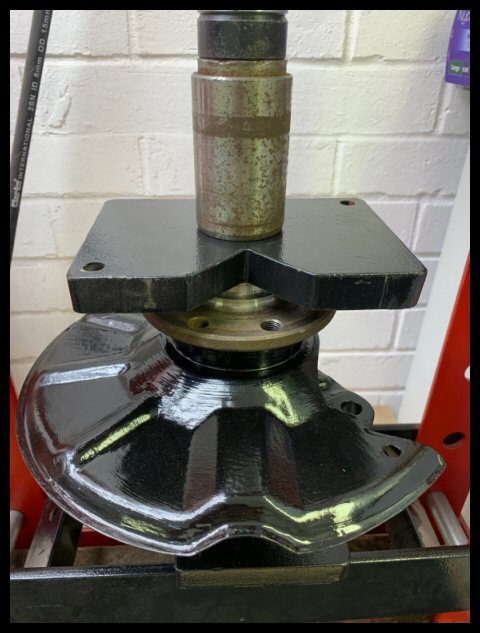
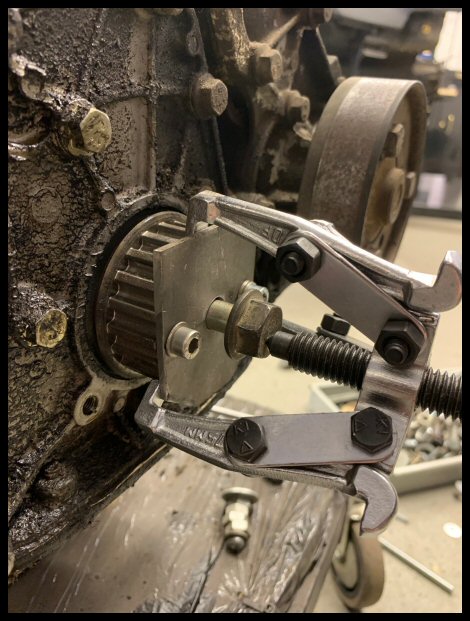
The crank sprocket was particularly stubborn, had to make a plate - thankfully the sprocket has bolt holes for a puller...
 Covers & Seals
All cleaned (timing case & auxiliary case) and old sealant removed.
Overkill I know to use a 12t press, but I prefer it because it starts new seals in a square and controlled manner. Sometimes when drifting in with a hammer they start on the squiff...
 Oil Cooler
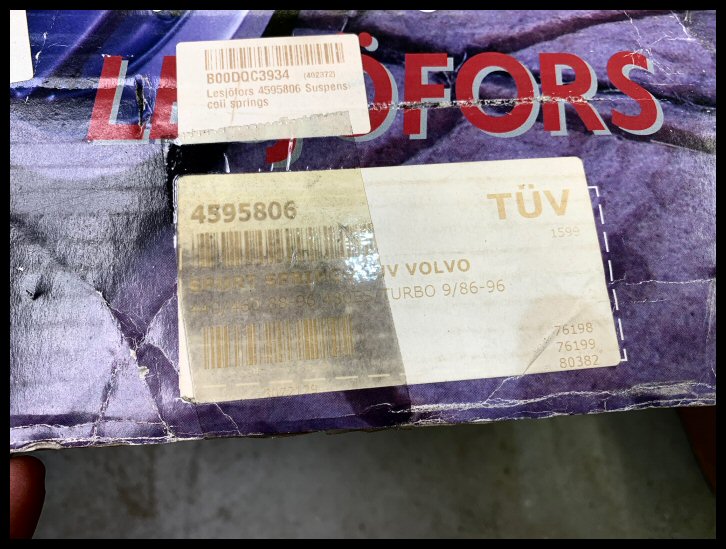
Here is the Nissens oil cooler (90697) for the Renault F9 diesel engine (Vauxhall Vivaro & Renault Trafic amongst many others). As far as my best attempts to measure go, i'd say identical... even using the same central mounting 'bolt'.
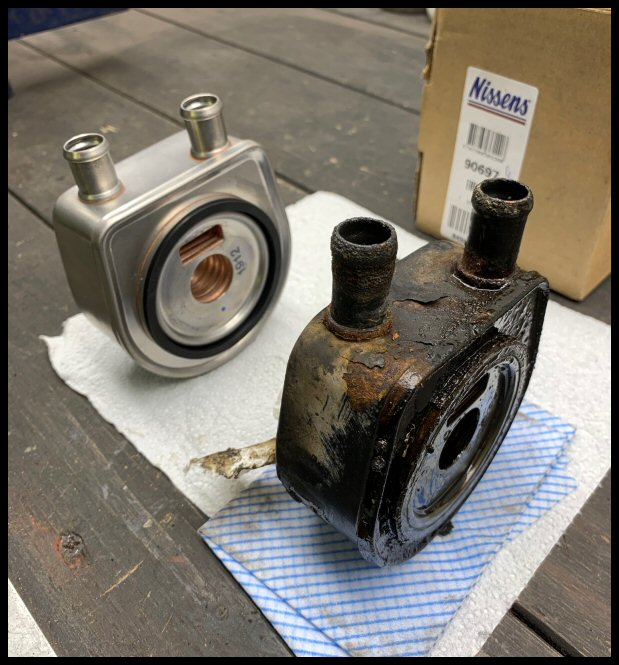
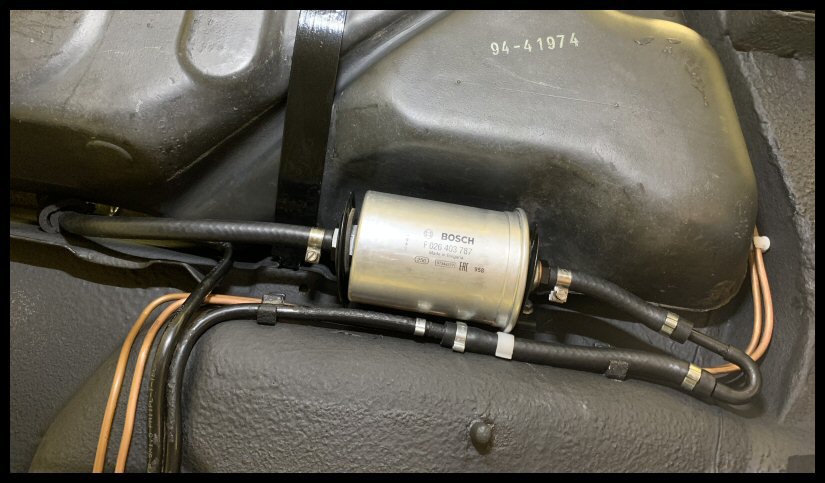
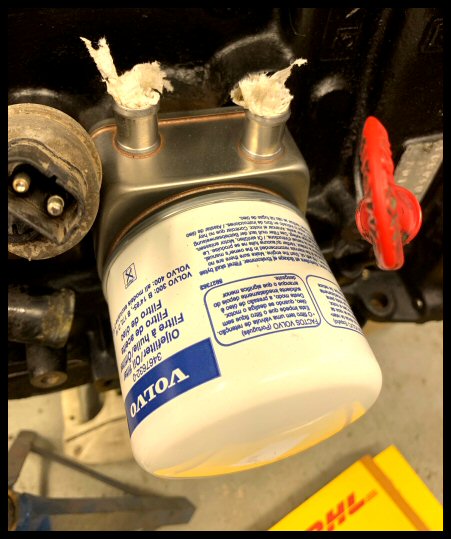
All fitted with a genuine Volvo filter... one of the few 400 parts still available from a dealer!
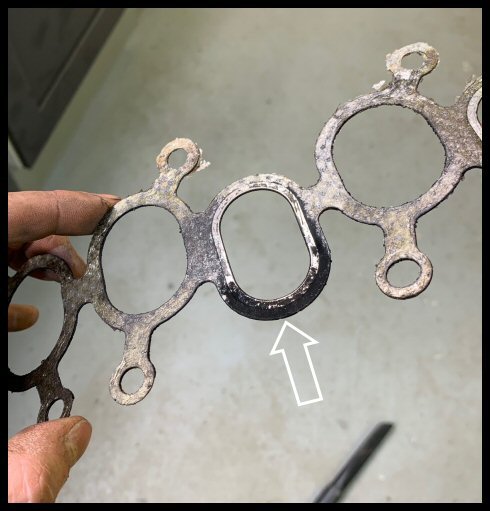
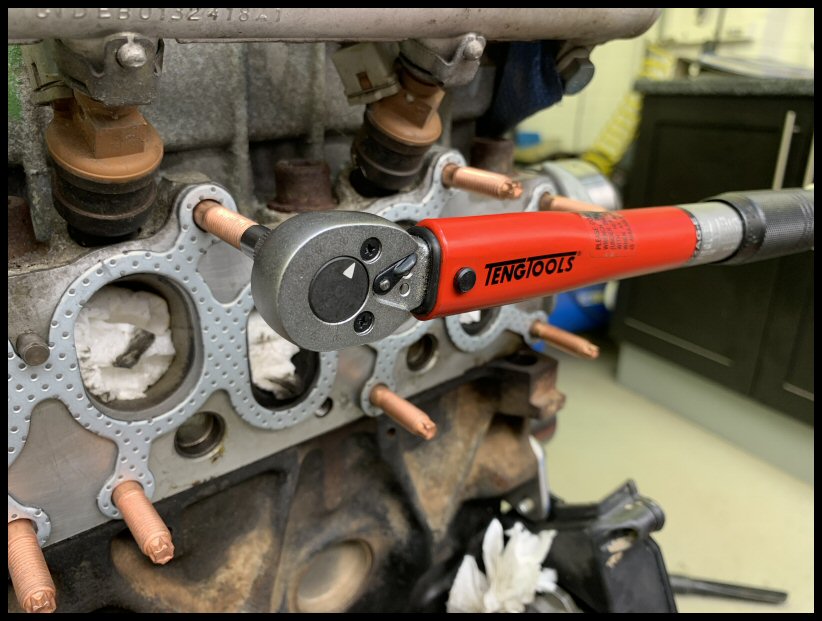
 Manifolds
Turbo/Exhaust/Inlet manifolds removed.
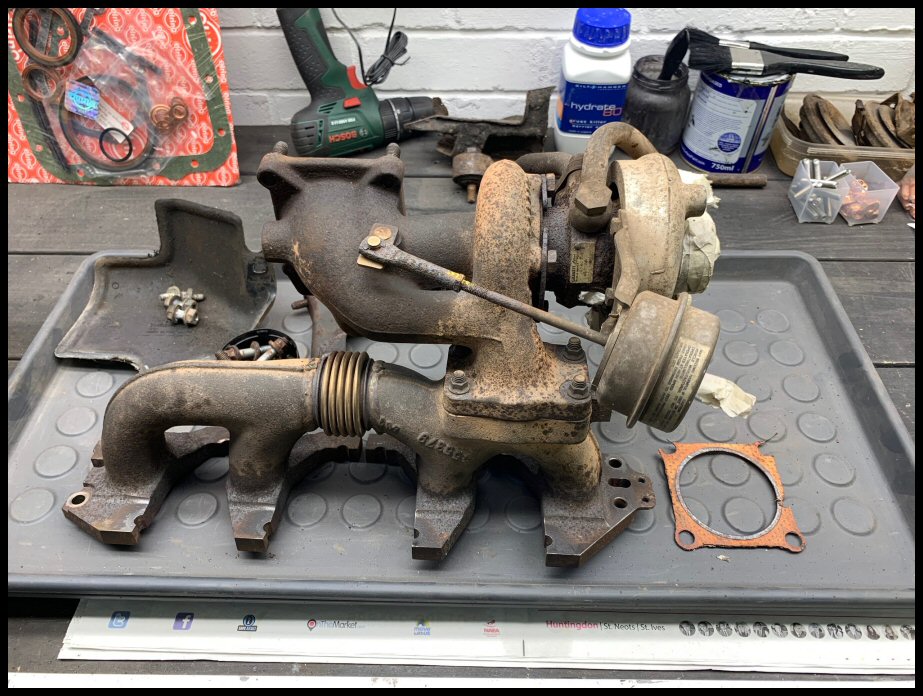
Stud removal via the double-nut method. Thankfully no drama's and all came out...
All needed doing; exhaust leak evidence on old gasket...
Not surprised with the appalling (and short in quantity) selection of manifold fixings...
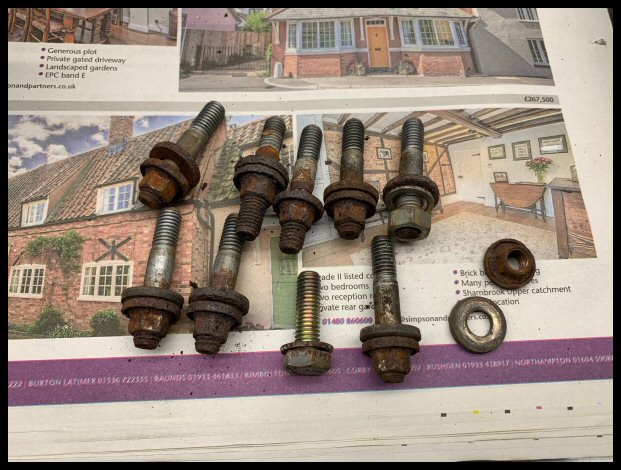
A lot of research went into my favourite stud choice. My criteria being:
a) they need to be as soft (or softer) than the head. I don't want say titanium studs harder than the head.
b) they needed a middle 'blank' section - some of the threaded holes in the head have nothing to bottom out on. Some holes even collide with the head bolts. The blank section allows a torque down.
c) they need an ability to use a torque wrench
Well, after looking at HUNDREDS of studs, not joking, I eventually found Vauxhall/Opel 24578147...
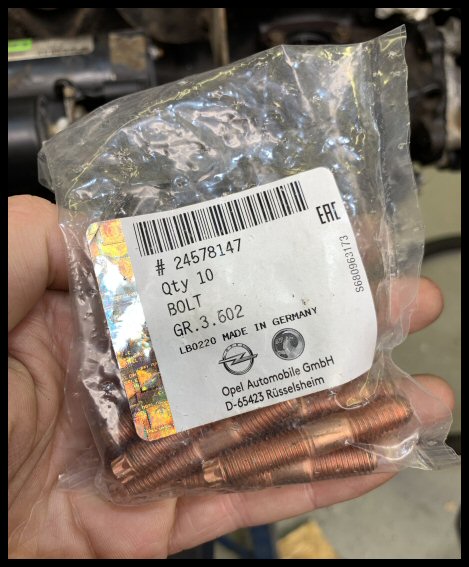
They are perfect...
With new gasket. The B18FT has a special gasket - even though many parts suppliers say all the B18 engines are the same. B18FT has a metal reinforced set of linked rings. These are getting rare.
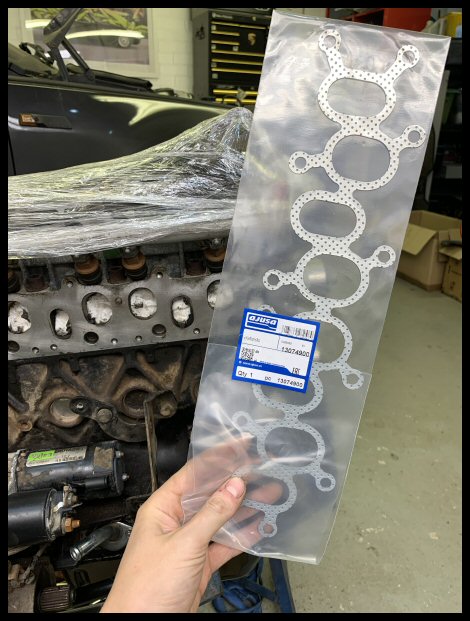
Does make me worry about B18FT longevity. This and many other parts...
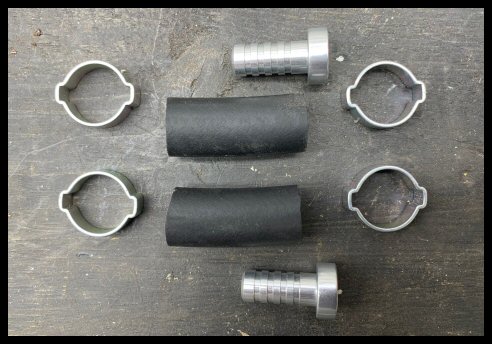
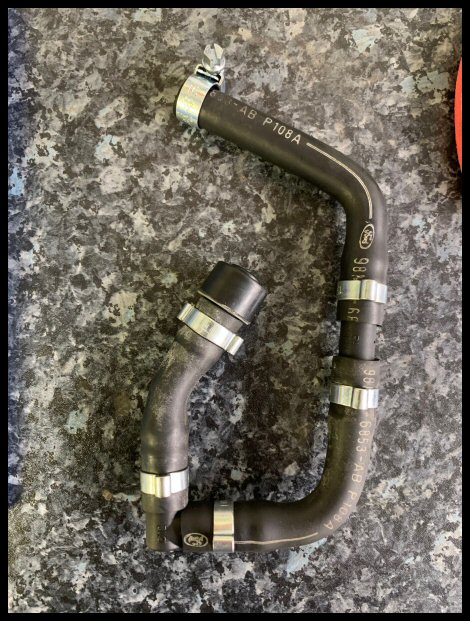
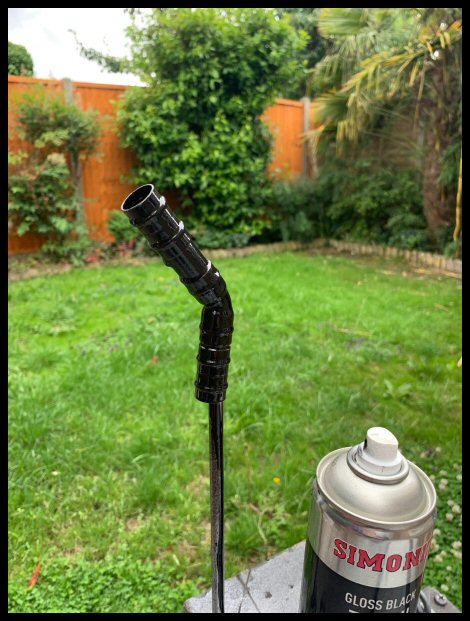
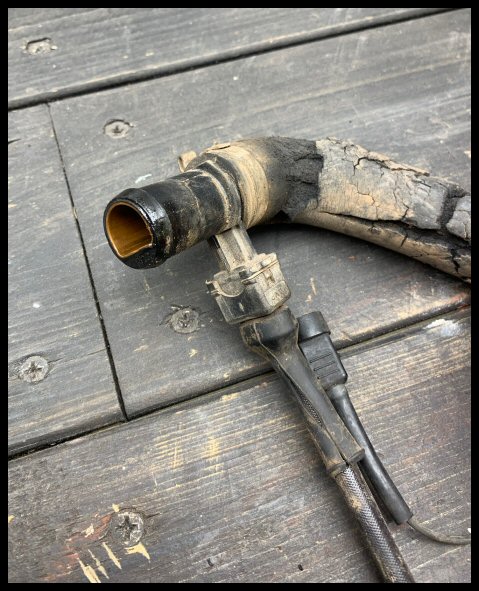
Turbo Drain Hose
I don’t know if this is the original item or not, but it had gone squidgy, sticky and porous. It was like someone had used a coolant hose which is obviously not oil tolerant. Straight in the bin!
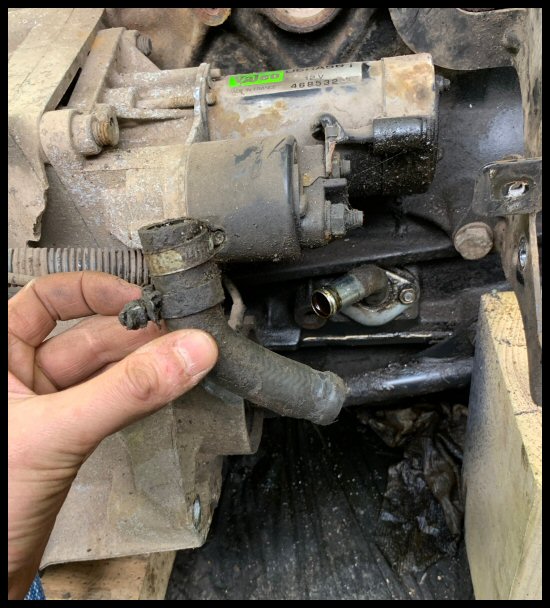
Metal elbow removed and block mating face cleaned. Surrounding area cleaned too (including starter motor remove & reinstall). Metal elbow re-sealed and torqued.
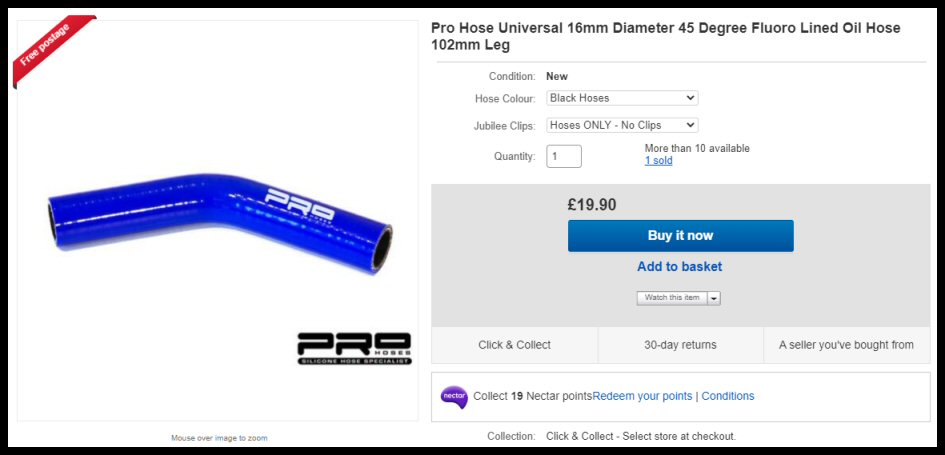
I used a 45 degree universal silicone hose, but with an FVMQ (Fluorosilicone or just 'fluoro') internal liner specifically for oil use. Black, not blue as depicted...
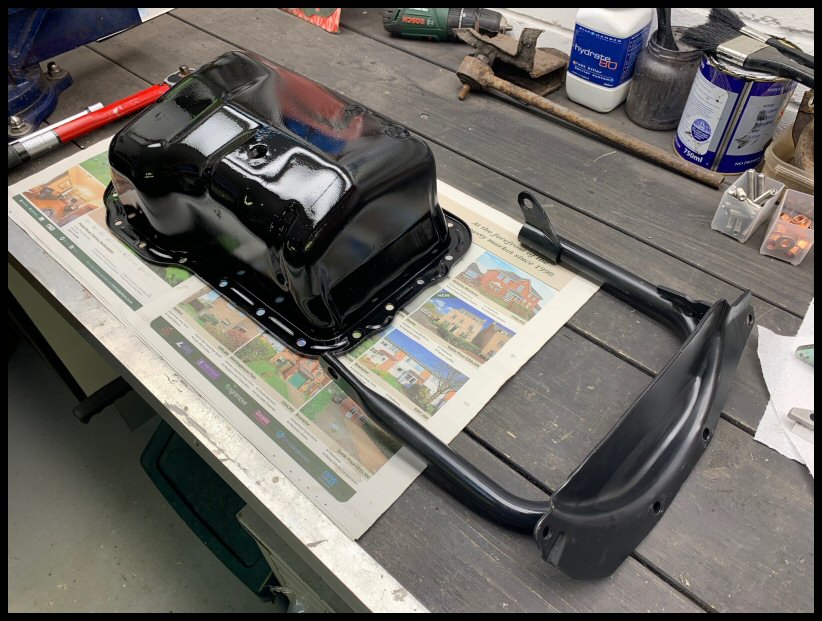
 Oil Pan
24 years of grime...
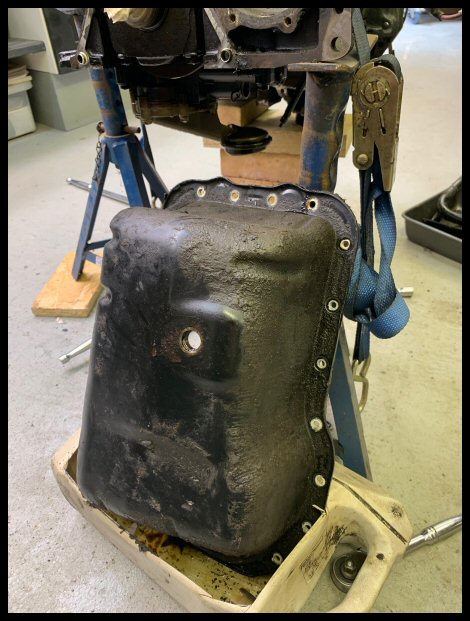
All cleaned and re-fitted...
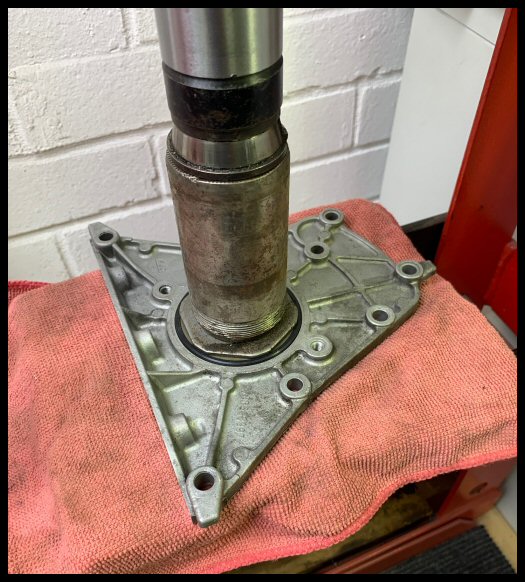
 Aux Shaft Plug
One of the probable oil leak causes. Plug removed...
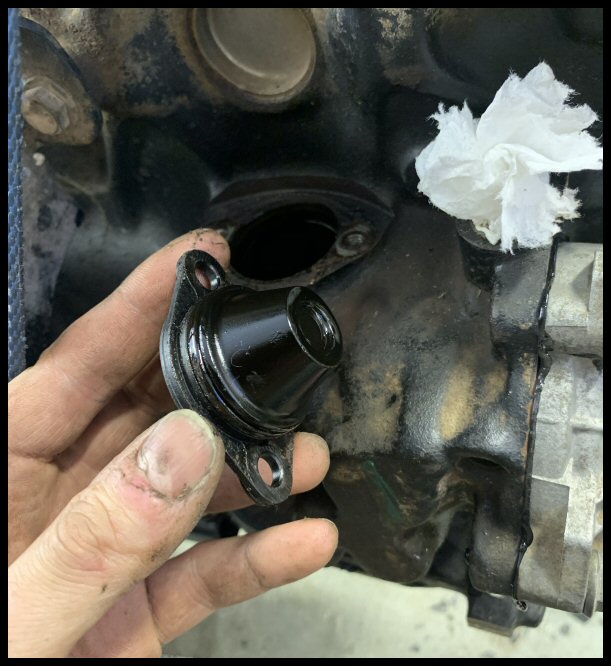
Oil seal rock hard and no longer 'o' in section...
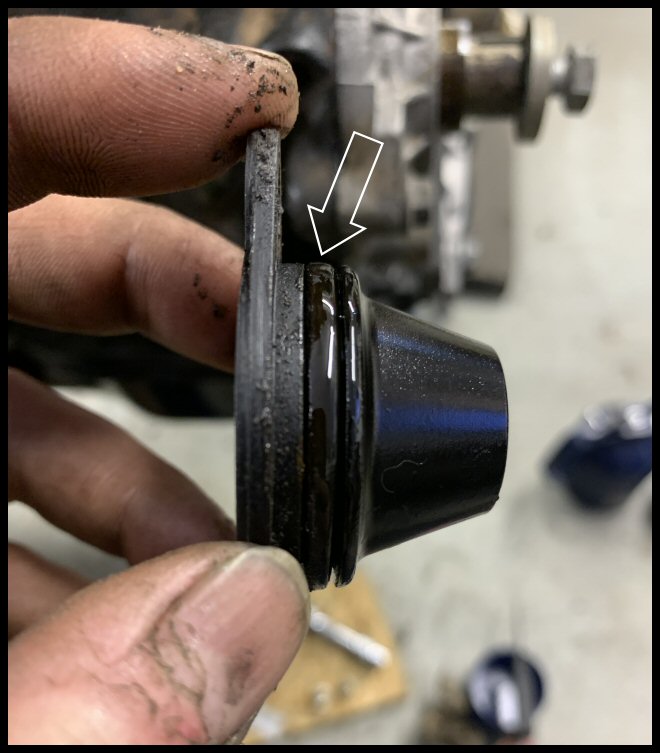
New o-seal sourced...
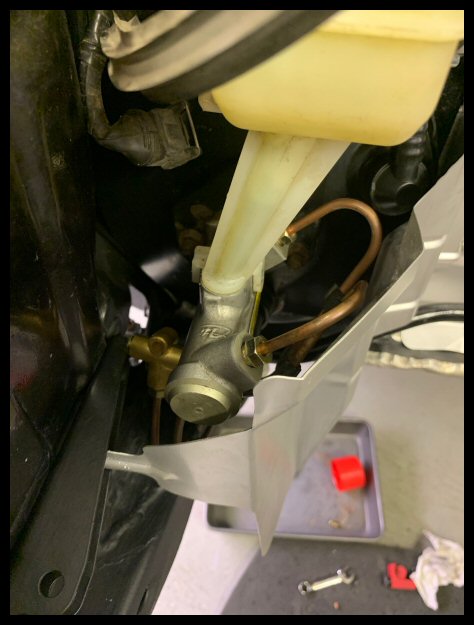
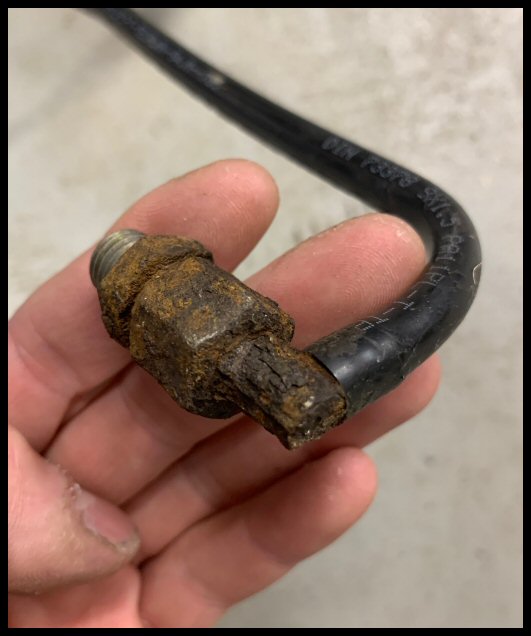
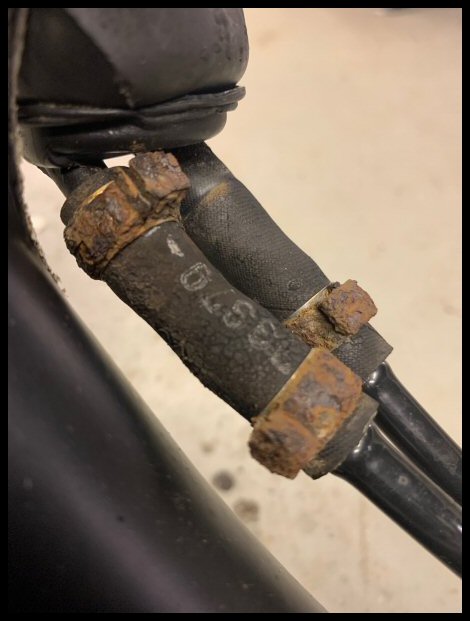
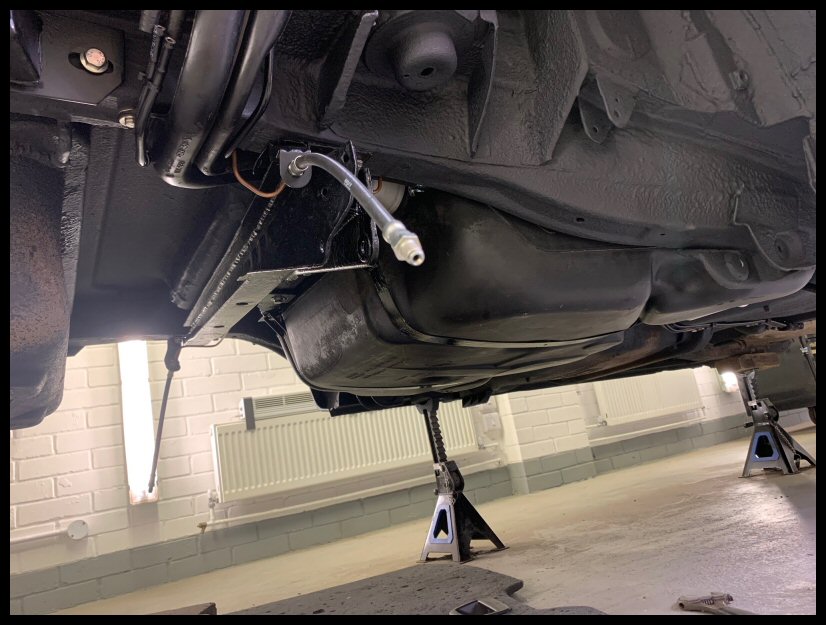
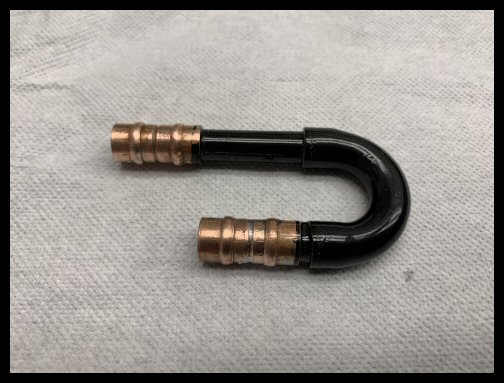
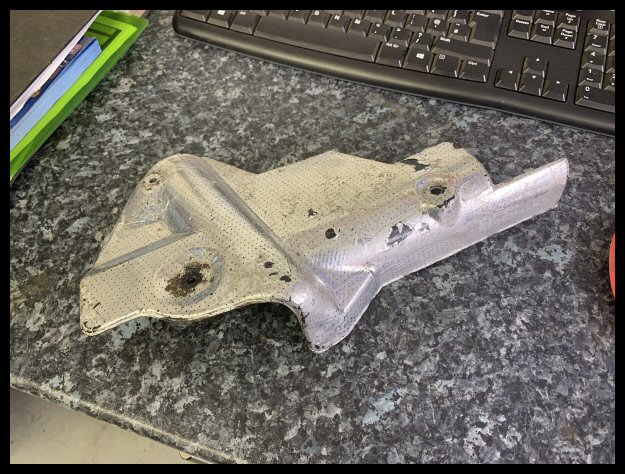
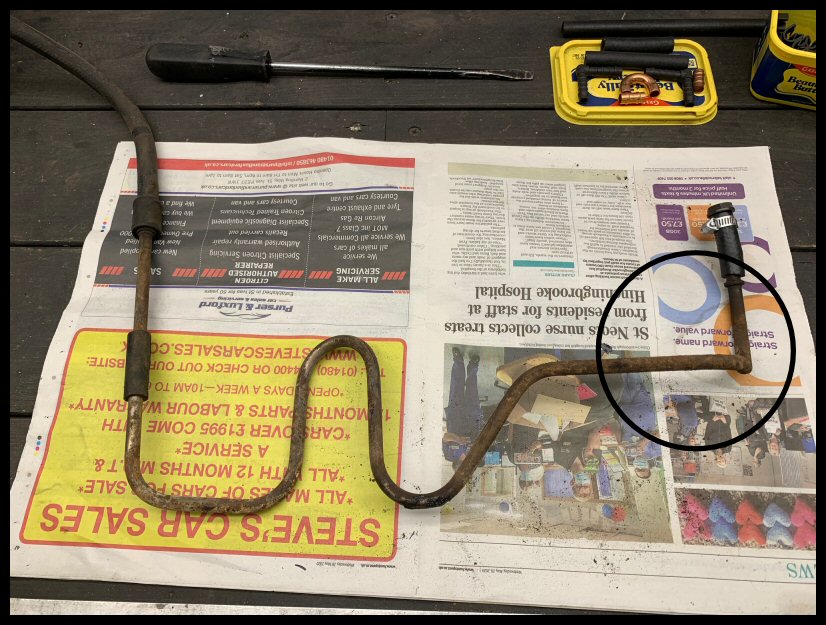
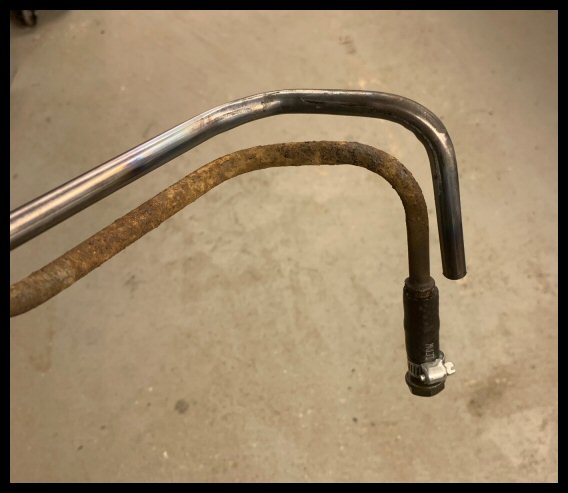
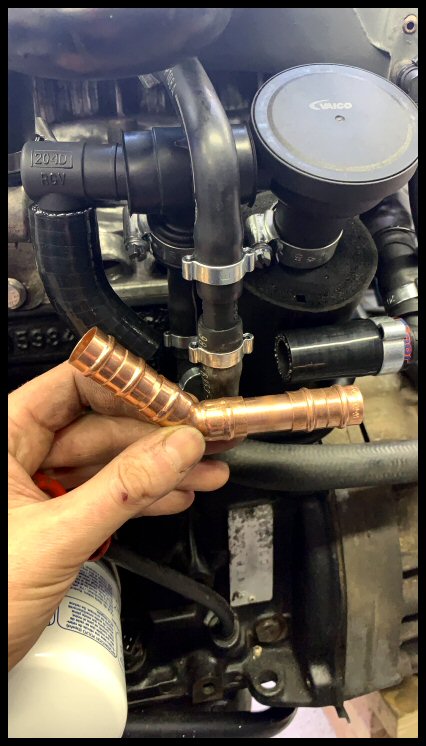
 Turbo Oil Feed Pipe
Wasn't happy with the amount of corrosion here. A long search on the forums reveal some have pin-holed already. Not good and a fire risk.

The corrosion area was heavily localised at the support bracket that bolts to the exhaust manifold. Obviously the heat at this location is contributory.
Even back in the day, a 2011 thread says Volvo wanted £270 for this pipe! Even if it was still available I wouldn't pay that! Custom reproduction is the only method with matching olives & adaptors.
I wanted an actual pipe and not a universal (and cheaper) braided line. It gets pretty hot around these parts!
I used Pirtek in Peterborough.
All ready for fitment....
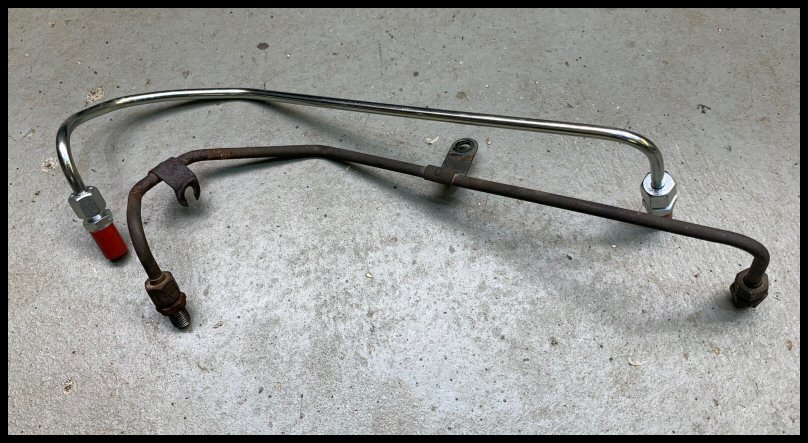
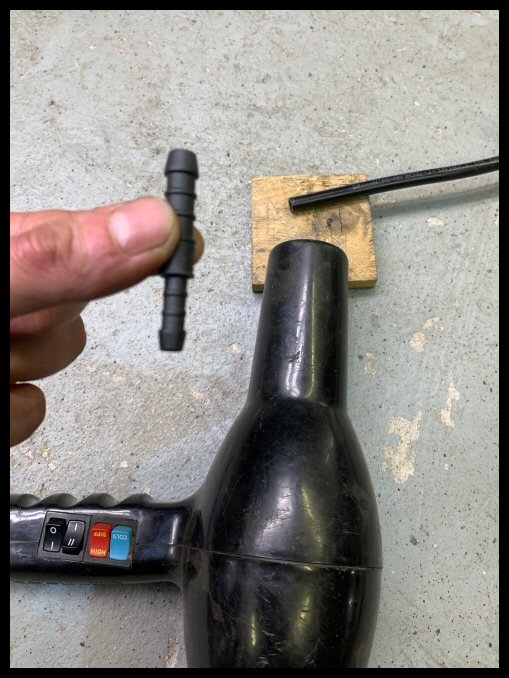
Extremely fiddly and time consuming as you have to custom make all the support brackets for the bare pipe...
 Oil Prime
The engine has sat oiless for two months. What follows is purely precautionary based on my experience the hard way - in as much that oil pumps don't self prime. That, and I wanted to see oil from my new turbocharger feed pipe.
Fill up with new oil. Use a drill to the auxiliary pulley via some old hose...
Spin up & wait...
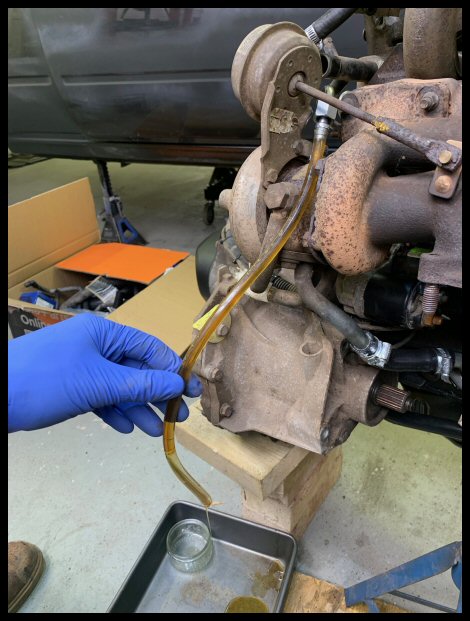
Obviously if this didn't work, you have to back feed from somewhere until it does. Luckily didn't have to. Happy days!
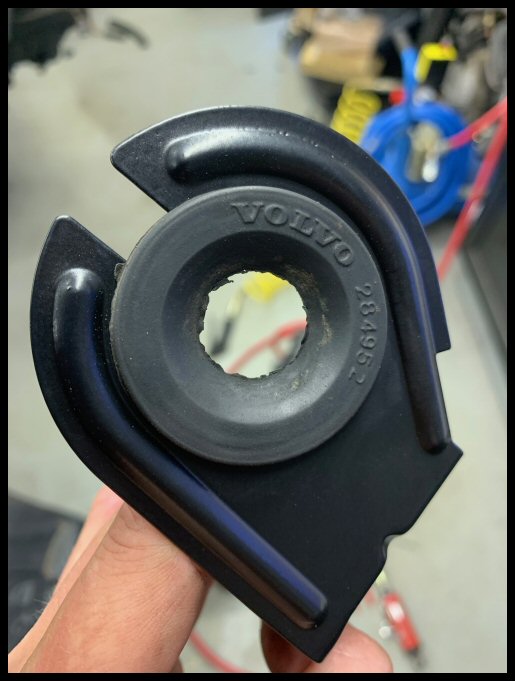
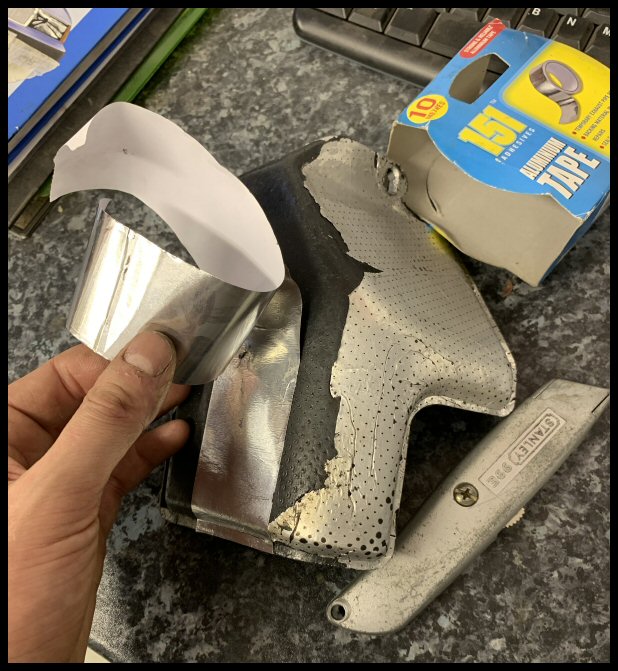
Heat Shields
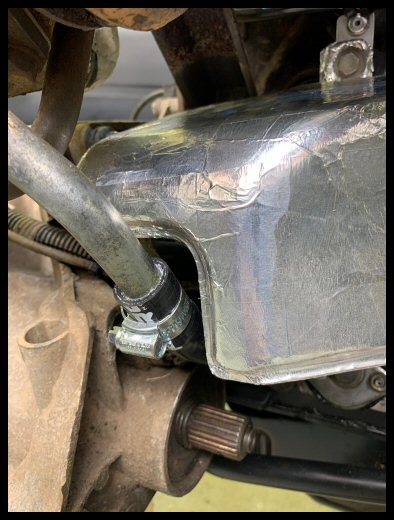
Not only were the heatshields filthy with grime, but they had lost their heat foil coating. This was rectified with AluTape...

All fitted, together with the new oil return hose...
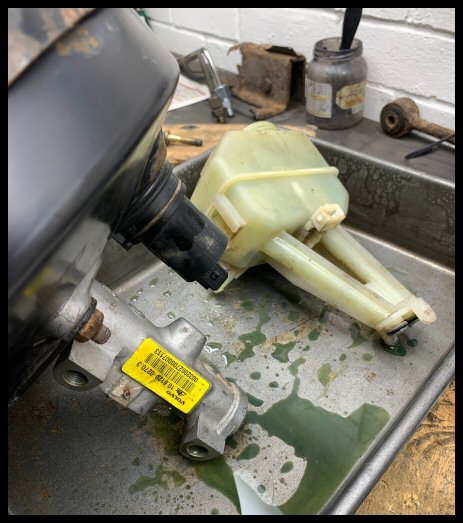
 Coolant Pump
Whilst the pump was dry externally (via the drain hole) and felt really good, it was date stamped 1994. Just makes sense to do it anyway.
I was expecting a brown mess within...
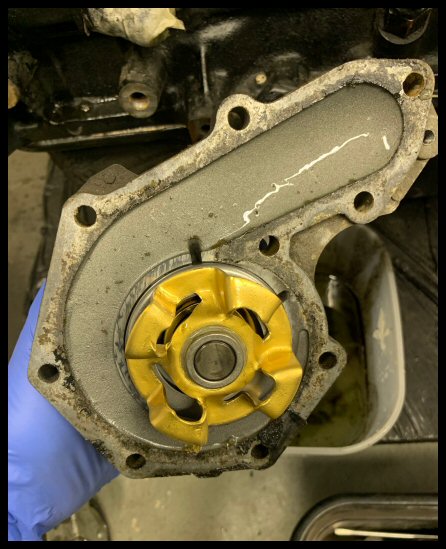
Came off crystal clear.... amazing. Don't laugh, but the car does have a history file. I know I have swept most of the car up into a dustpan, but it must of had a good few coolant changes in its 26 years.
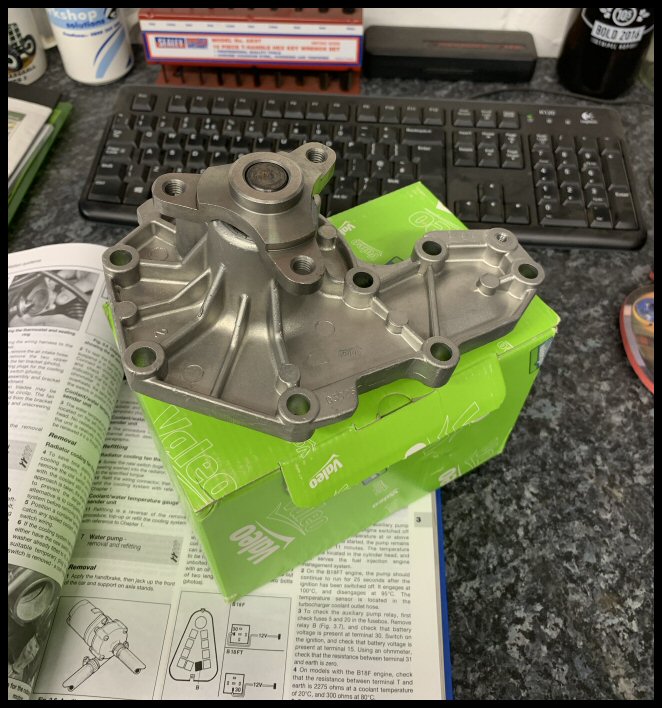
A French made genuine Valeo in a nod to originality.
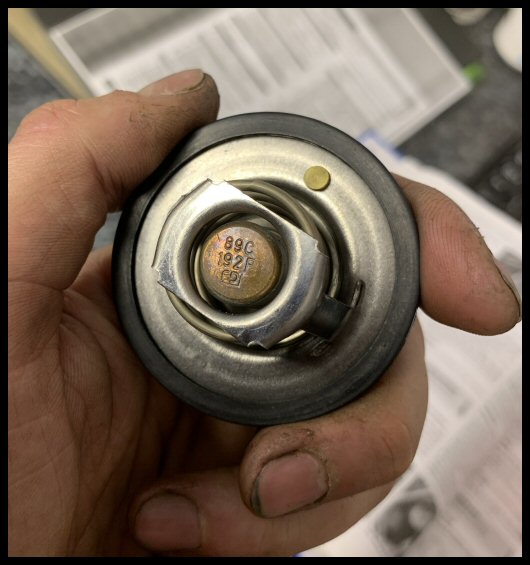
Thermostat
Makes sense to do... jiggle pin at the top and sourced with a new rubber o-ring...
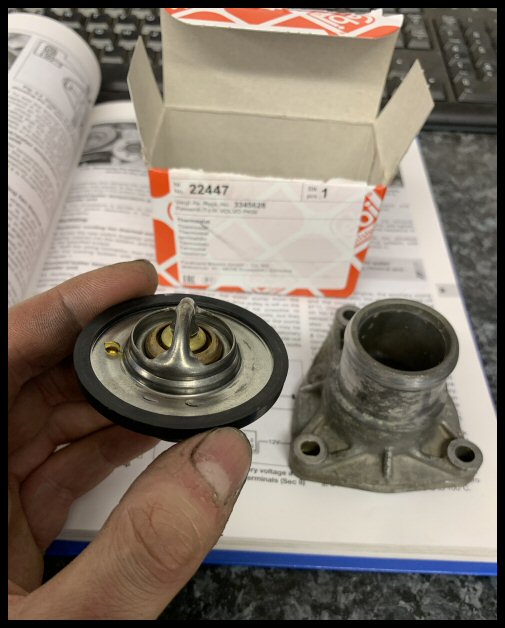
According to my Haynes manual (and VADIS) the B18FT has a lower opening temp. Again, many parts suppliers group all the B18 thermostats together as one. Not so.
89'c verified...
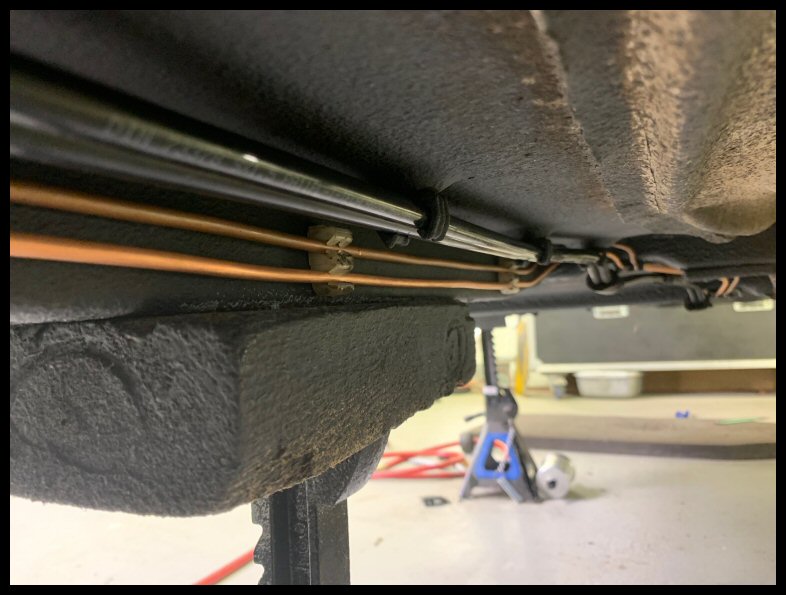
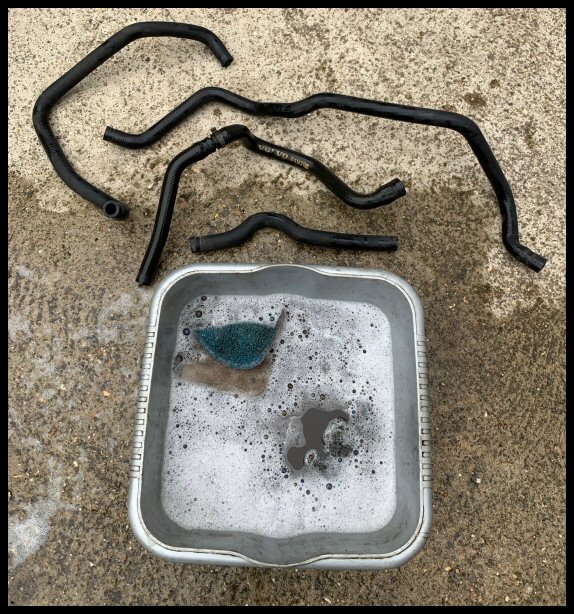
 Coolant Hoses
All hose clips junk...
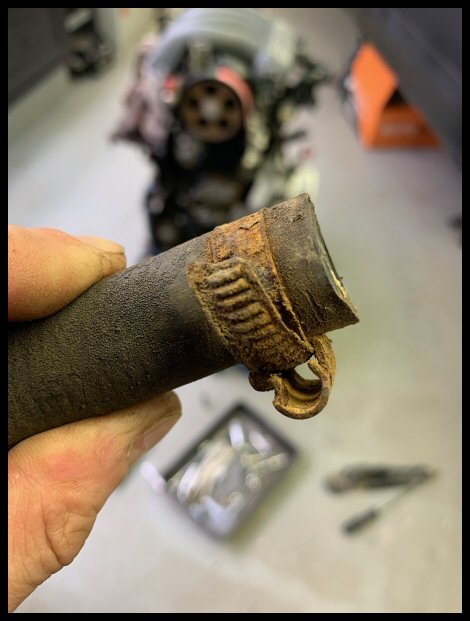
All cleaned and checked for cracks...
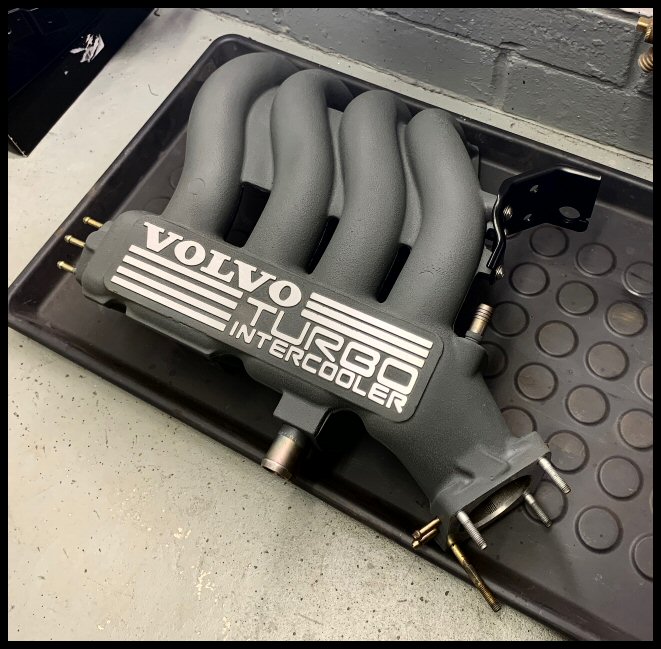
 Inlet Manifold
The inlet manifold to me is special. Hear me out on this one!
Re-wind 30 odd years, and that 480 brochure I talked about...
I read that brochure cover to cover as a kid, a hundred times over, and there is one picture that stands out...
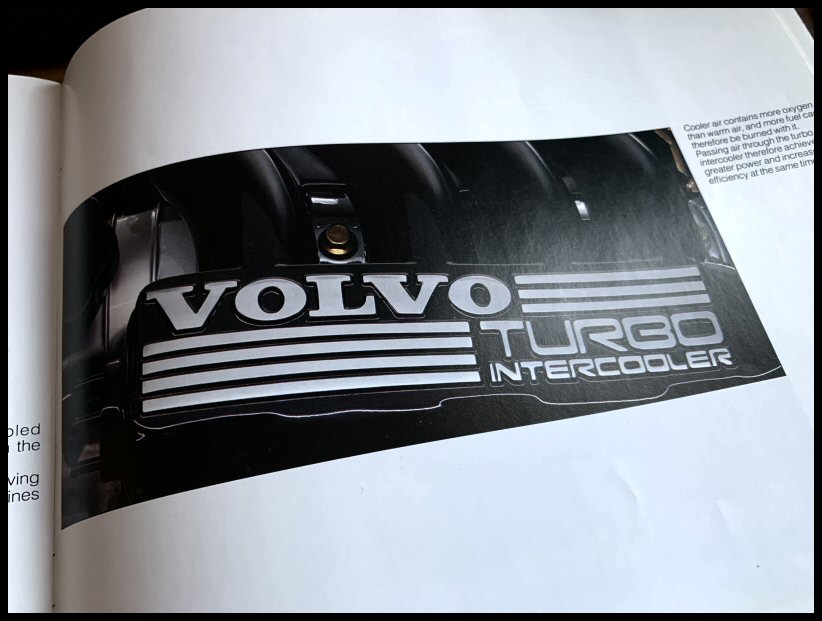
As a young lad, any engine with TURBO INTERCOOLER written on it is the coolest engine in the world!
I love the machined text contrast of the early black inlet manifold... but mine isn't an early car to have a black manifold. I think the later unpainted manifold (clearly a Volvo cost cutting measure) loses the impact of the text.
What for me is a rare deviation from factory standard, I chose slate grey as an inoffensive half-way-house. In fact I found a VHT textured grey, cleaned the manifold and masked up pipe connections...
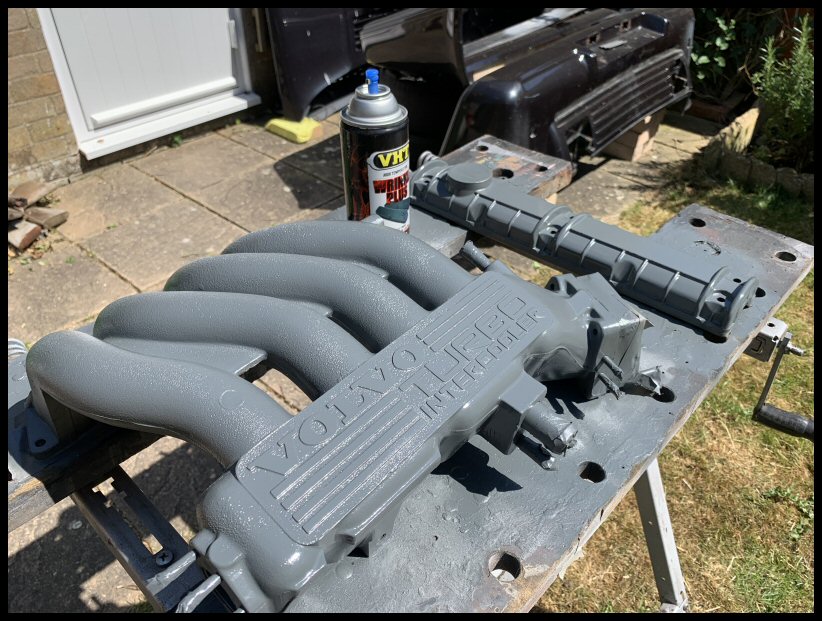
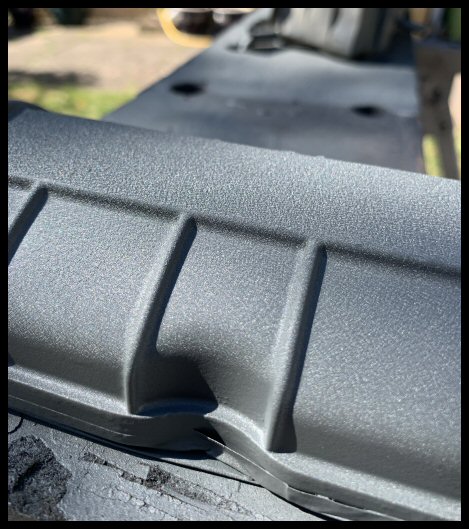
It gives a lovely textured finished which reminds me of that seen on red Honda VTEC cam covers....
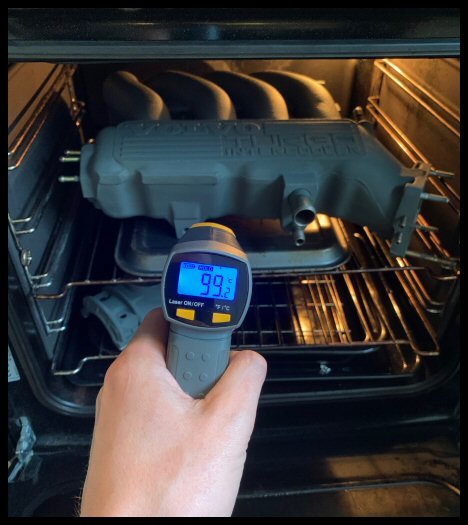
Does take a few days to dry though and can't be touched beforehand...
Then oven baked @ 100'c as per instructions to cure the VHT process...
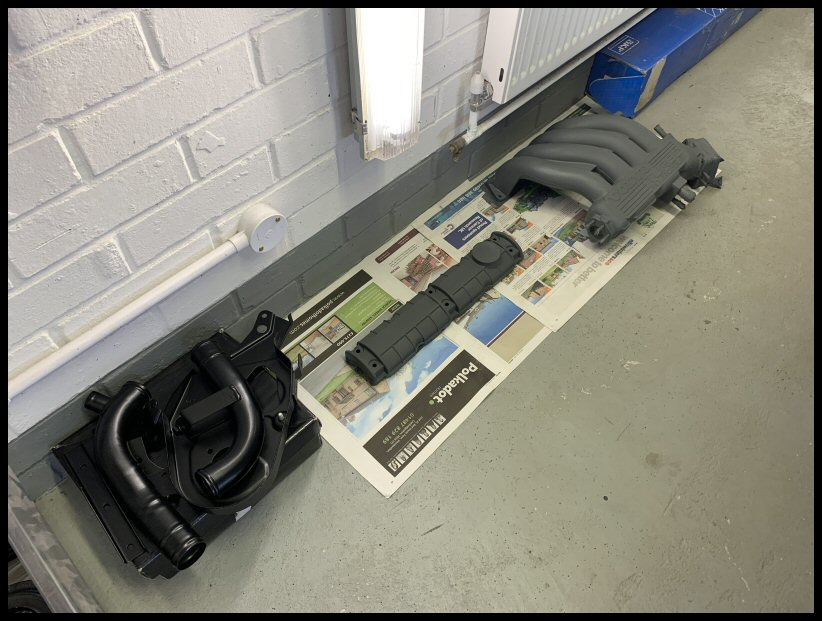
Masked up for protection and top layer sanded...
All done...
 Valve Clearances
Amazingly, something went well!
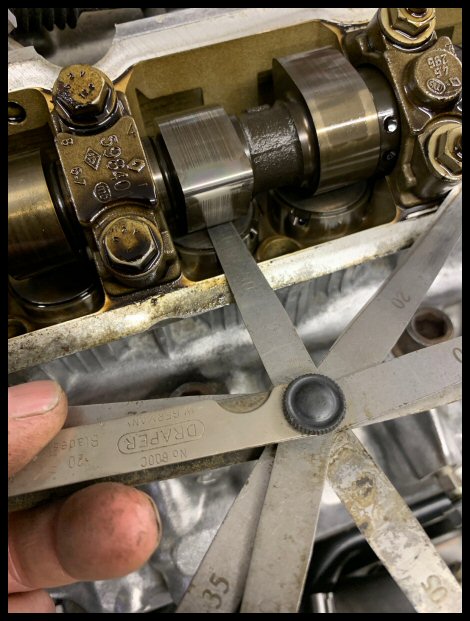
All within checking tolerances... no further work required!
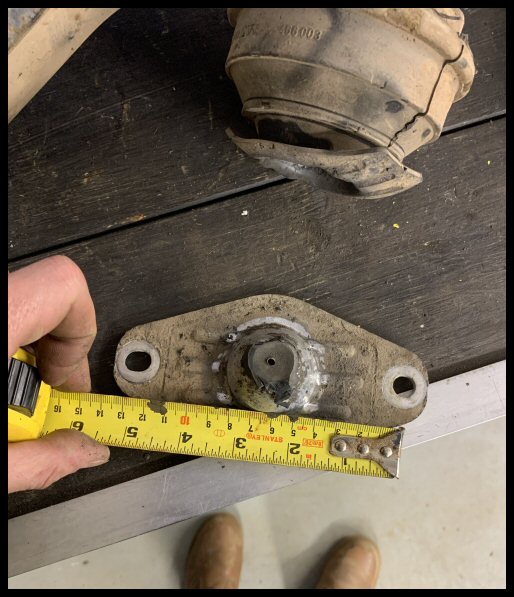
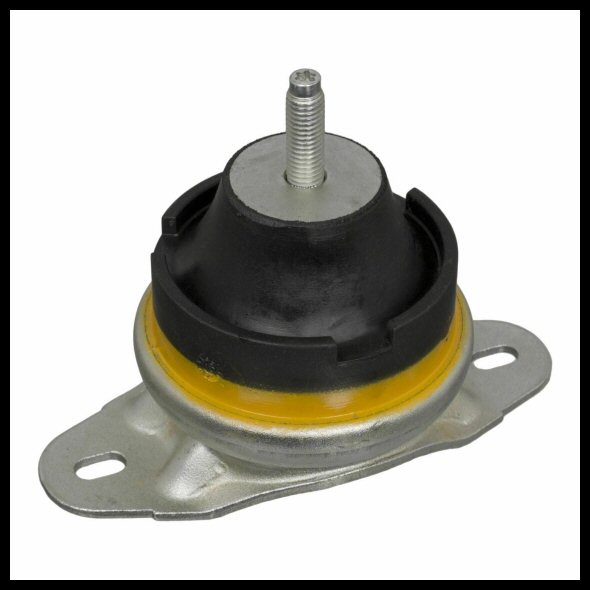
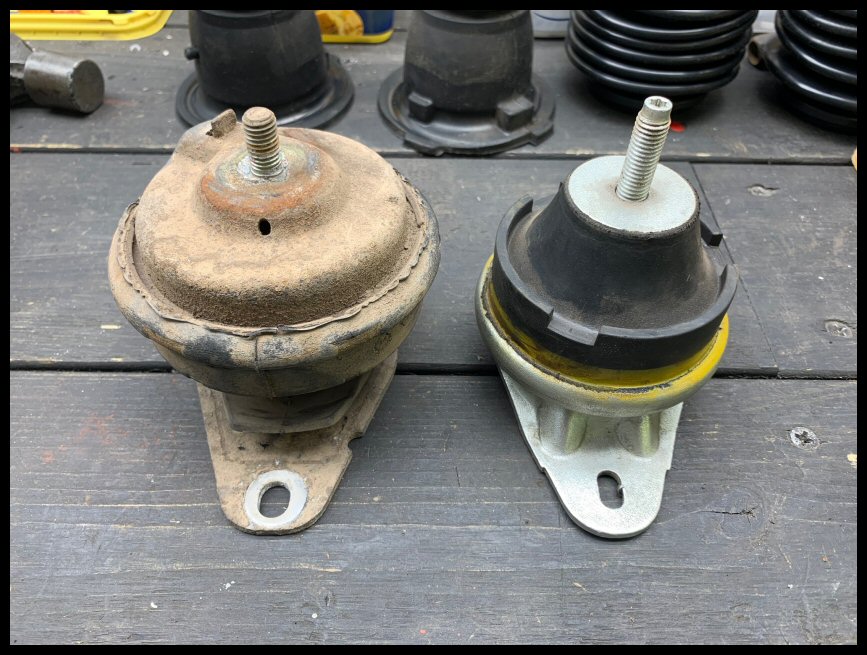
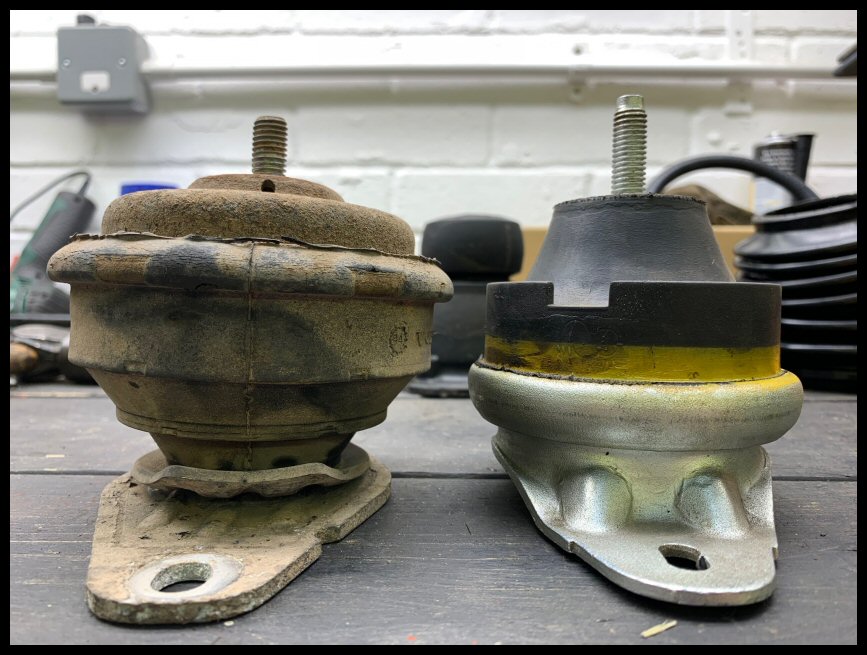
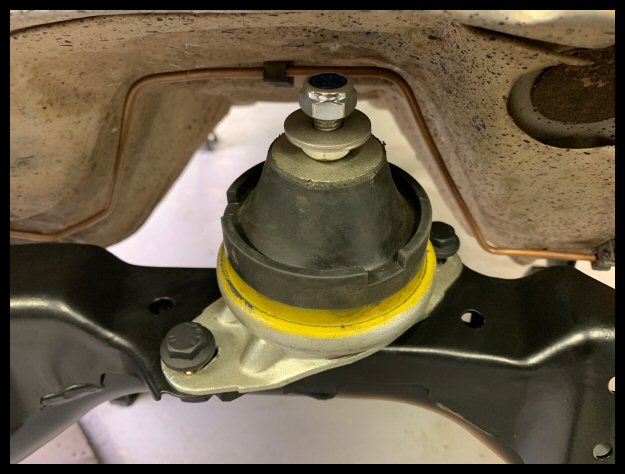
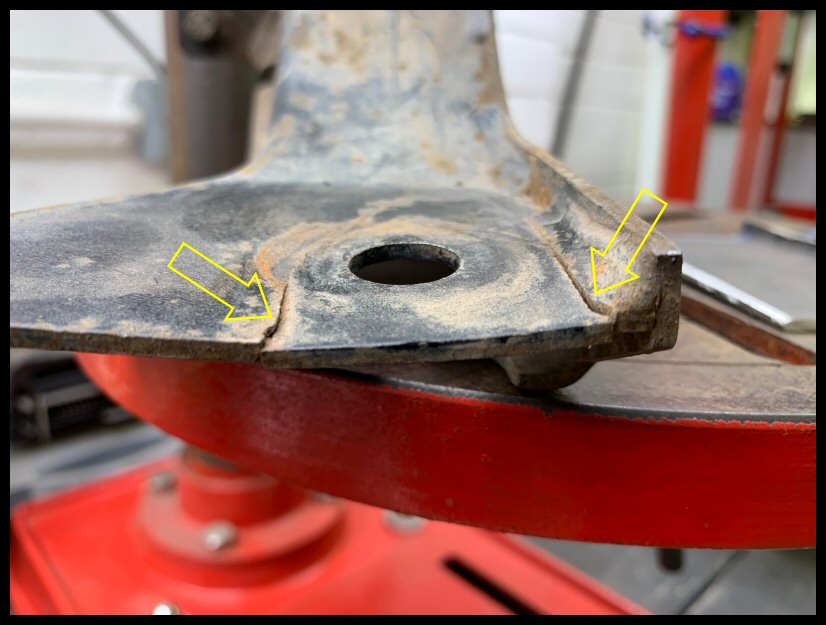
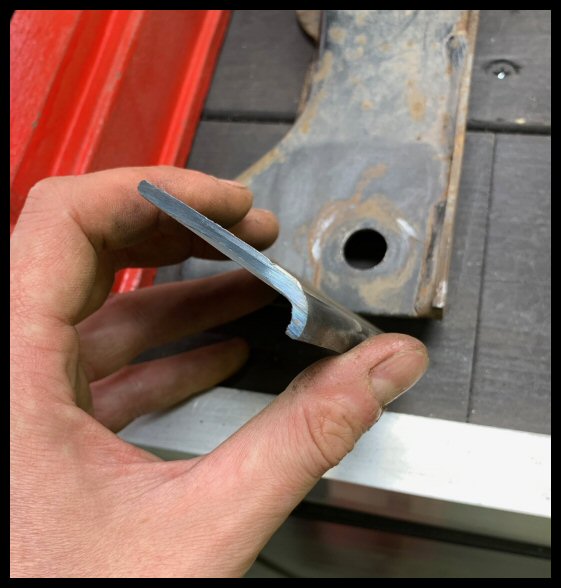
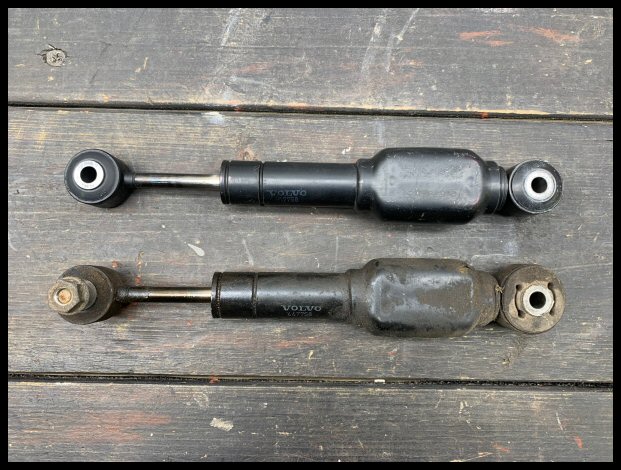
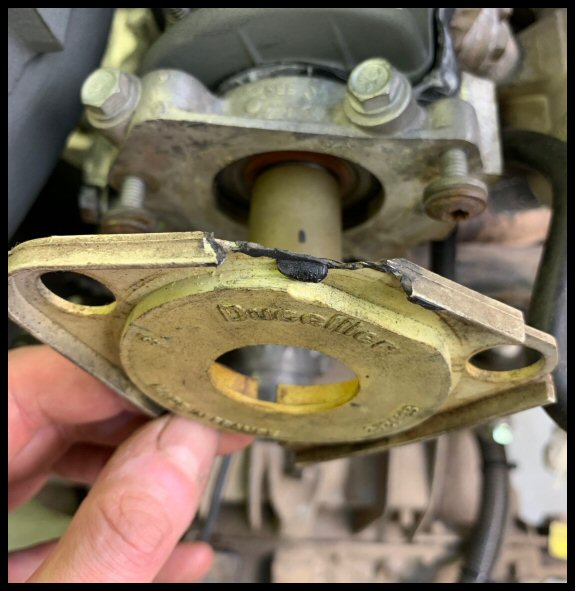
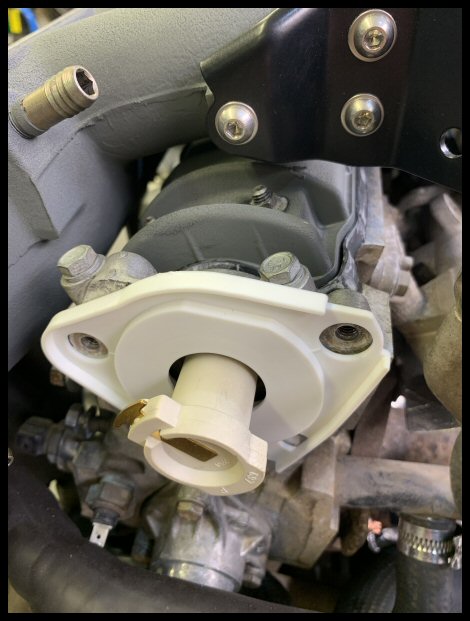
 Engine Damper 447758
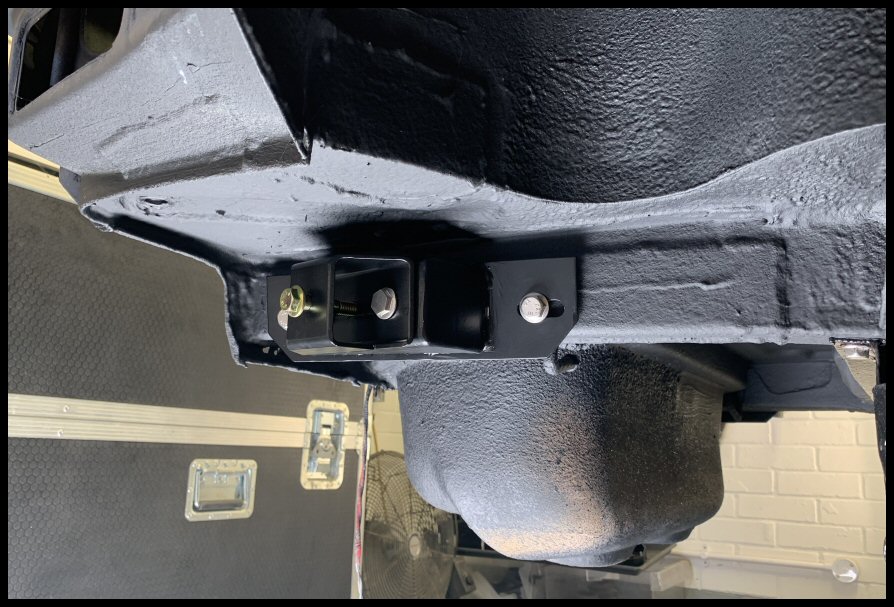
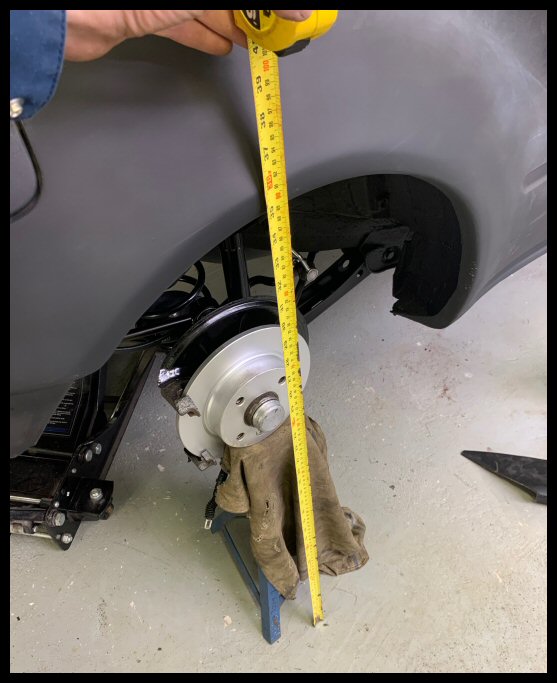
You could push this damper in & out with ease. Might have been a contributory factor in my rear engine mount damage.
Amazingly, a good second-hand part obtained (top). This replacement takes considerable effort to push in and out, together with an audible damping effect like a shock absorber.
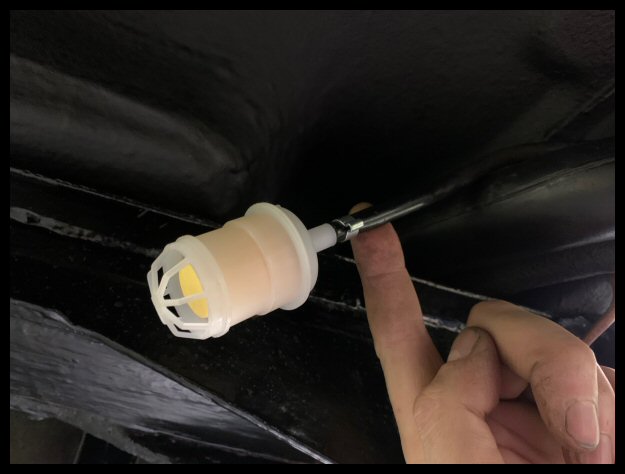
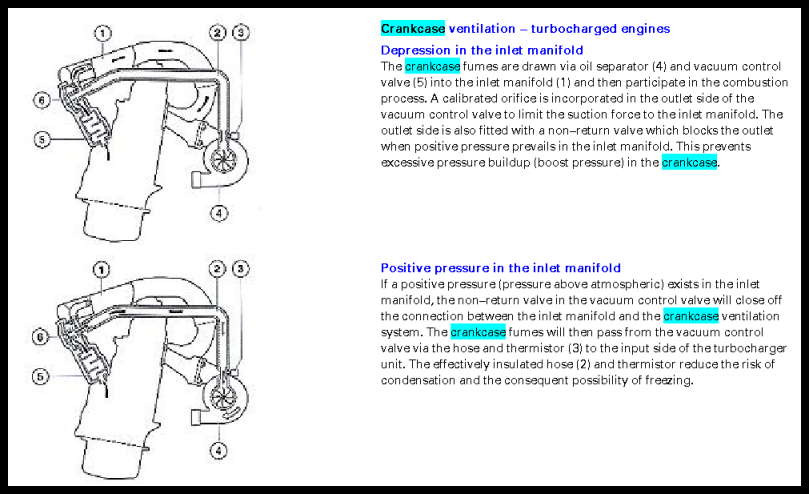
 The B18FT Achilles' Heel; Vacuum Valves
If you haven't got a cup of tea, go make one for this subject!
I swear this topic is the cause of many B18FT running problems. It affects everything from idle speed, crankcase pressurisation, boost pressure, power and driveability.
Below are the three vacuum/pressure valves from the B18FT charge/PCV systems. Some may recognise them already...
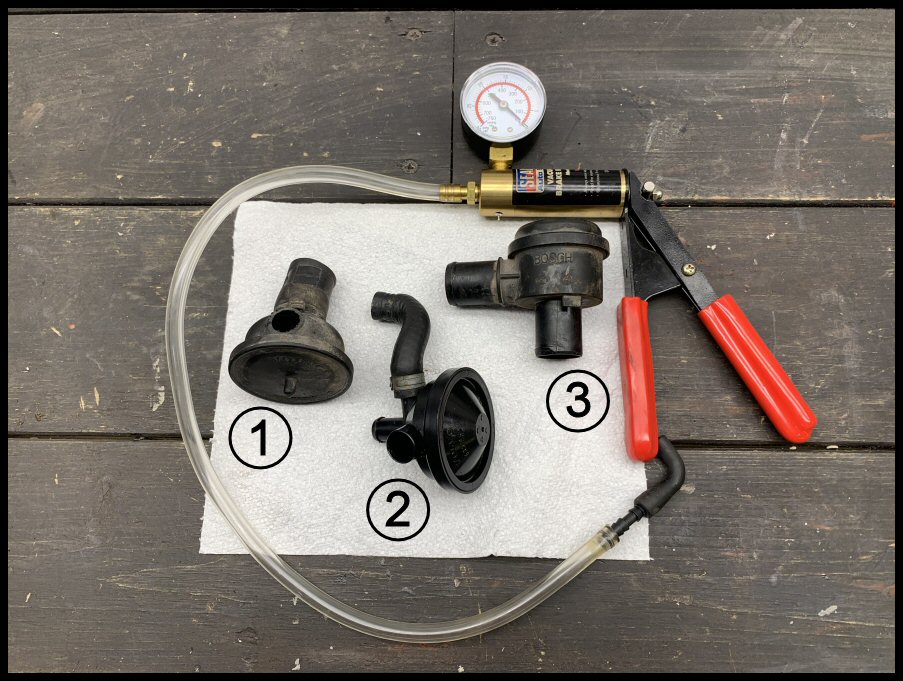
We have, left to right:
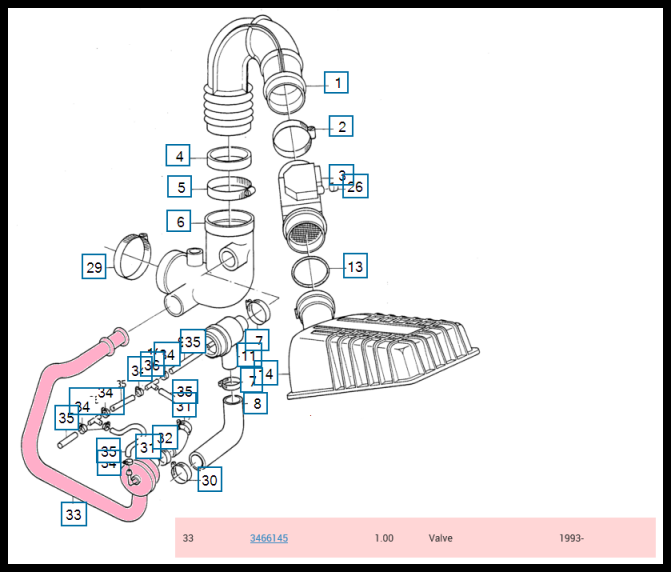
1) Idle Diaphragm Valve : Volvo 3466145 (Note : this should have a long rigid plastic pipe attached but cut off for the photo)
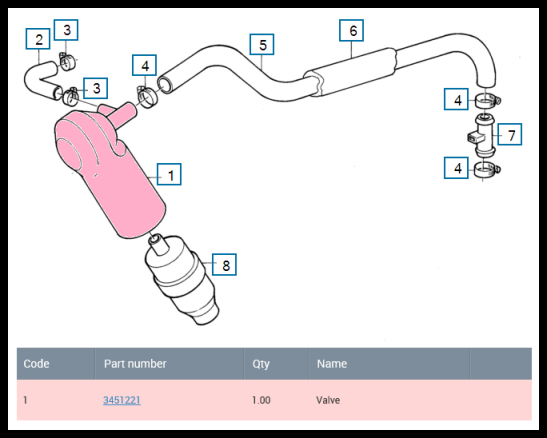
 2) PCV Control Valve
 : Volvo 3451221 (Note : located on top of the oil separator)
 3) Turbo Diverter Valve
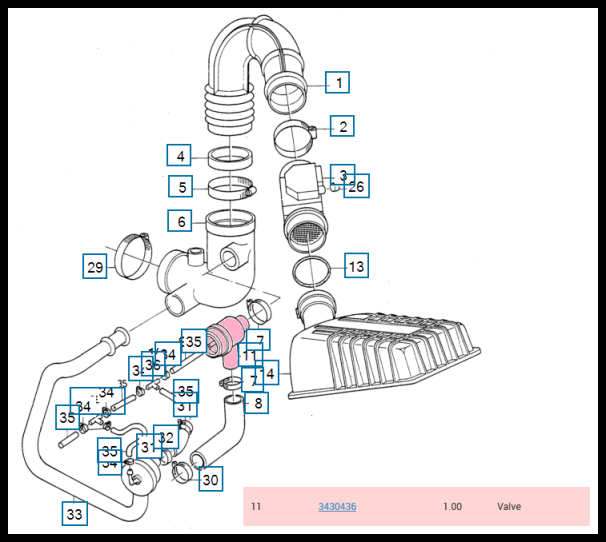
 (Note : located on the turbocharger air inlet pipe; also called a dump valve, re-circ valve, 710N valve, charge bypass valve) - Volvo 3430436 or Bosch 0280142102
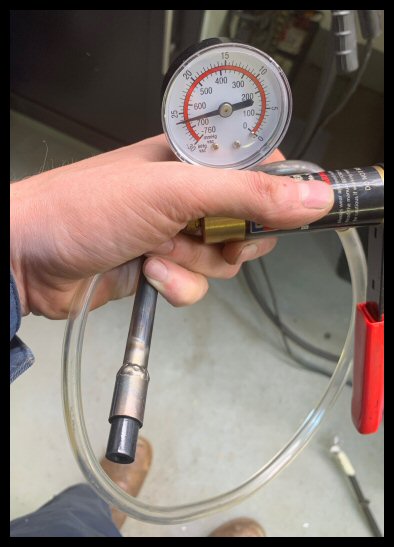
All three valves tested - and all three are absolute junk. Probably all original. None of them would hold a vacuum or subsequently operate.
The engine would have been leaking boost for sure, down on power, and unresponsive between gear changes. When looking back on the very little I have driven the car, I have never driven it in anger, that's probably why it was largely unnoticed. I have always driven the car to get it from storage place A to storage place B with as little drama as possible.
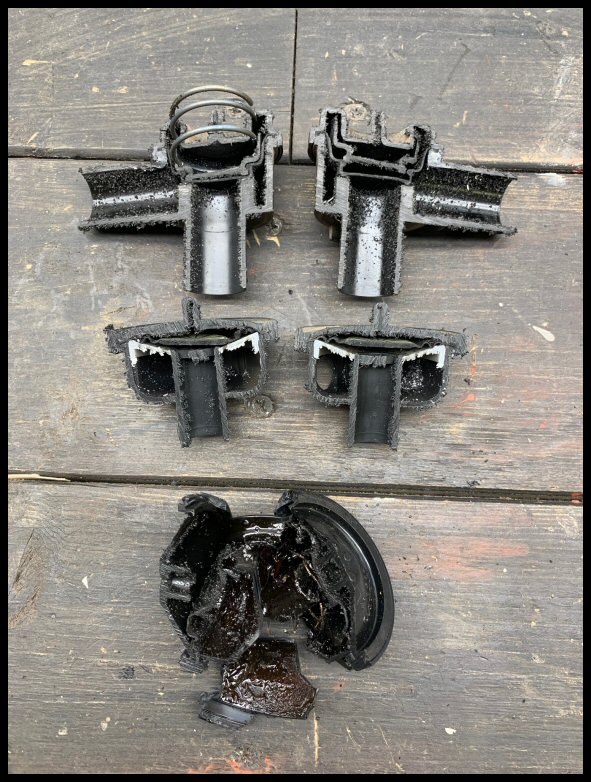
Not pretty, all sludged up and all internal rubber perished...
So, where to start with all three valves which are NLA from Volvo (obviously)?
In reverse order...
'Valve 3' - Turbo Diverter Valve - Volvo 3430436
A solution for Bosch 0280142102 is no problem. You can trace this valve (and Bosch part number) all the way back to the Ferrari F40 (1987), through 1990 Porsche 944 Turbo, evolving into the 2001 Audi BAM 225 engine and beyond; albeit with 15 consecutive Audi part numbers in between. The latest incarnation today is VAG 06A145710P. Easily available from Audi/Skoda/Seat/Volkswagen dealers for a healthy £45. Visually identical...
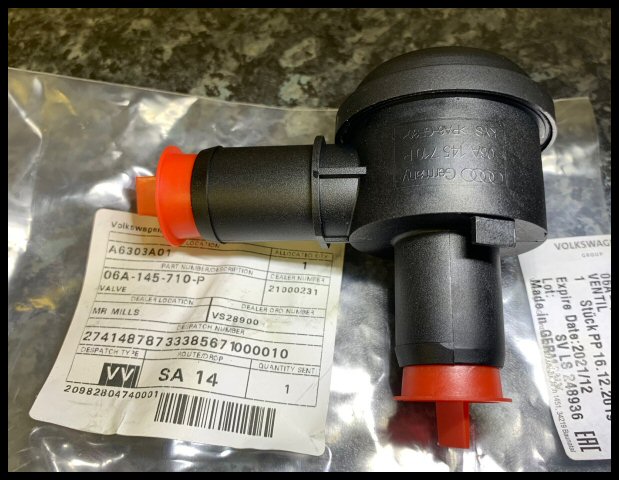
Pattern valves are available - I originally purchased a 'Topran' at a fraction of the main dealer price. However, when I applied vacuum, it just didn't feel 'nice' and had an unsmooth action. The genuine, from VAG, is beautiful in operation and silky smooth.
Amazingly the Audi item, although some twenty years apart, has a location tab identical for the 480 inlet hose...
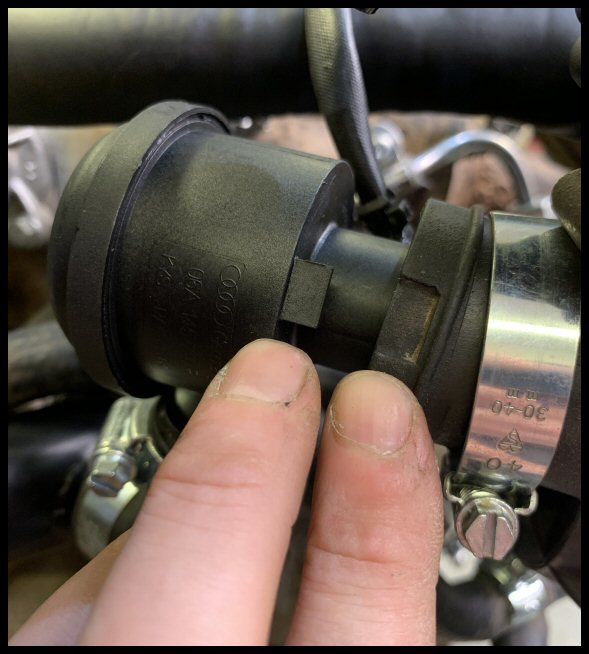
All fitted with new JCS Hi-Torque clamps...

This valve will now maintain boost, and open when the throttle snaps shut, maintaining turbine shaft speed between gear changes and thus driveability.
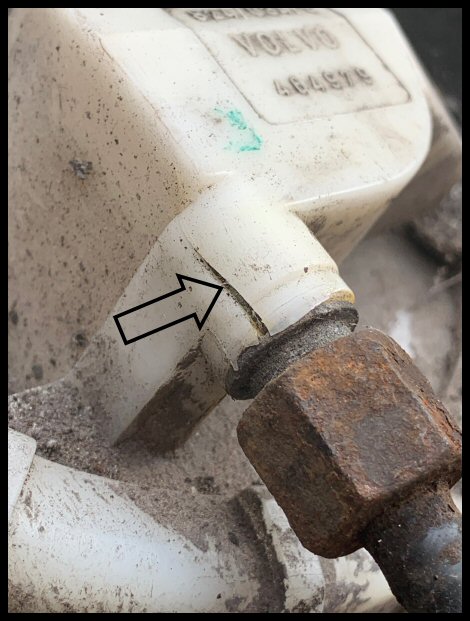
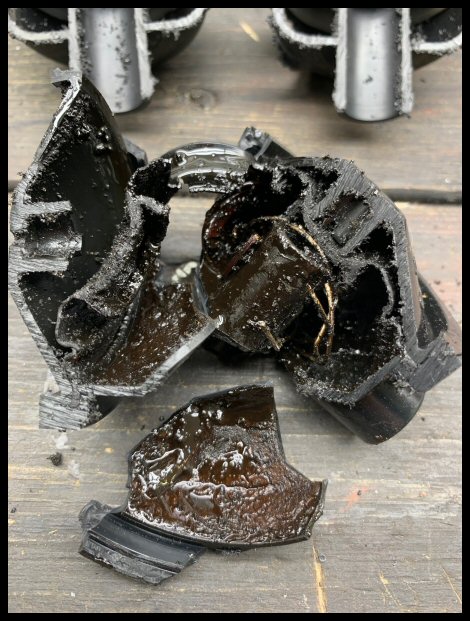
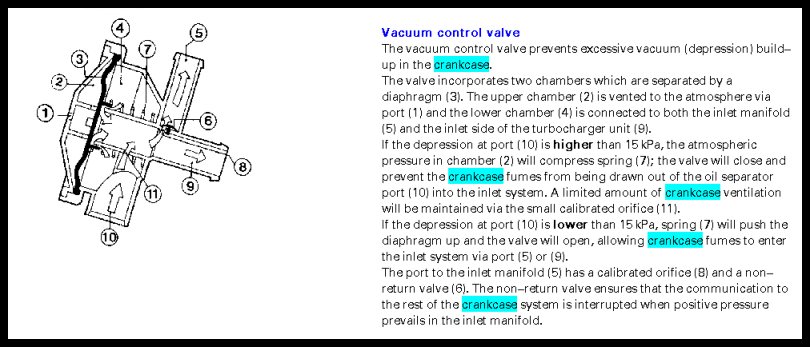
'Valve 2' - PCV control valve - Volvo 3451221
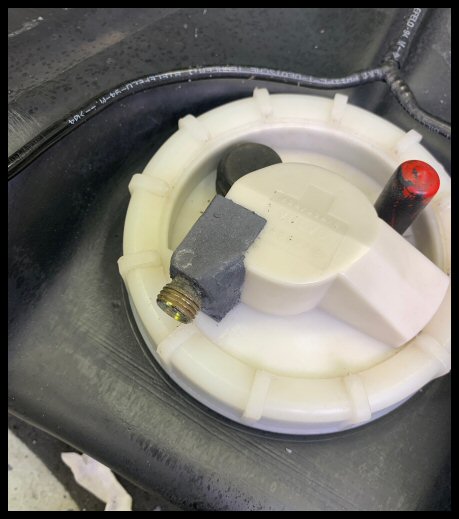
This PCV valve 3451221 is a problem. Here it is removed from it's foam housing...
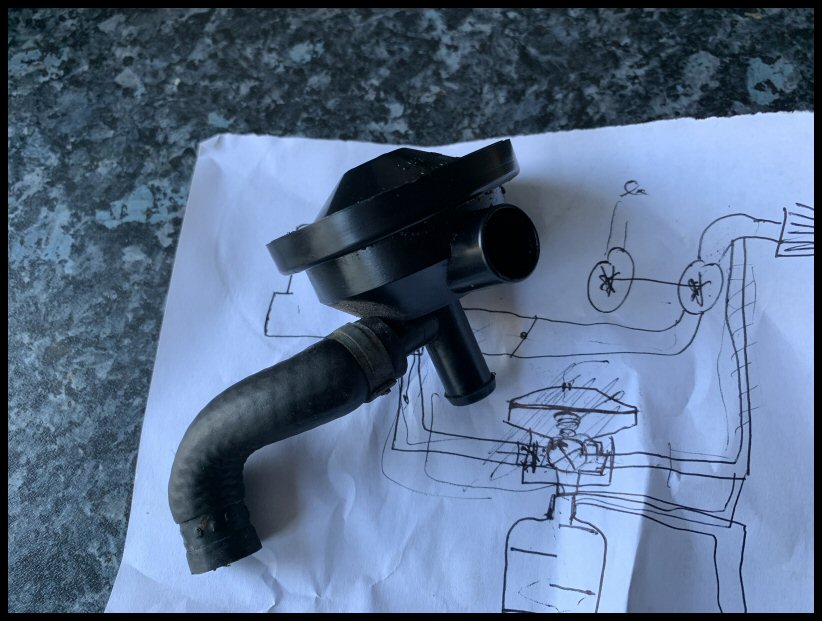
It has three important jobs;
1) It chooses a choice of two PCV vent routes dependant on driving conditions, namely inlet manifold (during idle/overrun) or pre-turbo (during acceleration).
2) It provides a one-way valve function to prevent boost back-flowing from the inlet manifold and pressurising the crank case (pushing up the dipstick commonly)
3) Controlling a maximum allowed vacuum value. Believe it or not, too much crankcase vacuum is a bad thing. For naturally aspirated engines, this isn't a problem. But for turbocharged engines, when the valve chooses the 'pre-turbo route' and the turbo inlet vane is drawing hard, it can cause
too much vacuum. Excessive crankcase vacuum can create problems with oil pump suction and oil piston spray jet patterns. I read a really interesting research paper on a dyno experiment during power runs with different crankcase negative pressures and believe it or not, too much vacuum actually resulted in a slight loss of BHP. The conclusion being crankcase vacuum needs to be in that ‘sweet spot’.
Below are the testing and description slides from VADIS:

Being no longer available new, this is when the project ground to a halt. Firstly, a second-hand part isn't viable. They are prone to failure due to age and their working environment (PCV fumes and sludge).
Many late nights trawling the internet & parts catalogues looking for other valves from other engines. I ordered 4 valves from Euro Car parts (for a collection of other vehicles) and ran tests, returning what didn't work to ECP.
I lost three weeks here. Not joking.

Eventually, I found
THIS excellent write-up by QuattroWorld.com.
It is actually written for the Audi RS2 20V... but sometimes you have to steal things from lesser vehicles

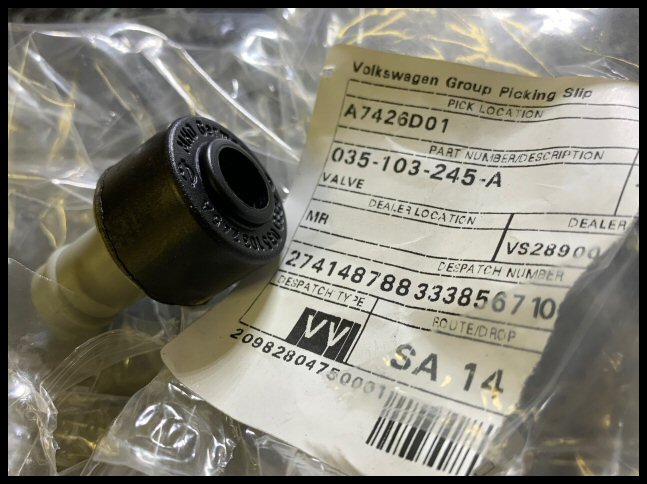
It revealed two valves...
1) a small in-line one-way valve for the inlet manifold, designed for PCV fumes, still available from VAG part number 035103245A. So I bought it...
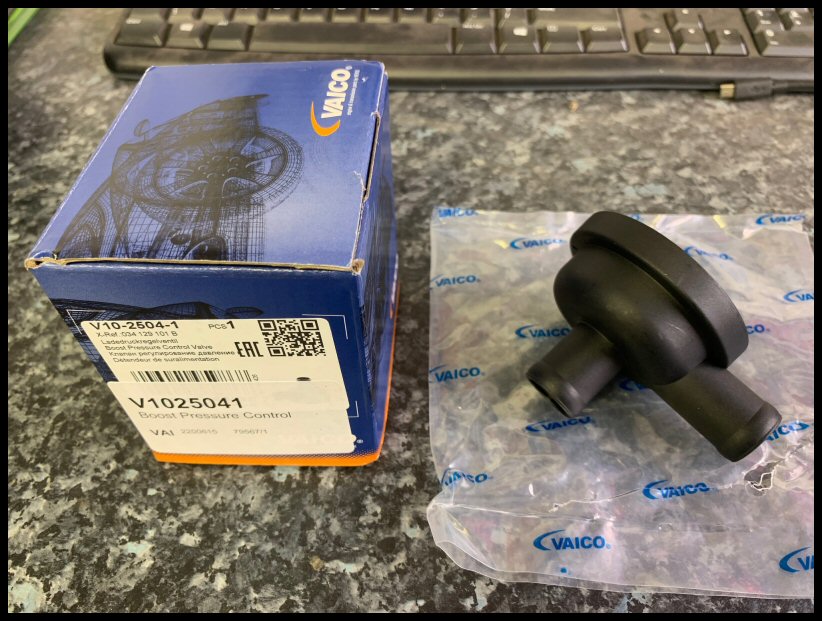
2) a vacuum regulation valve, VAG part number 034129101A. This is available as a pattern part from Vaico. So I bought it...
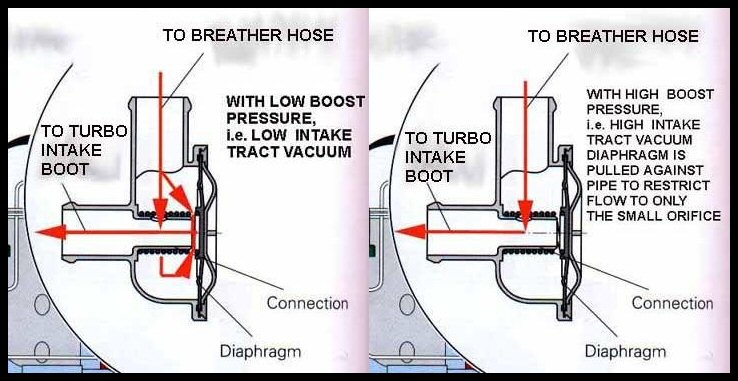
Above is a cross-section of 034129101A courtesy of QuattroWorld.com. Note the use of a 'controlled orifice' which is exactly the same as the Volvo part. If you read the VADIS operation slide for 3451221 (earlier) then it's word-for-word in operation.
You can actually see the 'controlled orifice' that gives maximum vacuum control on full boost - basically a small hole...

If I could include these two valves into my own PCV system, it would achieve all the three PCV objectives listed above provided by Volvo 3451221.
So that's what I set to...
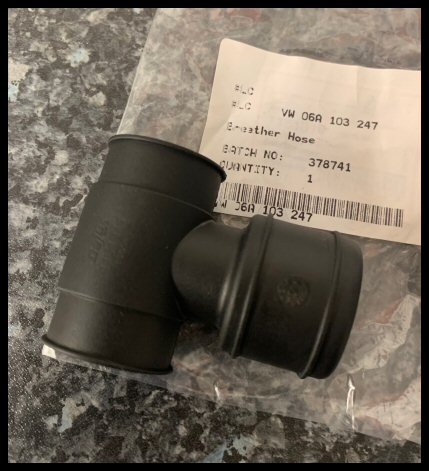
It makes it easier if you purchase the T-junction (VAG 06A103247) that the one way valve 035103245A sits in...
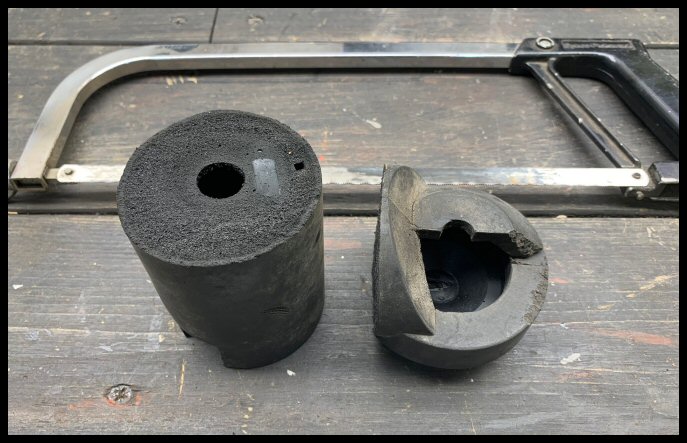
Cut the top off the flame-trap insulator...
Plumb the inlet manifold anti-return line with 035103245A...
When I have custom automotive plumbing projects I always use Yorkshire fittings as it makes good ridges for hoses...

All measured up...
More black, less copper...
Plumb it all up in a way that is as close to OE looking as possible...

So crankcase fumes get drawn up the oil separator with vacuum. Not too much vacuum as this is controlled by the vacuum limiter valve. It then has a choice.... a route to the inlet manifold with an open one-way valve, or under boost, that valve closes and the fumes go ahead of the turbo.
Below is my PCV map. The vacuum limiter valve (blue) sits on top of the oil separator (black) and the one way valve (pink cross) blocks the inlet manifold off under boost....
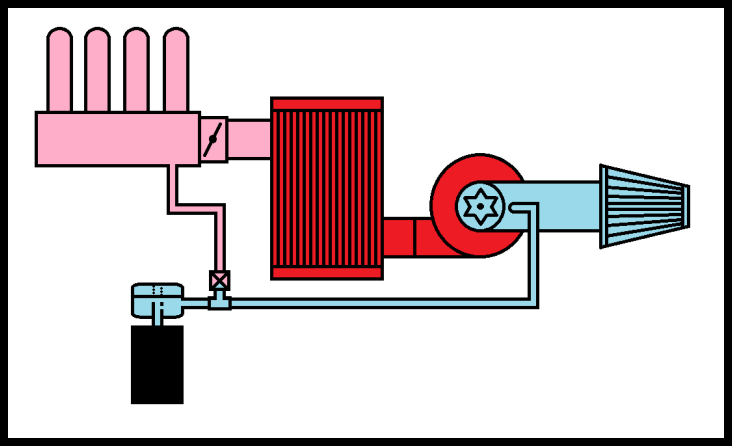
So now I have a vacuum limited, one-way, boost blocking, multi-path PCV system identical to the factory design, using today's commercially available parts.
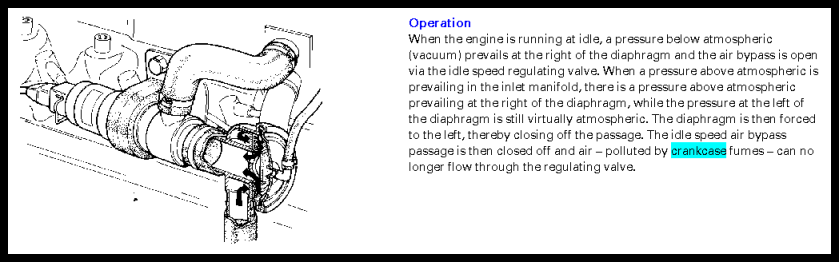
'Valve 1' - Idle diaphragm valve - Volvo 3466145
Looking at this VADIS diagram, the function of this valve is essentially a vacuum controlled one-way valve.
I struggled to find a one way valve up to the task. I spent hours in parts catalogues, spent money on valves to test and I ran experiments using both 06A145710P & 035103245A on my Golf. None of the tests were completely successful. I either had poor starting (not enough vacuum when cranking to open the valve) or a restrictive one-way valve that would create mild 'hose crush' on the vacuum side.
Given that electronic idle speed control using the same Bosch idle control valve (ICV) was fairly generic in the 1980's, I looked at what other manufacturers did and what one-way-valves they used for turbocharged applications. Truth is, they didn't bother, because in all the vehicles I checked, only the B18FT takes idle air from the pre-turbo side. All the period turbo cars I checked, idle control air is taken post-turbo. So, under a boost situation, there is no need for a one-way valve, as pressure is balanced either side of a wide open throttle. So, if I did the same, I wouldn't need to source a one-way valve replacement for 3466145. Then, I made a discovery... in 1993 Volvo changed the inlet system from this simple setup post-turbo, to a more complicated set-up pre-turbo. My best efforts in a diagram, below, explains...
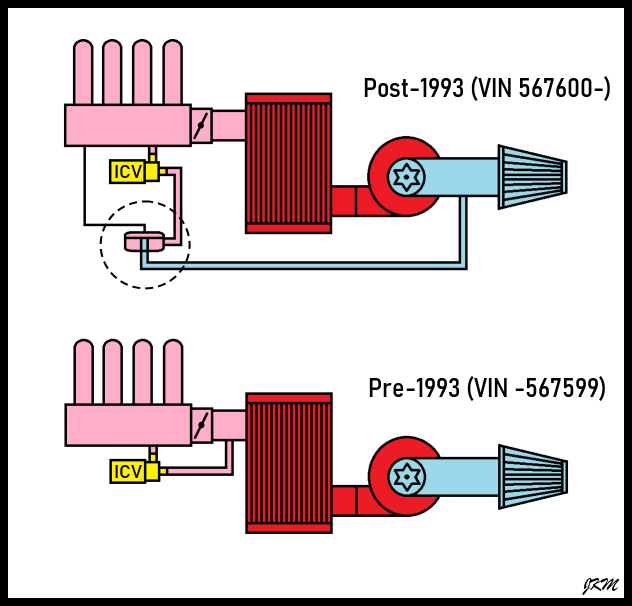
• Top is my factory setup, post 1993; the valve I am trying to source is circled. Bottom is the early pre-turbo setup up to 1993.
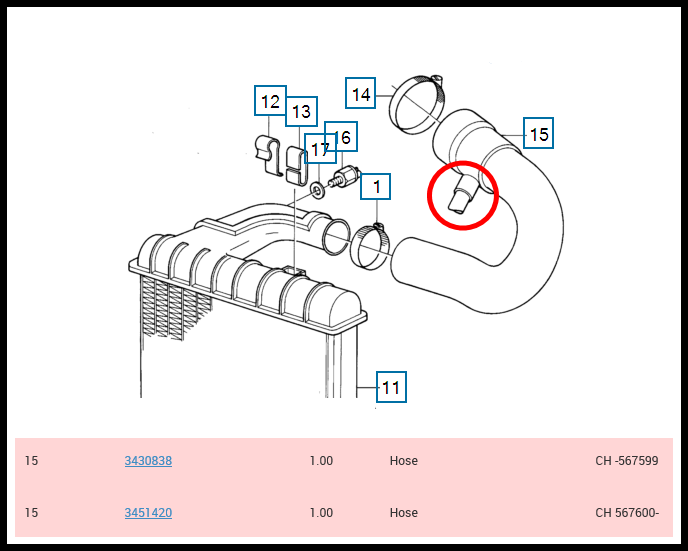
• The parts catalogue also shows the idle control valve take off point on the intercooler hose (circled; post-turbo obviously) which was deleted post chassis 567599.
I think this post-1993 revision was to stop inlet air with oil vapours going through the ICV and gumming it up. Indeed, some references I read on VADIS called 3466145 an "anti-sludge valve". Volvo obviously had problems with the ICV gumming up and flipped the air intake pre-turbo for fresher, cleaner, non-PCV contaminated air. As far as I am aware, the B18FT is the only turbo car to do this; but i'm happy to be corrected... but you'll also have to provide their one-way-valve solution if you disagree!
The more I research the B18FT, the more 'extreme measures' I find that can only be due to the cold weather testing demands of Volvo and an utter phobia of unreliability - the latter having some irony

So very long story short, and it took me considerable time to figure it all out, but basically I will modify the ICV circuit to a pre-1993 setup, thus eliminating the unobtainable diaphragm valve 3466145.
When the time comes, I will either obtain a second-hand 'early' intercooler hose 3430838, or tap my own take-off point.
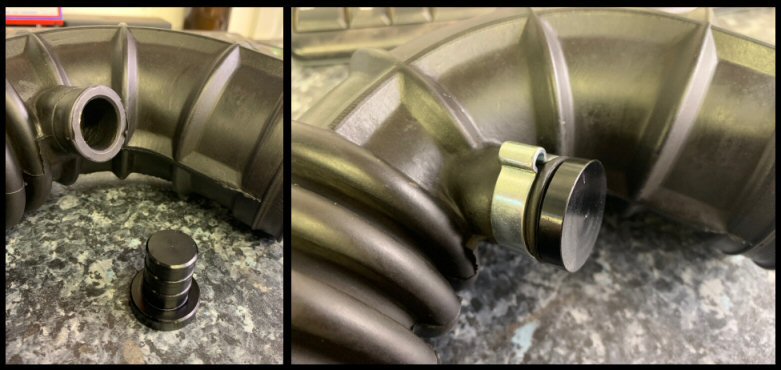
If this is your chosen method, remember to now block off the now redundant pre-turbo take off point.
All intake hoses cleaned...

Redundant pre-turbo take off point for 3466145 terminated...
Talking of extreme cold weather testing, the PCV hose is insulated AND heated! I think Volvo wanted to avoid frozen PCV condensate hitting the turbo impellor vanes. Amazingly, I put the PCV heater across a battery and it still works, becoming warm to the touch. I have no doubt it is original, so that’s a small miracle.
Insulated foam hose looking shabby...

Shabbiness sealed within big-bore heat shrink...

Here endeth my knowledge on B18FT vacuum valves 1, 2 & 3. The vehicle, at this glacial rate of progress, will not be driven for many months to come. If it has any changes, I will edit this thread accordingly!
Ignition System
New rotor arm, cap and interestingly, backing shield. My backing shield was broken and someone had tried a repair with silicone (?!)...
Not all distributor cap kits come with it. I found this backing shield for the equivalent F engine Renault Laguna made by FACET...

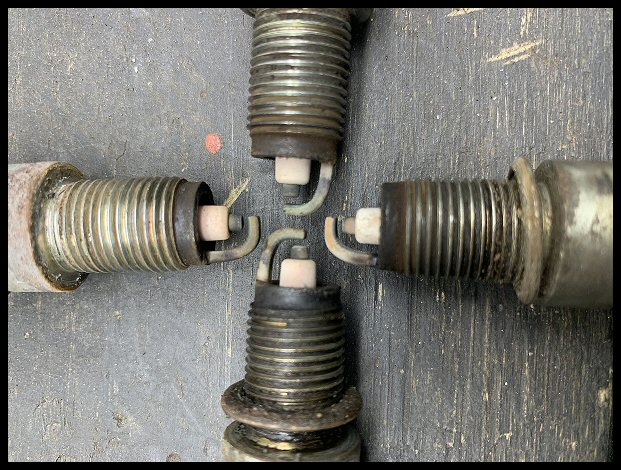
NGK plugs. I have fitted NGK for 25 years now, and that recommendation was passed down to me from my apprentice 'mentor' back in the day.
All gapped to 0.8mm...
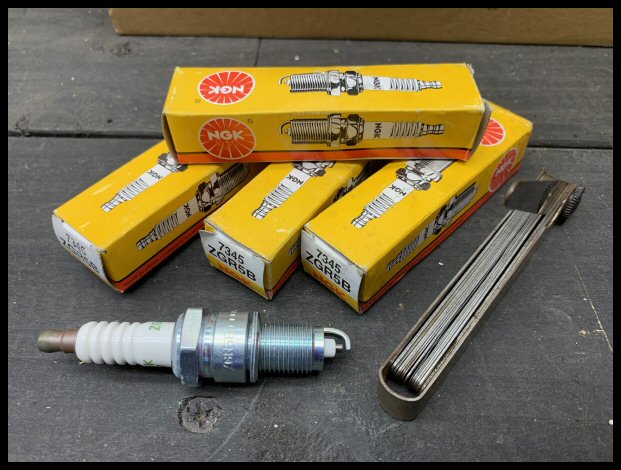
I try to read as much as possible from old spark plug condition, like reading someone's palm! Happy with these...
New Bosch HT lead set...
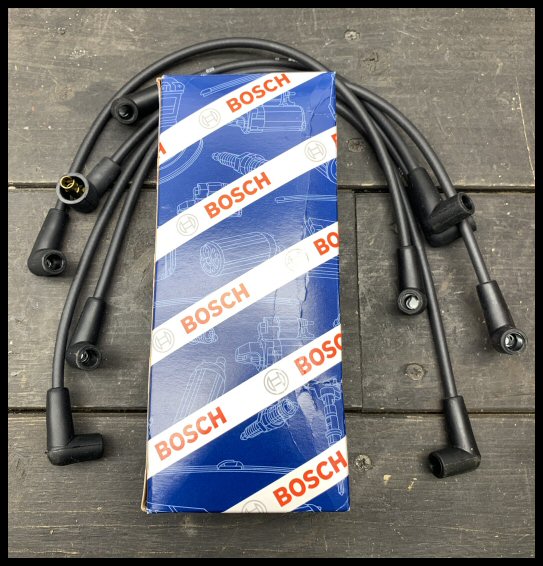
With my zip-tie separators...

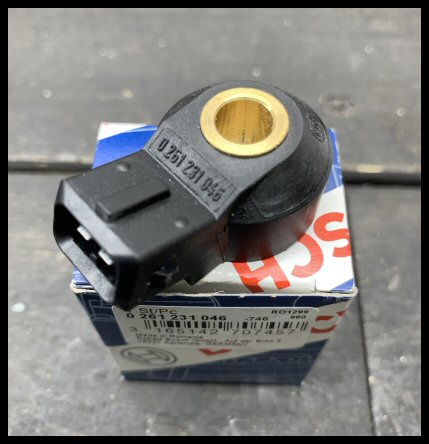
New genuine Bosch knock sensors still available. The same sensor 0261231046 is hugely popular across many cars...
 Timing Belts & Pulleys
Powder coated backing cover fitted, pulleys torqued and new belt fitted...
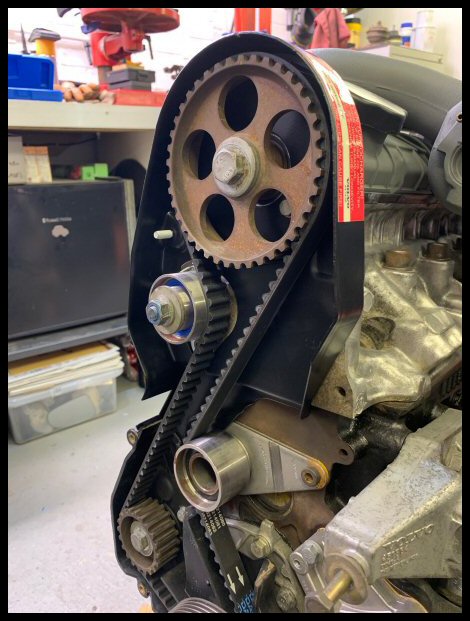
Trust me, it would get the old "quarter turn tension check" if the engine was installed within the engine compartment! But as I have the luxury of space, I used the "official Volvo method"...
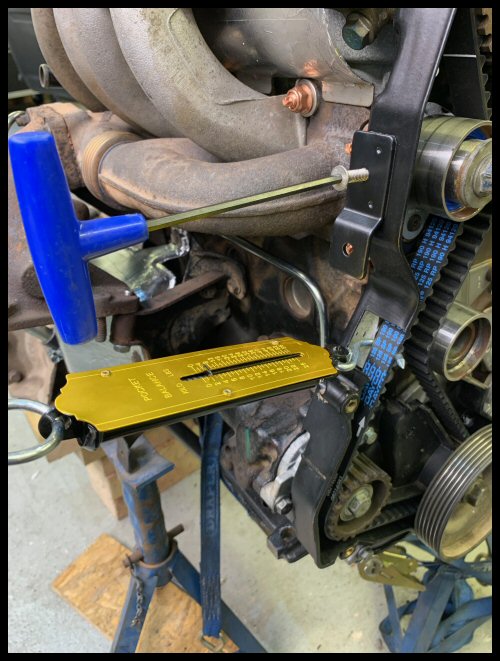
30 Newtons should give a 7mm deflection (on a cold engine). Guess what, it feels and looks just the same as a quarter turn!
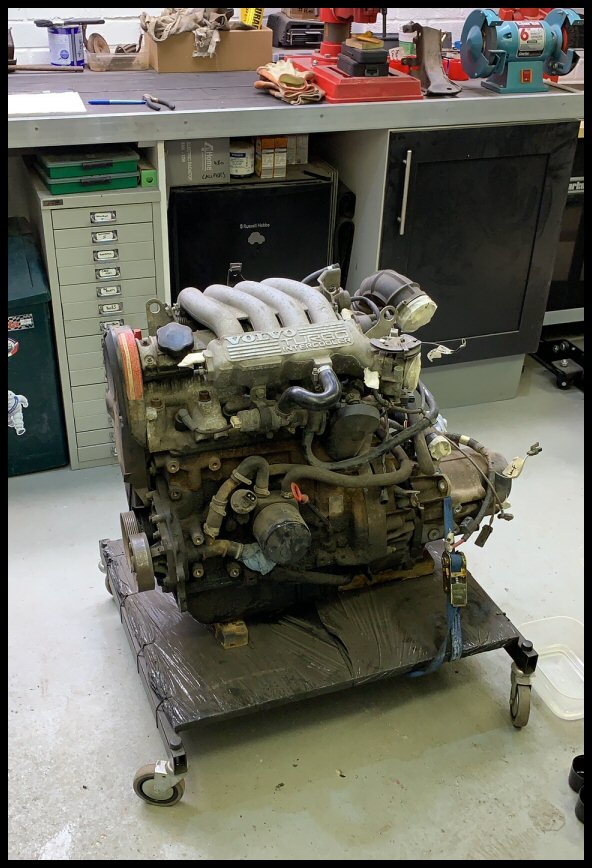
Outer covers fitted, bottom pulley torqued, placed back on to the trolley...
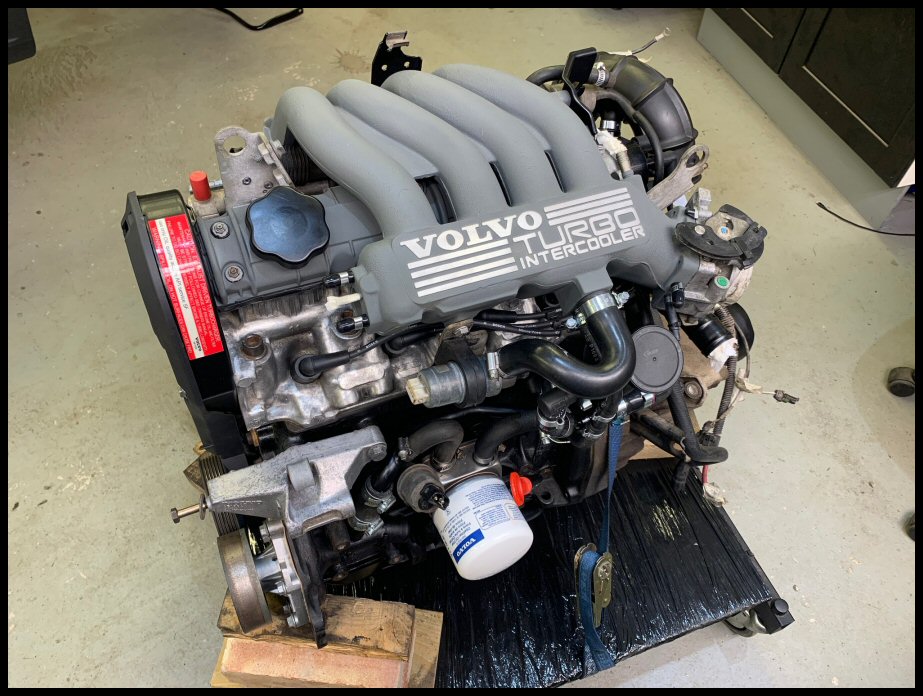
Hopefully objective met of it being a bit more presentable.
Pushed into the corner for refitment one not-too-distant day, covered with a dust sheet...
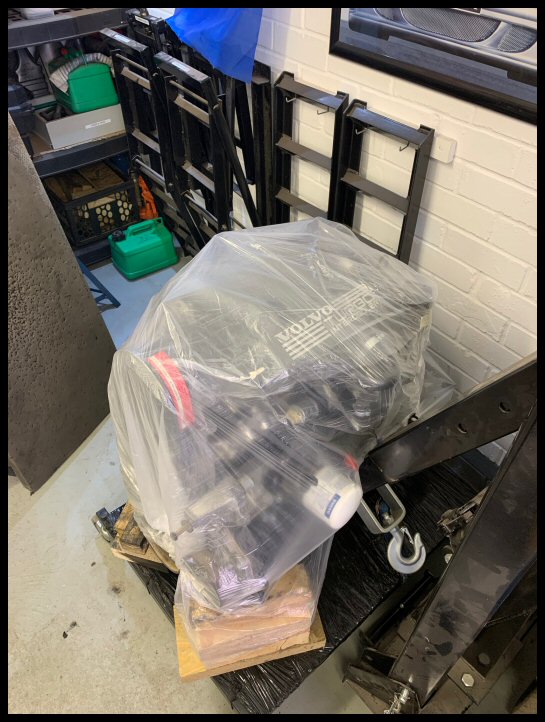
That's it... sorry it has taken so long. Attention turns to the body again.
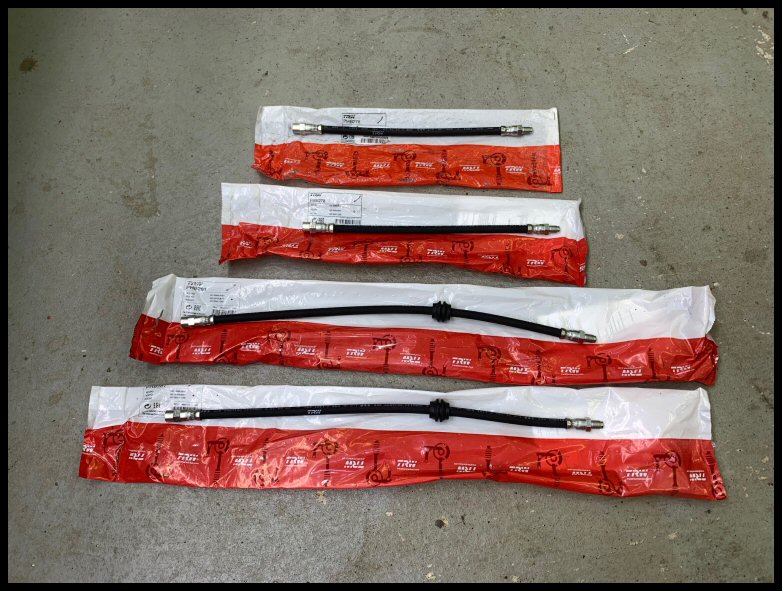
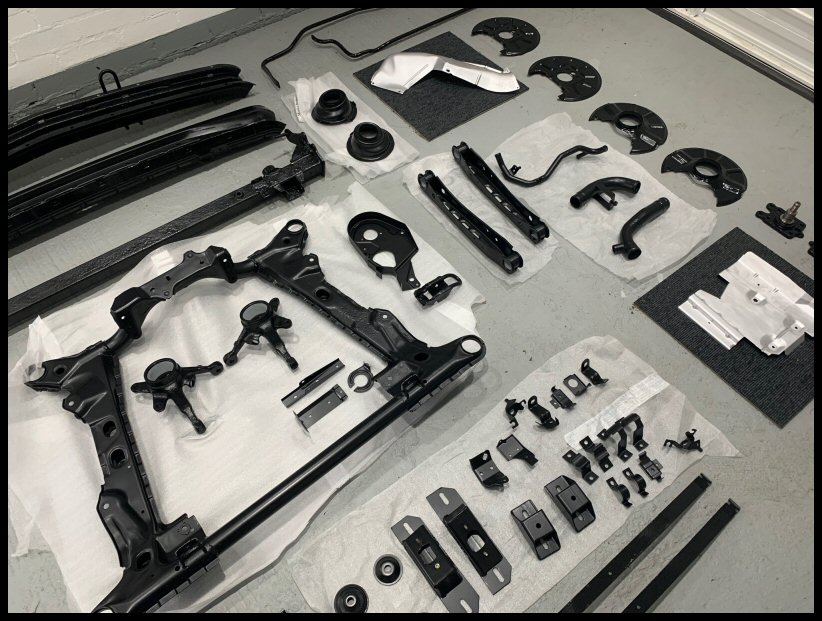
I have this lot to install...

Until the next update; best wishes.
JKM