1994 Volvo 480 Turbo Diary - Update October 2024

Here you can start a thread about your 480 days. Only the starter of the thread is allowed to fill his thread, and only one thread per person. Threads are simply a personal diary.

Moderators: jifflemon, coyote1980, Rachel

User avatar
MisterH
480 Is my middle name
Posts: 1175
Joined: Sat Nov 24, 2018 6:15 pm
Location: Stockbridge

Re: 1994 Volvo 480 Turbo Diary - Update October 2020

Post by MisterH » Fri Oct 30, 2020 11:12 pm

Oh my word that is just heart stopping :eek:

I am not particularly practical, or at least not as practical as I'd like to be when it comes to cars, but that looks like a massive job.

I'm just trying to work out how that is possible
to mess up, given that the arches are part of the tub, but did you say it was a dodgy repair?


I am so sorry to hear this, but as you said the positive to this is that you found it before spending c.£3k on paint :D


Hope this can be sorted and we can help out as a community

Ben
Current Jobs to do (23/1/22):
Fix Central Locking
Fix drivers side speaker
Annoying Scratching Squeak
Water leaks
Complete Front O/S rebuild

User avatar
Jay-Kay-Em
Advanced 480 rookie
Posts: 502
Joined: Tue Nov 27, 2012 10:42 pm
Location: Huntingdon
Contact:

Re: 1994 Volvo 480 Turbo Diary - Update October 2020

Post by Jay-Kay-Em » Sat Oct 31, 2020 12:15 am

jifflemon wrote:
Fri Oct 30, 2020 9:25 pm
Just to be ABSOLUTELY sure (and I'm sure you've checked) but have you measured from window frame down to arch?
Measurements validated from floor > up, as well as window line > downwards.

The history file has an invoice in 2010 for 'bodywork' by a garage in Abergavenny. This will be it i'm sure.

Its comical really; wheel arch replaced 20mm too high and I have fitted 20mm lowering springs only to obtain a standard ride height :rofl:

Looking back at the few photos I have of the car it was always there to be seen NS vs. OS..... but I never really studied the car because it was always seen as a project.

It'll keep me busy in Lockdown #2 !
Jay-Kay-Em
-------------------------------------
Click here for My 480 Turbo Diary
Click here for My Cars

User avatar
Jay-Kay-Em
Advanced 480 rookie
Posts: 502
Joined: Tue Nov 27, 2012 10:42 pm
Location: Huntingdon
Contact:

1994 Volvo 480 Turbo Diary - Update December 2020

Post by Jay-Kay-Em » Sun Dec 13, 2020 12:20 pm

Hi all!

December 2020 - The Wheel Arch Procrastination Edition!

What can you find to do instead of cutting all your hard work to pieces?

Instrumentation

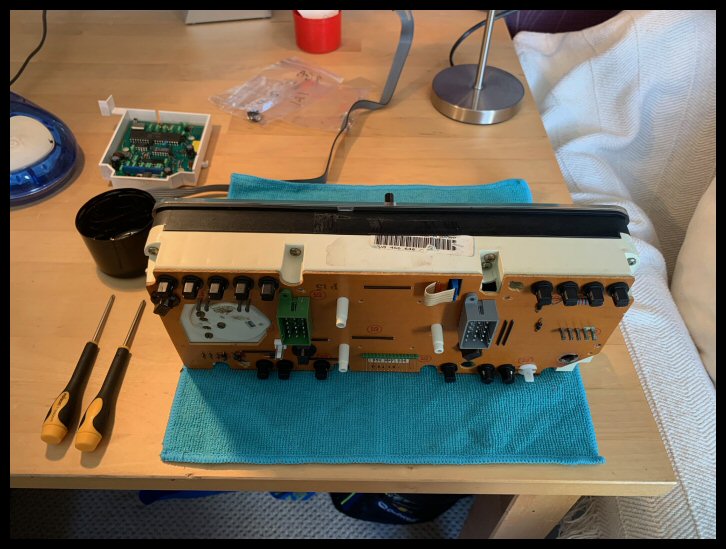
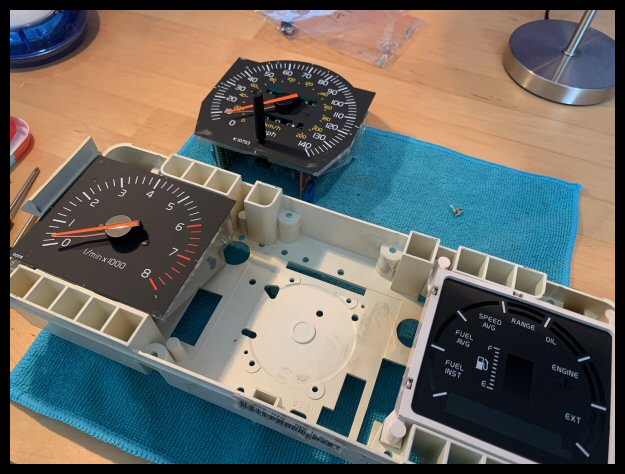
I had the steering column out in the last update, so it seemed like a perfect time for instrument cluster removal...

Image

Image

There are 'issues' to be seen already... corrosion...

Image

Three known defects to rectify:

1) Intermittent speedo operation
2) Odometer not working at all - irrespective of speedometer
3) Info Centre not visible

Plus, SRS and ABS lamp deletion for those two now-removed systems.

Firstly, a massive thank you to Jaster and Brinkie for the official thread here

Info Centre Bulb

You could only see the info centre if you shined a torch on the LCD... it was clearly an illumination issue.

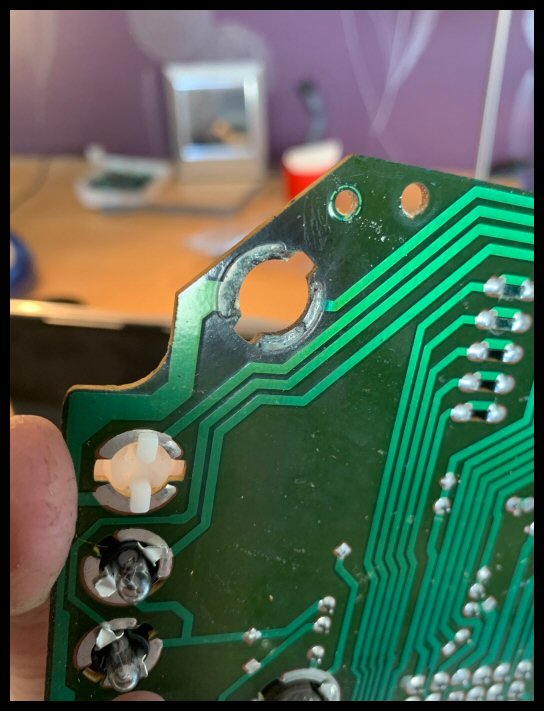
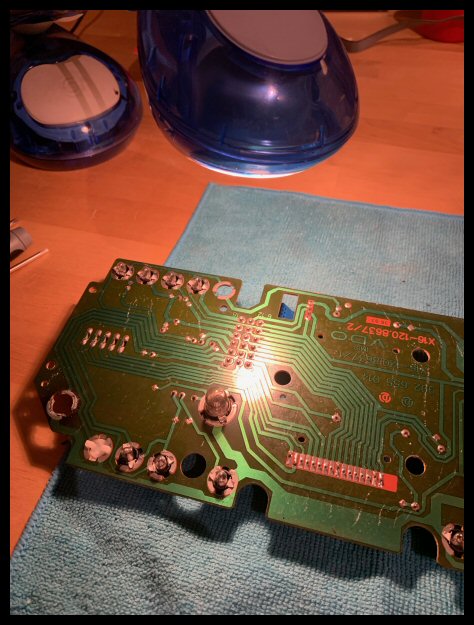
The old bulb was seriously corroded with a dirty twist socket track...

Image

No worries, just clean the socket track right? Errrr, no! Some of the PCB track missing after cleaning... :shock:

Image

The prongs of the new bulb will have no metal to contact with.

Twist-track repairs underway... this is where Brinkie cringes.. I am no electronics guy!

Buy a length of clock spring copper...

Image

Solder into position...

Image

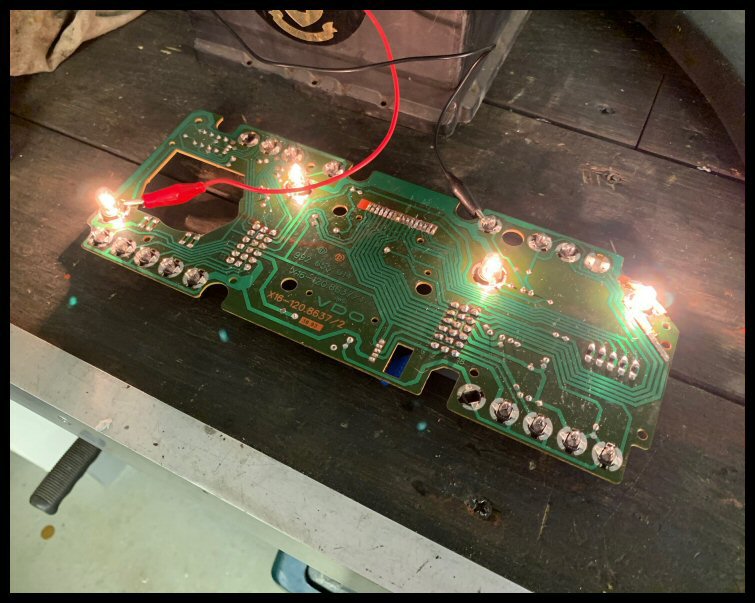
Testing for 30mins or so (so heat can be a factor)... all good!

Image


Odometer Cog

Again, I can't praise the "how-to" thread highly enough...

Remove the speedo head...

Image

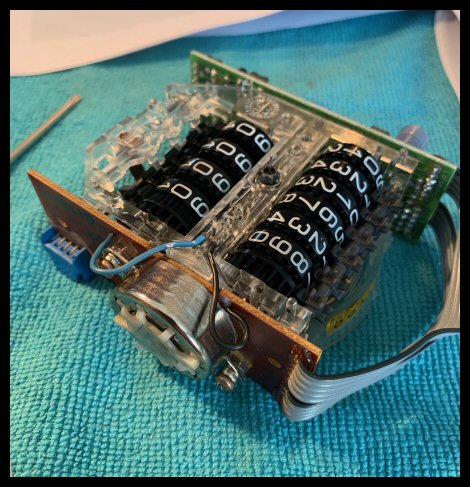
Remove the odo wheel set...

Image

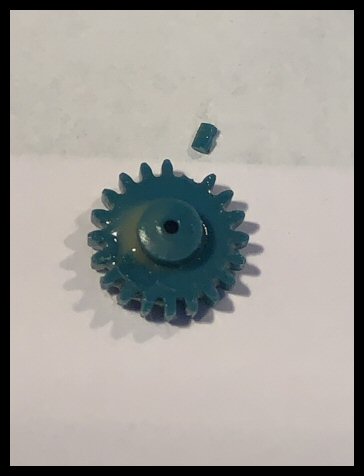
Open up and find the offending cog of doom...

Image

Image

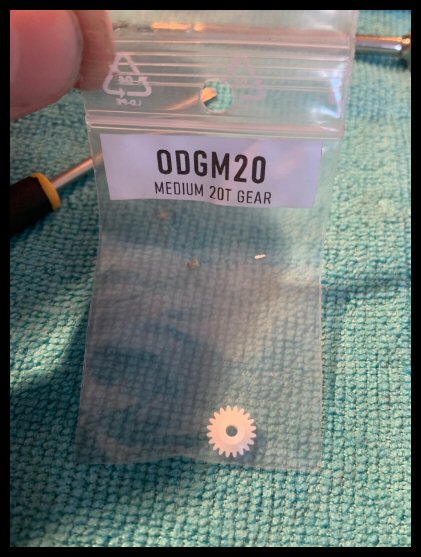
Available on eBay due to the amazing 3D printing community (again)...

Image


Speedometer (hopefully!)

In a search for speedometer issues, the mandatory "dry-joint" inspection can commence...

Image

The main culprit was the main board connector blocks...

Image

Really bad solder cracks that are easy to spot with magnification...

Image

Re-soldered...

Image

Hopefully that has cured all issues.


Ancillary Parts

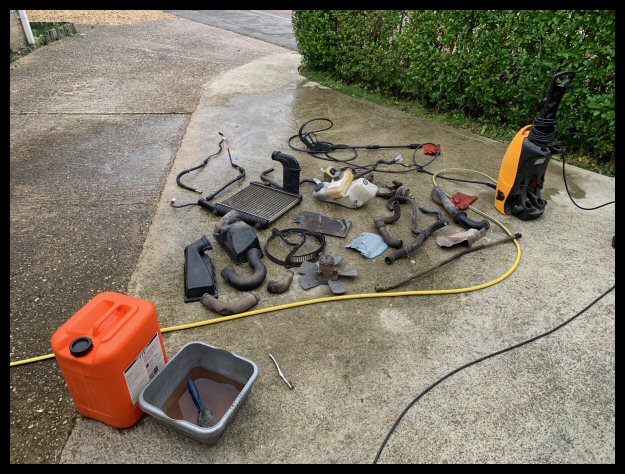
In preparation for engine install, an assessment and cleaning of all ancillary parts...

Image

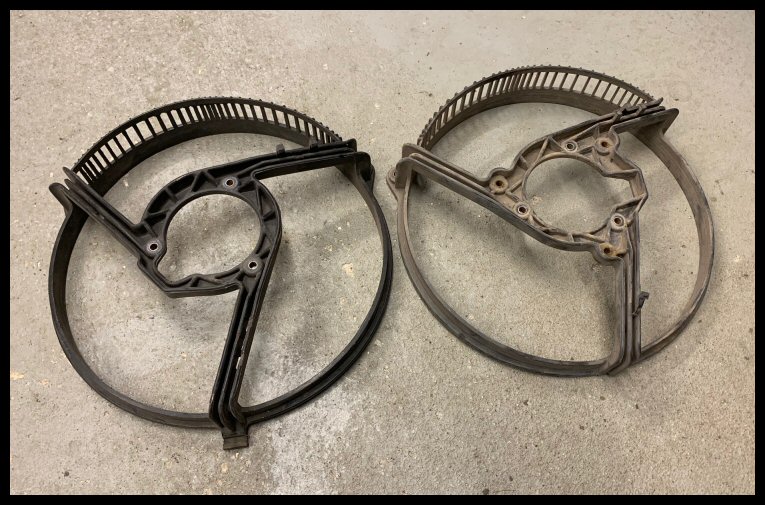
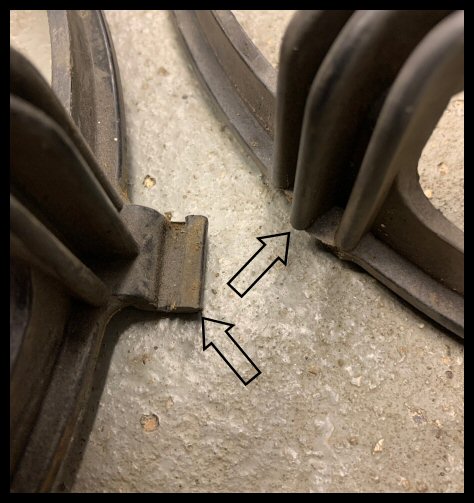
Upon which I noticed my fan shroud had a broken bottom clip, so a second hand item obtained. They are not quite the same, the fan motor orientation is different, but I think it will be ok...

Image

Image

The problem with making things nice is that the project starts getting out of hand. You can't go bolting on shabby items when so much effort has occurred elsewhere.

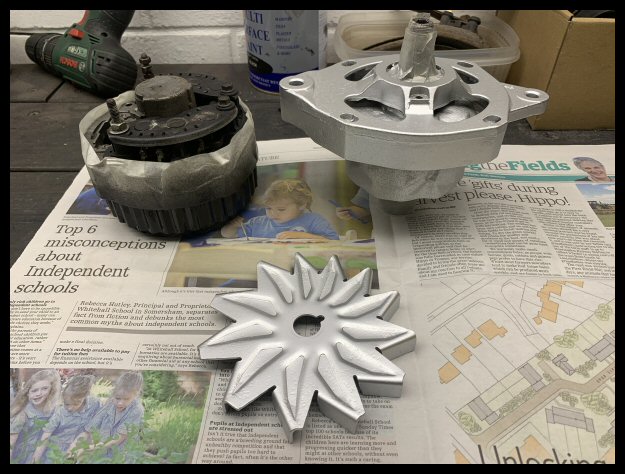
I present "Exhibit A"... a shabby alternator...

Image

Stripped as far as the windings will allow and smartened up...

Image

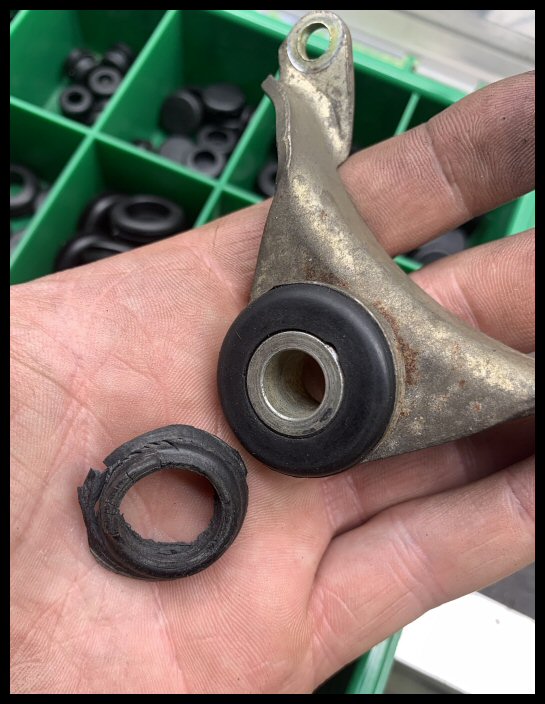
Mounting bushes not good; all renewed...

Image

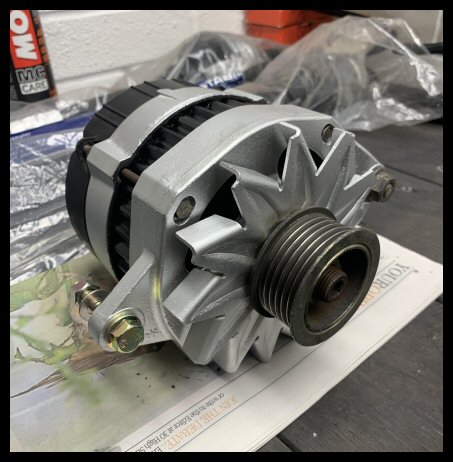
That's more acceptable...

Image

Parts back from Morley Bros Cambridge (yet more!). Battery tray, repaired rear engine mount and other fabrications (see last update)...

Image

Heatshields

Some are the salvaged, shot-blasted and powder coated originals. Some others wouldn't have survived a stiff breeze, let alone a shot blasting!

OE Heatshields are sadly on the unobtainium list. Boy, what i'd do for a factory fresh new set!

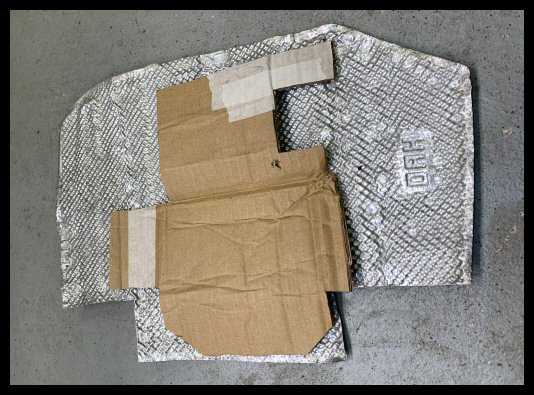
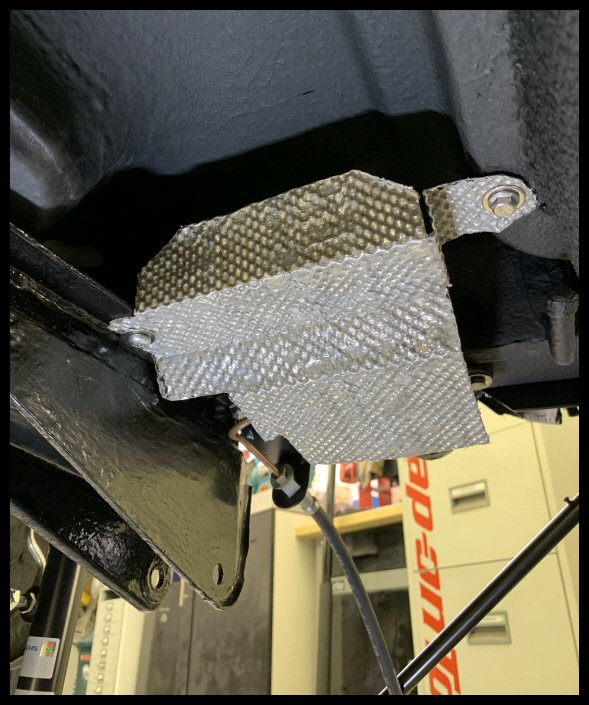
Some heatshields therefore 'sculptured' from scratch using dedicated corrugated heatshield material...

Image

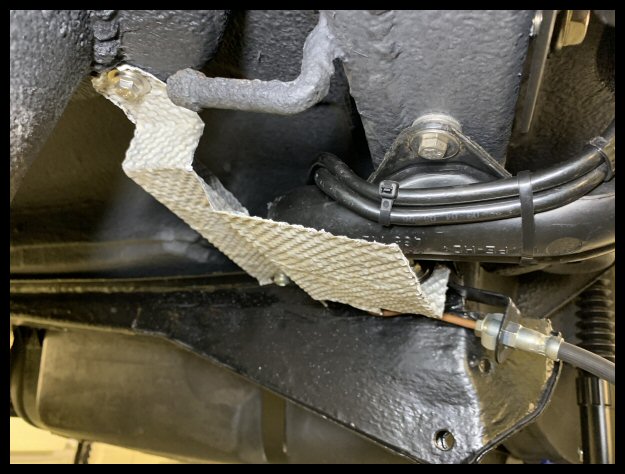
Upon disassembly many moons ago, I noticed the fuel filler pipe had the soggy remains of a heat mat. Decided to make a heatshield instead...

Image

Fitted...

Image

Given the necessary clearance...

Image


Headlamp Motor Service

Embarrassment at an MoT station (sadly a few years ago now) meant this was on the list. Motors ran for a good while in a vain attempt to clean the tracks...

Image

Noticed some cracks to the factory applied rubberised seal coat... cured with sealant.

Image

There are some HORRIBLE design issues on the 480 as we all know, this being one of them. Front end wiring management is all i'll say! Razor sharp edges on the front panel with wiring harnesses passing by. Be careful with your routing!

Image

The Mighty Taurus

For reasons that may seem bizarre to some, I bought a spare set...

Image

Set A - These are the original set I refurbished in 2016 and have done 30 miles since - just like the car sadly :cryhard:
Set B - An eBay set with dubious tyres and kerb rash

Why a spare set you ask?
1) They were super cheap (probably due to 1.7mm tread depths)
2) Handy to have a spare for what is a rare wheel nowadays - future pothole strikes pending.
3) I'd like a 'slave set' for when it goes to the paintshop. They can inadvertently overspray them all they want.
4) I need to start soaking Set 'A' in tyre dressing so it's absorbed over time - tyre dressing is incompatible with a paintshop!

When - heaven knows - it returns from this mystical paintshop, it will be nice mounting the best set to a freshly painted car. Kind of a cherry on the cake moment - that's how my brain works anyways!

Sunroof Drains

This might be an oversight on my part, but I have no recollection of where these went. Or, they didn't go anywhere, and just filled my entire back end with water. To be honest, with the amount of rectified corrosion in these parts - this may have been the case! :rofl:

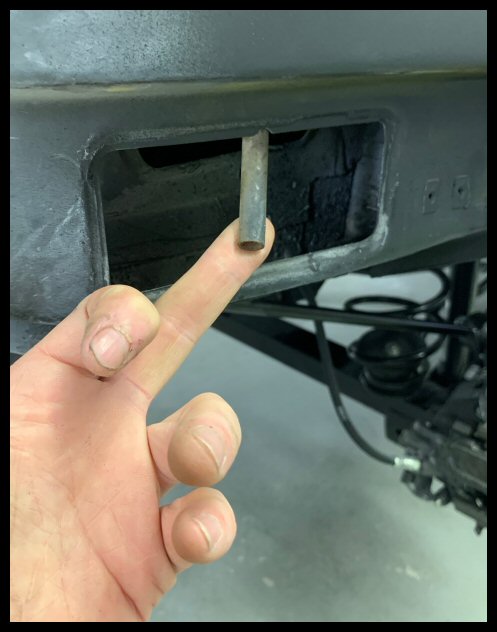
Image

New holes made, painted, then grommets installed, drains poked through and sealed...

Image

Body Vents

Whilst I'm in that area... these vents are located in the same place, behind the rear bumper. All the rubber flaps disintegrated and some had vanished entirely. They should act as a one-way valve. Renewed...

Image

I guess repairing those vents was one procrastination step too far! Time to bite the bullet, get the grinder out again and turn my workshop into a dust-bowl :cryhard:

I hate bodywork - I don't have the patience and I hate the mess!

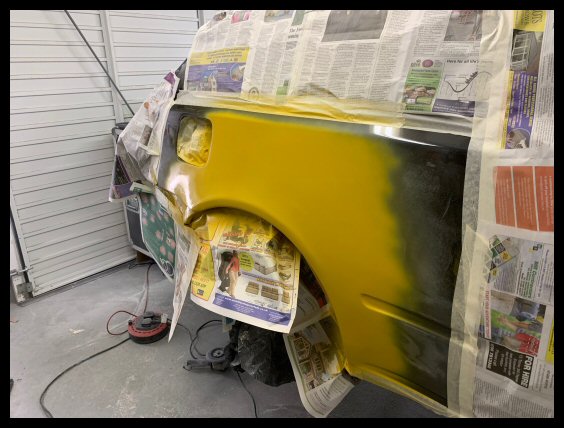
Offside Wheel Arch; Finally!

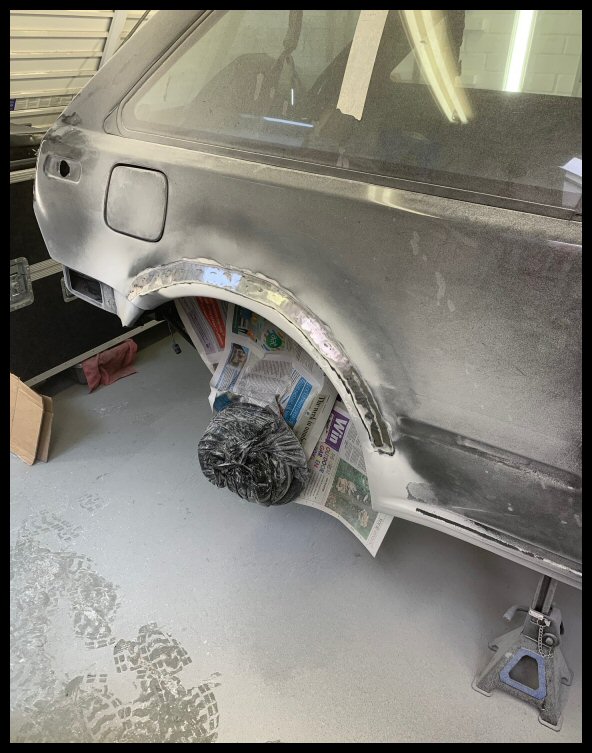
Step 1: Take one perfectly fine wheel arch (ignoring the dimensions obviously)...

Image

This was a project low, not going to lie. Really felt like taking a step six months backwards...

Image

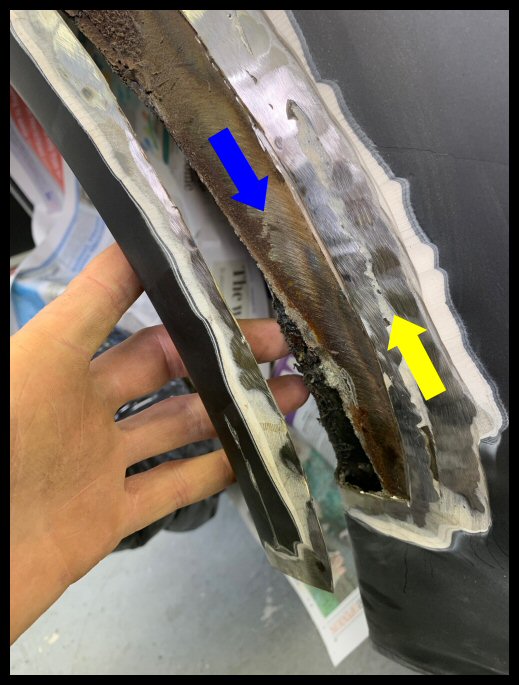
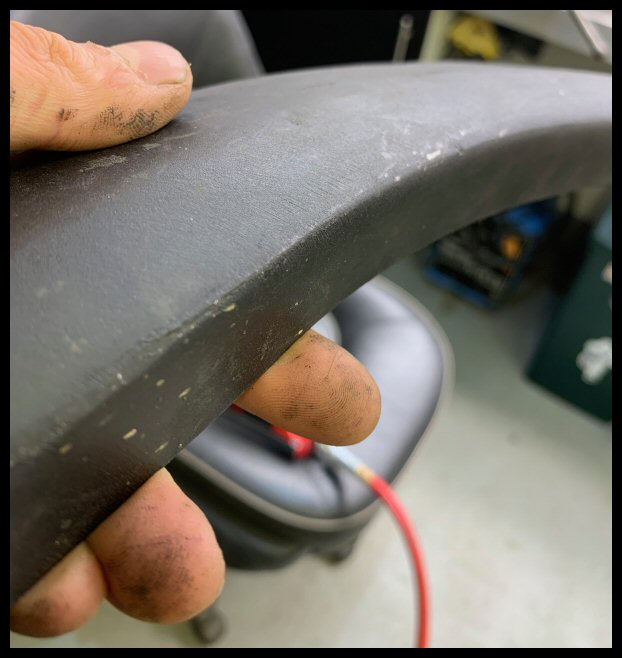
As suspected - and the cause of my dilemma - historic evidence of arch replacement. With the wheel arch lip pulled backwards, the old weld line (yellow) and ugly inner wheel arch tub repairs (blue)...

Image

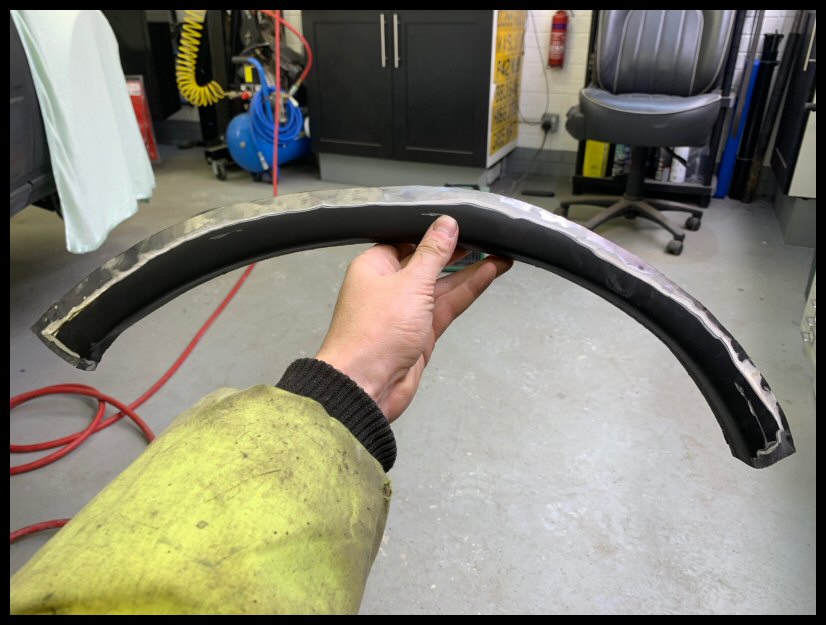
Didn't want this bit anyway... :cryhard:

Image

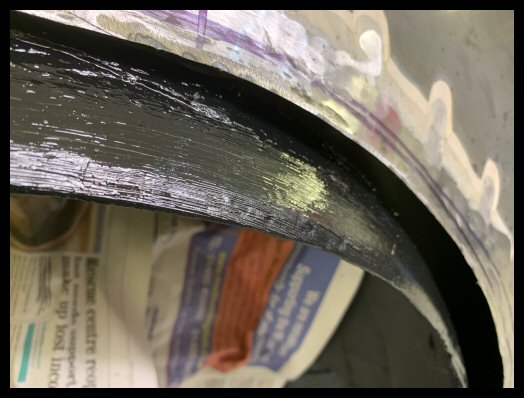
With that out of the way, you can treat and paint the inner tub - a task the Abergavenny garage failed to do.

Image

The credit card came out, again, for the THIRD wheel arch purchase from SKANDIX...

Image

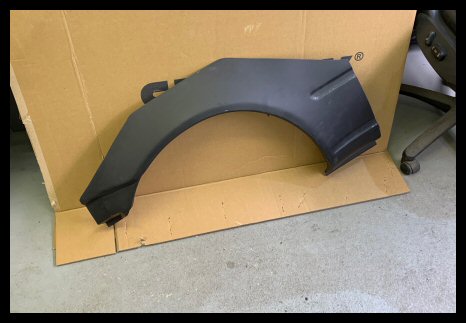
Not to be sniffed at costing £170... and again, the quality annoyed me. I don't believe the termination at the bumper to be good enough...

Image

That, and the wheel arch lip is in some areas rolled and in other areas sharp...

Image

Given that this new panel will need a few hours rectification, I balanced up the pro's and con's, considering I had a spare section left over from previous work this year - so I could fabricate what's missing.... thus saving £170.

On that basis, I organised a SKANDIX return of the third repair panel and started work. To be fair Skandix were cool and organised a refund.

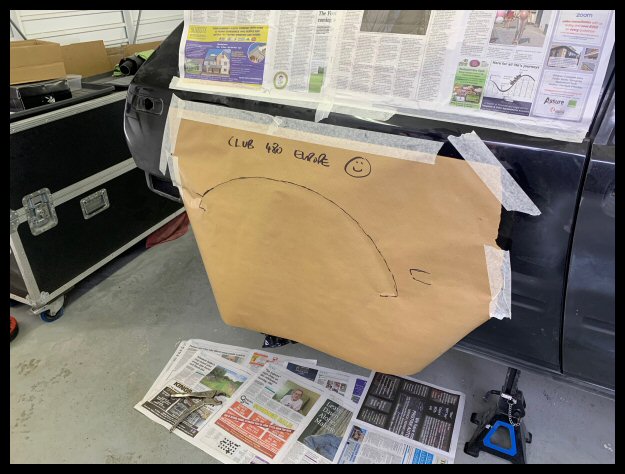
I made a template of the cut...

Image

Then compared and cut from my previous offcuts...

Image

I then created an inverse step with my "joggler"...

Image

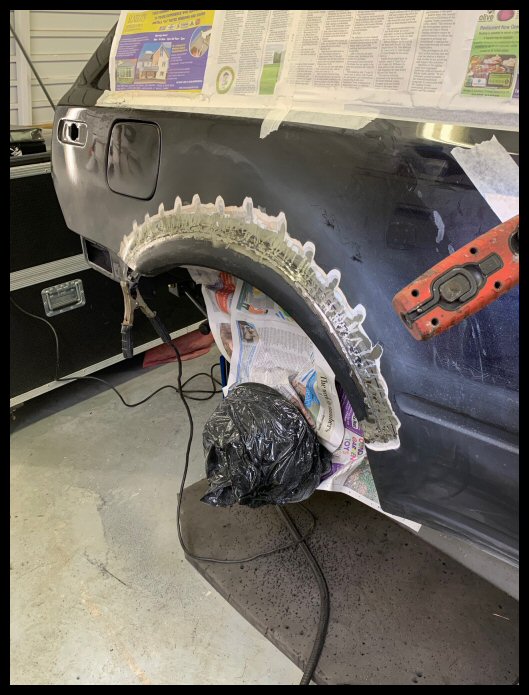
This tucks it into the body quite nicely, and gives you meat to weld to - NOT blowing holes in a butt joint...

Image

Welding into place (at the correct height... triple checked!)...

Image

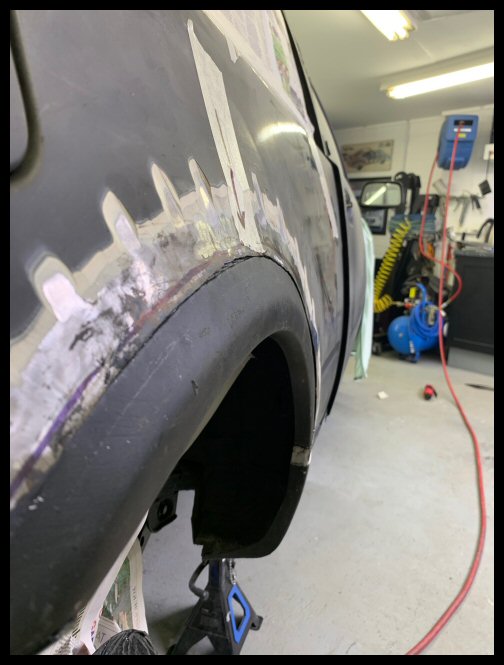
I follow all known precautions about heat build up when welding - doing spots at a time, left & right - but that didn't prevent some panel distortion. I think being welded twice didn't help matters. I don't think the previous garage were quite so cautious...

Anyways, many, many hours later, after filler and filler primer.....

Image

I'm 80% happy... there's a few quality issues that hopefully the paintshop can rectify with the aid of my cheque book :eek:

Image

Yes, they are the same height now, left & right :rofl:

What a caper! :wall:

Normal Service Resumes!

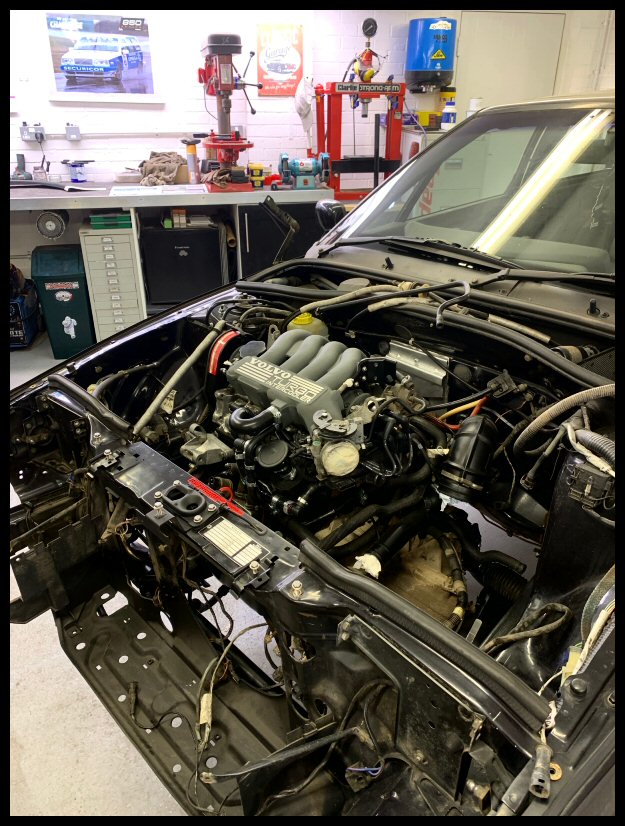
Ending on a high this time. Wheel arches done... so the engine can go back in...

Image

No problems with the Peugeot 407 rear engine mount... we are in!

Image

Talking of the rear engine mount, I had a lovely email from Rachel who has fitted this mount. She has an ECU-mod Turbo and is running it now. I feel a bit guilty she is doing my durability testing - but thus far, no problems to report!

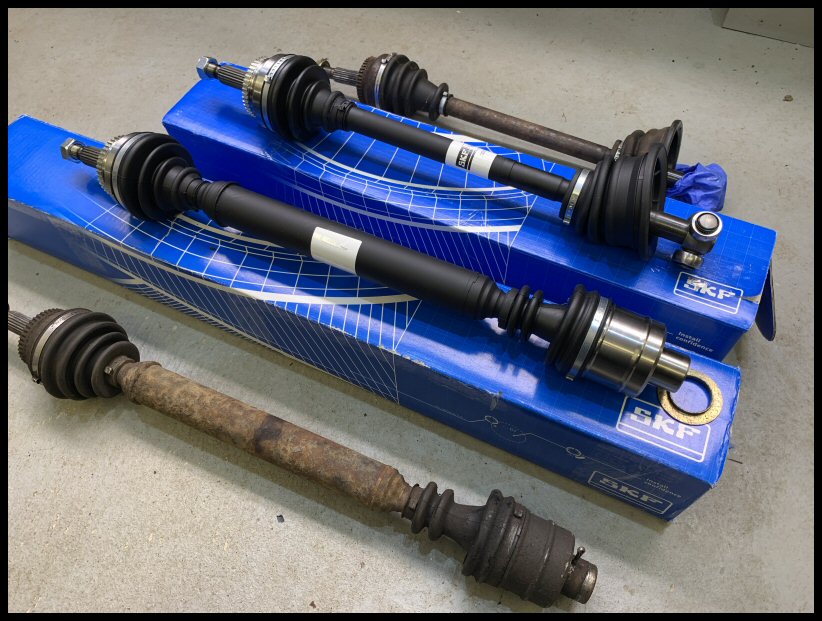
For it to go back on its wheels, I need to torque the front wheel bearings; therefore, driveshafts required!

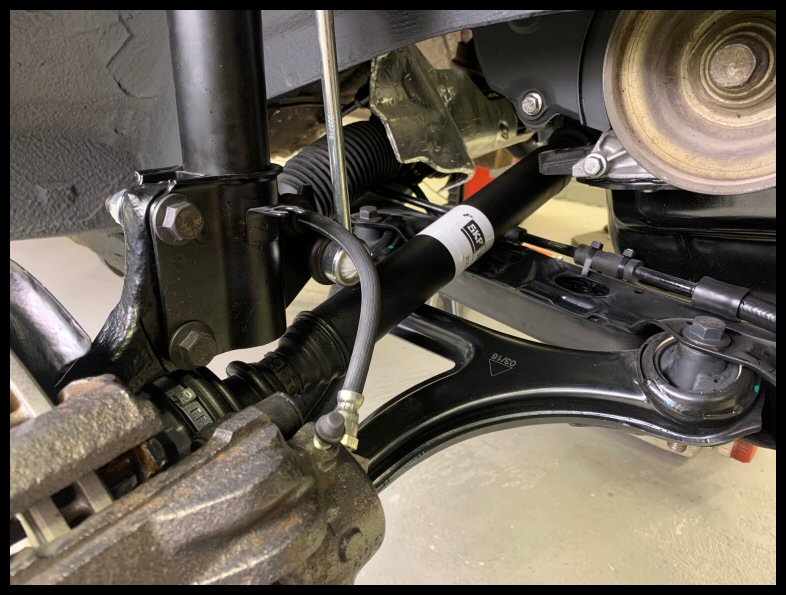
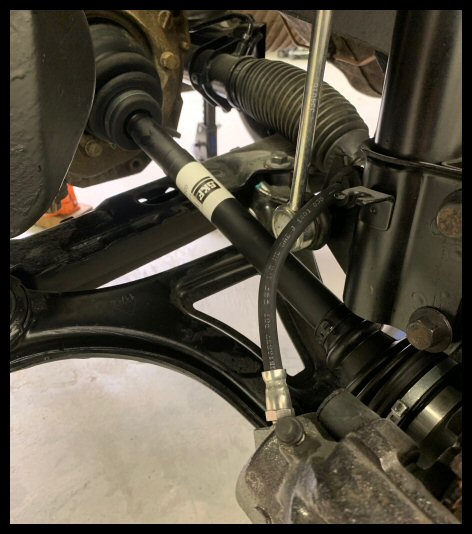
Time to fit the new SKF items bought last year....

Image

Offside Driveshaft

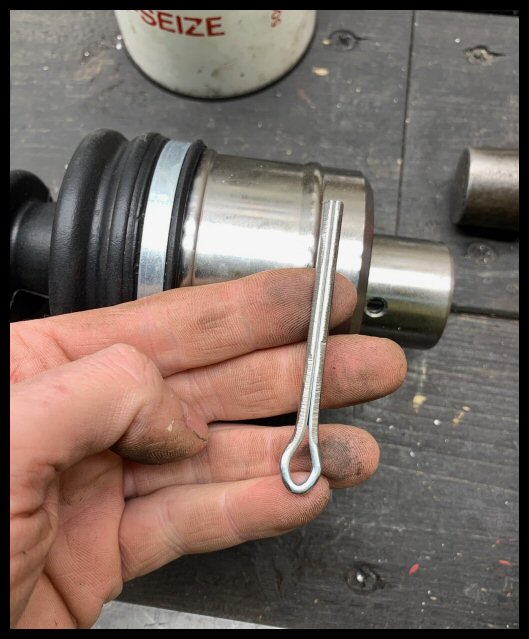
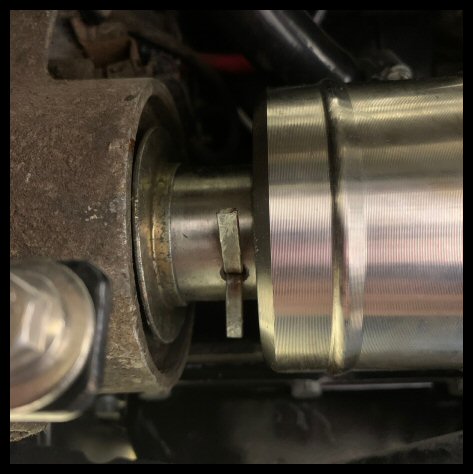
No Renault double-roll pin method for me.

I'm going jumbo split-pin, purely for ease of removal...

Image

Inserted with copper slip for a hopefully easy future removal...

Image

All in...

Image

Nearside Driveshaft

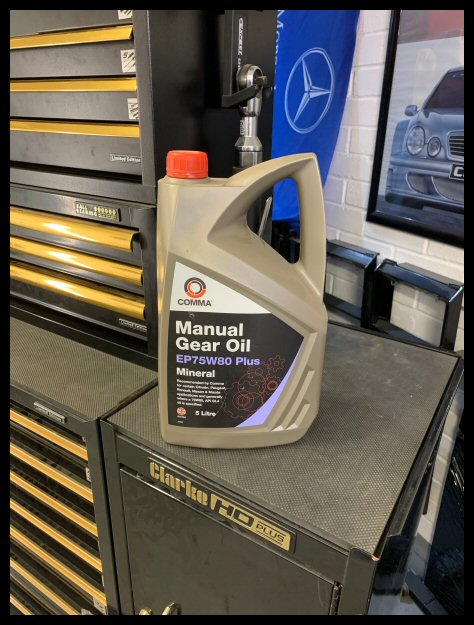
Hopefully I have the correct gearbox oil this time (discussion thread here)...

Image

• GL4 ONLY
• 75W80 (EP)
• Renault approved (TransElf equivalent)
• Yellow metal friendly

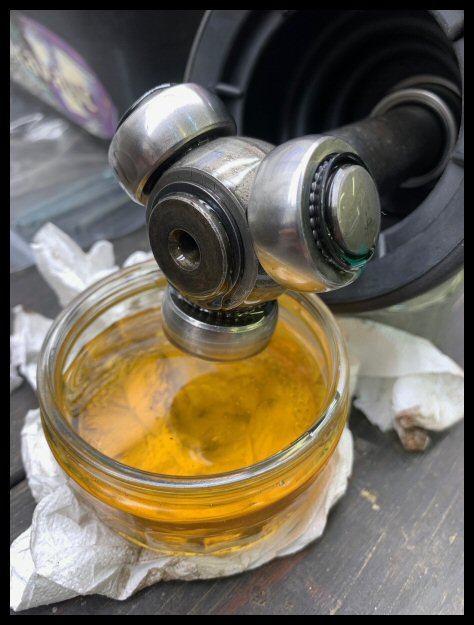
I need the oil already because the new roller bearings are supplied dry. Pre soaked...

Image

All in...

Image

Currently the easiest access in the world for a transmission fill...

Image

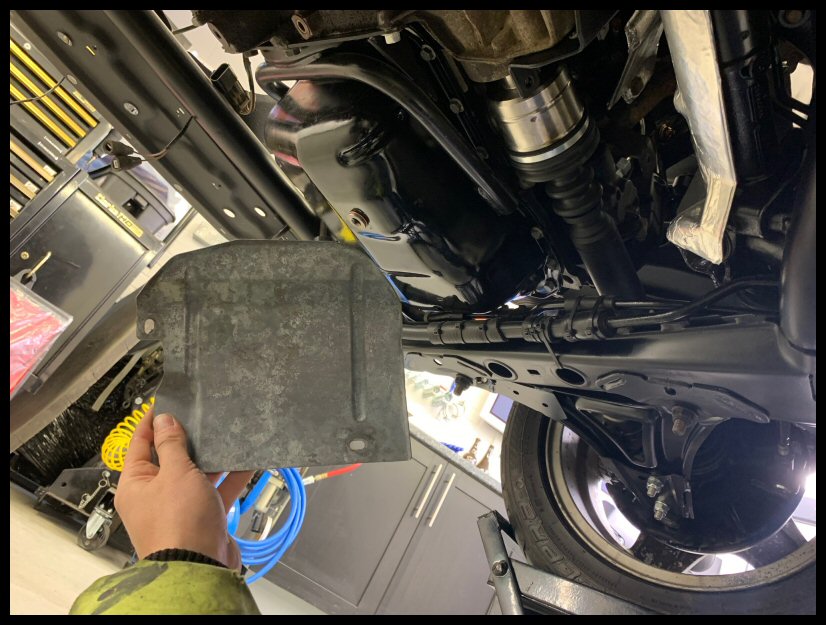
Galvanised driveshaft guard installed (with 26 years of grime removed!)...

Image


Happy(er) Endings

Image

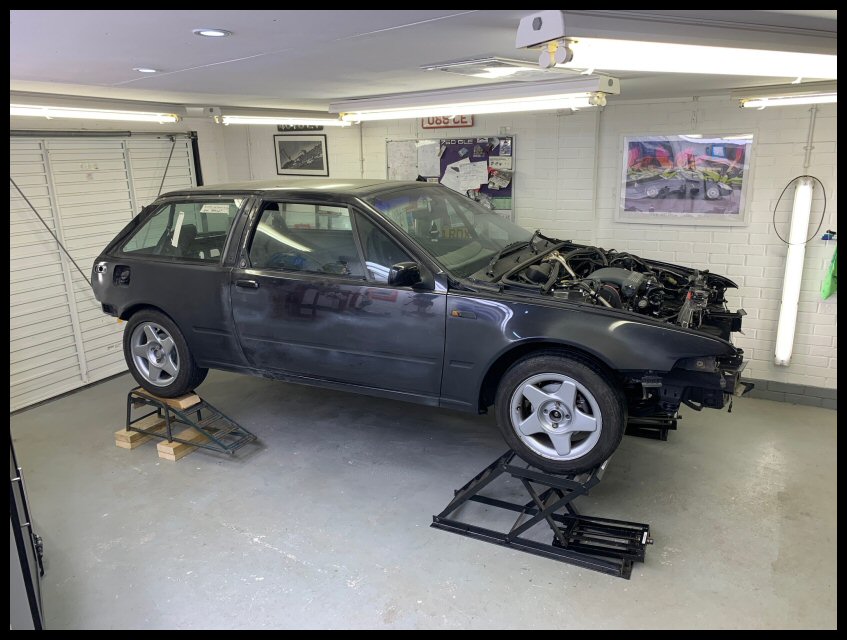
I know it still looks like an absolute pile of junk, but.... :lol:

1st December 2019 that went wheel-free on axle stands... 3rd December 2020 and the wheels make contact with the ground again. Best part of a year with 323 recorded hours of tasks. Aesthetics will follow, but that is now a sound bodyshell throughout, all refurbished and powder coated sub-assemblies, with all new/overhauled suspension & steering. It should see me a good few years and hopefully be MoT stress-free for a decade of my ownership.

It currently sits as high as possible for:

a) Suspension tightening at ride-height.
b) Rear axle at a representative height for pending exhaust manufacture.

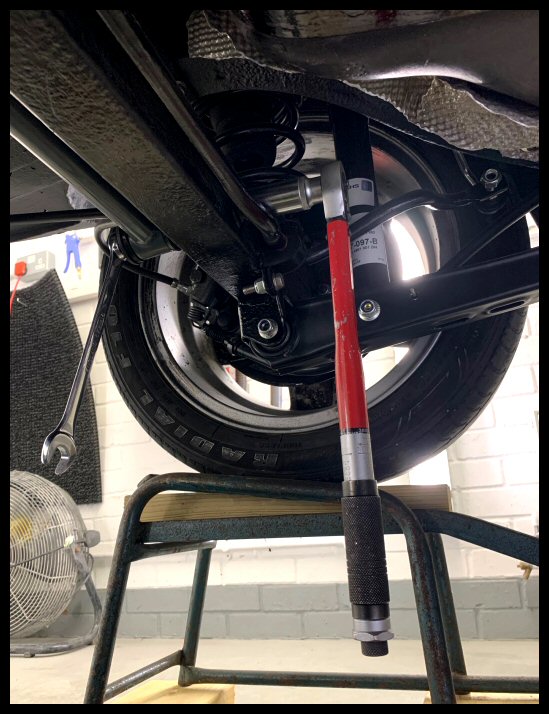
Suspension all torqued at a normal ride height...

Image

Some light at the end of the tunnel now. Just ordered all my stainless exhaust parts which should be here next week.

All the best for the Christmas holidays.

Jay.
Last edited by Jay-Kay-Em on Wed Dec 27, 2023 9:48 pm, edited 1 time in total.
Jay-Kay-Em
-------------------------------------
Click here for My 480 Turbo Diary
Click here for My Cars

User avatar
jamescarruthers
480 Is my middle name
Posts: 2540
Joined: Mon Jul 07, 2003 3:19 pm
Location: Cambridge

Re: 1994 Volvo 480 Turbo Diary - Update December 2020

Post by jamescarruthers » Sun Dec 13, 2020 2:05 pm

This is looking great! As usual a tremendous amount of skill and time which I very much admire.

Lets hope Morley's work lasts as both of our 480's have had their undercarriages pass by there!
1987 Volvo 480 ES, 507274, 217 - Red (Ness)
2006 Citroen C6 Exclusive 3.0 petrol/LPG
2008 Mini Cooper convertible (Mau)

Previous 480's:
J123 CFU -- ES
J449 MNL -- ES auto
D864 CPV -- ES
L691 JFC -- Turbo
F70 MNR -- ES
H858 FGV -- Turbo auto
E981 KHM -- ES (509849)

Alan 480
480 Is my middle name
Posts: 1522
Joined: Sun Aug 28, 2011 9:03 am
Location: Aberdeen

Re: 1994 Volvo 480 Turbo Diary - Update December 2020

Post by Alan 480 » Sun Dec 13, 2020 3:35 pm

some serious dedicated effort.

well done although best not cost the 'man-hours' at anything more than £5/hour?

I like the wind up ramps, gets height without a four-poster!
Alan

480 ES 2litre 'Celebration' ? , C30 1.8ES, SS1

User avatar
edie_fox
480 Rookie
Posts: 424
Joined: Wed Jun 29, 2005 9:05 pm
Location: Lincolnshire

Re: 1994 Volvo 480 Turbo Diary - Update December 2020

Post by edie_fox » Sun Dec 13, 2020 8:58 pm

Do you think, after all of this, that you'll ever want to drive it? What if it rains? :lol: All that perfect work!

Amazing updates, as per. Green(er) with envy at each new post!

It's nice to see what it's like to spend money on one too. What you get for that extra £300 on this, that or the other. You are not a make-doer!

Are you keeping it the original colour? Without looking: was it black? Fresh respray will be a proud/exciting moment I bet. :D

jifflemon
480 Is my middle name
Posts: 2568
Joined: Sat Dec 17, 2016 11:03 am

Re: 1994 Volvo 480 Turbo Diary - Update December 2020

Post by jifflemon » Sun Dec 13, 2020 9:52 pm

Jay-Kay-Em wrote:
Sun Dec 13, 2020 12:20 pm
I present "Exhibit A"... a shabby alternator...

Image

Stripped as far as the windings will allow and smartened up...

Image

Mounting bushes not good; all renewed...

Image

That's more acceptable...

Image
Stop immediately! Do not pass go, do not collect £200....

[Nerd mode]
Originally, the stator would have been red. Red stators were used on New Units. A black stator indicates a a remanufactured unit.
[/Nerd mode]

Obviously, not a seriously comment, but more a passing observation from my time reconditioning starters and alternators many,many years ago!

Although please tell me you've put a new starter on there? its a bloody awful job once the engine is fitted

Absolutely bloody stunning work as ever. Your monthly updates are fast becoming my favourite thing on the board!

User avatar
Jay-Kay-Em
Advanced 480 rookie
Posts: 502
Joined: Tue Nov 27, 2012 10:42 pm
Location: Huntingdon
Contact:

Re: 1994 Volvo 480 Turbo Diary - Update December 2020

Post by Jay-Kay-Em » Mon Dec 14, 2020 8:21 pm

Evening all; thanks for the comments...
jamescarruthers wrote:
Sun Dec 13, 2020 2:05 pm
Lets hope Morley's work lasts as both of our 480's have had their undercarriages pass by there!
Hi James – I gave the subframe a lot of grief installing the stubborn bushes and it's been fine. I did pay extra for the zinc primer which might help things. That primer has gone into all sorts of hard to access places – that’s the joy of electro-static painting! I think we are good; time will tell.

Alan 480 wrote:
Sun Dec 13, 2020 3:35 pm
well done although best not cost the 'man-hours' at anything more than £5/hour?

I like the wind up ramps, gets height without a four-poster!
Hi Alan - Can you imagine including a labour rate?!? Even at a timid £25/hour it is utterly eye watering. You can easily see why only E-types (et al.) get restored professionally because there is the financial gain to do so.

By the way, they are worm-gear ramps from "CJ Autos" – they are super quick with my air ratchet and get really good height. They are however really heavy and still a bit nerve-racking to drive up to with a fully painted nose-cone like the TVR. There is no free-lunch with any jacking solution. Even a two-poster is a nuisance as you can’t open the doors!

edie_fox wrote:
Sun Dec 13, 2020 8:58 pm
Do you think, after all of this, that you'll ever want to drive it? What if it rains? :lol: All that perfect work!

Are you keeping it the original colour? Without looking: was it black? Fresh respray will be a proud/exciting moment I bet. :D
Hi Edie – The vehicle when complete will be my summer daily... so it will have to earn its keep, doing the commute, April –> October. I don’t mind the rain so much, it's the salt I despise. It will never go head-to-head with a gritter again, that’s for sure!

My Golf has done summer commuting for ten years and that's still going strong as a H-reg... so an M-reg is positively modern for me :lol:

The colour is 305 “Black Metallic”...

Image

It looks nothing to shout about in the brochure...

Image

and yet, the more I see it the more I love it. It has a huge purple effect...

Image

When I took the carpets out and you see the factory overspray to the footwells, you can see the incredible purple-ness to it...

Image

It will stay the same to match the engine bay – and I’m foolishly thinking I can save money by not doing the door-shuts; but like all these things they escalate. My only disappointment in the colour is the name itself. All literature & brochures simply state “Black Metallic” when it really deserves a moniker much more dramatic and glamorous!

Really looking forward to your stainless exhaust update as this is my next job. Keep us updated!

jifflemon wrote:
Sun Dec 13, 2020 9:52 pm

[Nerd mode]
Originally, the stator would have been red. Red stators were used on New Units. A black stator indicates a a remanufactured unit.
[/Nerd mode]

Obviously, not a seriously comment, but more a passing observation from my time reconditioning starters and alternators many,many years ago!

Although please tell me you've put a new starter on there? its a bloody awful job once the engine is fitted
Hi Jeff!

I know you're joking, but I couldn't help myself...

I got out all my brochures and only the 440 range has full engine pictures.

The only Turbo engine I can find pictured must be very early. It has the black inlet manifold and the all-one-piece metal cambelt cover. It has a red-stator alternator just like you say, but a slightly different shape to mine....

Image

The oil cooler is on the p*ss too compared to mine.

The only later engine picture (and admittedly a naturally aspirated one) that I can find with the plastic cambelt cover, has my corrugated Valeo stator in black...

Image

That's an incredible shout on the early red alternator as pictured.

If you can find me a factory image, of a late engine or engine bay, with the "corrugated" Valeo, in red, then I will paint it in a heartbeat!

Round by the starter motor now looks like hell as you say. It didn’t when it was on the engine stand! It’s why I wanted the ease of the driveshaft split-pin because I can see how any job in this area means the driveshaft coming out... which isn’t the end of the world as it doesn’t require gearbox oil drain/fill to do so.

What has annoyed me is all my hose clips applied with the engine on the stand are now in completely the wrong positions with all the shields installed (with regards to screwdriver access).

I’ll hold my hands up – I have two spare turbo starter motors and didn’t want to purchase new when I have so many in reserve. On that basis, there is no point swapping used for used, so the original Valeo was cleaned, checked, lubricated and reinstalled. You can by all means have the first laugh when it fails! The only positive spin I can put on it, is that if the starter has failed, the car must be in use again – so that’s good news right?! :wink:
Jay-Kay-Em
-------------------------------------
Click here for My 480 Turbo Diary
Click here for My Cars

jifflemon
480 Is my middle name
Posts: 2568
Joined: Sat Dec 17, 2016 11:03 am

Re: 1994 Volvo 480 Turbo Diary - Update December 2020

Post by jifflemon » Mon Dec 14, 2020 8:30 pm

That early shot is a Bosch alternator - Yup, that's how sad I am....

Personally I did away with the stator painting worries and went with the later internal fan, slightly higher output valeo ones!

Image

:rofl:

User avatar
edie_fox
480 Rookie
Posts: 424
Joined: Wed Jun 29, 2005 9:05 pm
Location: Lincolnshire

Re: 1994 Volvo 480 Turbo Diary - Update December 2020

Post by edie_fox » Tue Dec 15, 2020 10:20 am

Jay-Kay-Em wrote:
Mon Dec 14, 2020 8:21 pm

Hi Edie – The vehicle when complete will be my summer daily... so it will have to earn its keep, doing the commute, April –> October. I don’t mind the rain so much, it's the salt I despise. It will never go head-to-head with a gritter again, that’s for sure!

My Golf has done summer commuting for ten years and that's still going strong as a H-reg... so an M-reg is positively modern for me :lol:

The colour is 305 “Black Metallic”...

Image

It looks nothing to shout about in the brochure...

Image

and yet, the more I see it the more I love it. It has a huge purple effect...

Image

When I took the carpets out and you see the factory overspray to the footwells, you can see the incredible purple-ness to it...

Image

It will stay the same to match the engine bay – and I’m foolishly thinking I can save money by not doing the door-shuts; but like all these things they escalate. My only disappointment in the colour is the name itself. All literature & brochures simply state “Black Metallic” when it really deserves a moniker much more dramatic and glamorous!

Really looking forward to your stainless exhaust update as this is my next job. Keep us updated!

Oh, that is a good colour. In my early 20s when I admired the 480 from afar, there was a man who had a (rare) P-reg one in my village. His was the same. It does look nice! Even nicer when it'll be all shiny and new.

That's great you're actually going to get to enjoy it after all of your hard work! Parking 12 miles from Tesco entrance though! :lol:

Well, I hope I understand what they're doing (for the exhaust)....will ask more questions when I take it in. I'm not sure what parts they intend to replace....

User avatar
MisterH
480 Is my middle name
Posts: 1175
Joined: Sat Nov 24, 2018 6:15 pm
Location: Stockbridge

Re: 1994 Volvo 480 Turbo Diary - Update December 2020

Post by MisterH » Tue Dec 15, 2020 11:32 am

That certainly is a stunning colour, reminds me of my father's late Golf TDi MkIV.

My car is a daily all year round and while I do fear the salt, I find hosing it down regularly seems to keep it in check
Current Jobs to do (23/1/22):
Fix Central Locking
Fix drivers side speaker
Annoying Scratching Squeak
Water leaks
Complete Front O/S rebuild

User avatar
Jay-Kay-Em
Advanced 480 rookie
Posts: 502
Joined: Tue Nov 27, 2012 10:42 pm
Location: Huntingdon
Contact:

Re: 1994 Volvo 480 Turbo Diary - Update January 2021

Post by Jay-Kay-Em » Sun Jan 24, 2021 3:35 pm

January 2021 - Exhaust System Update

Like most things on this car... this has snowballed out of control!

A good few years ago I purchased a brand new, pattern (by Klarius) system in preparation for this day. That was back when Euro Car Parts actually stocked these items!

Simple... just fit right?

Turbo rear silencer...

Image

Turbo centre section...

Image

There now follows a total change of plan; these items will go into storage as 'OE' parts because, in short, the quality is terrible.

The corners are squash bent, hugely restricting flow. The cross sectional diameter mid-bend is terrible...

Image

The flange neck seems to be a generic flange, the size of which is considerably smaller than the pipe itself, thus creating a terrible bottleneck...

Image

Whilst I am no modification-junkie... it goes against the grain to see these blatant restrictions.

Measuring the pipe...

Image

Image

That's 54mm OD standard... so that, in my opinion, is what the pattern part should be throughout... for bends and flanges!

I have been here before with my Mk2 Golf. I was endlessly fitting pattern centre boxes - Timax, Walker, Bosal... and they were all made of metal not fit for baked bean tins. Add condensation and infrequent use to the mix and longevity is nonsensical. It's a false economy for a car you plan to keep long term. I fitted a stainless Jetex system to the Golf some 9 years ago now, and haven't touched it since. Still looks as good as new to this day...

Image

There is only one solution to all this then; stainless and to my specification. Fit & forget. So here goes!

Tailpipe Preface

There are some 480 design features to this day that are awesome. However, in my own opinion, the exhaust tailpipe isn't one of them. All this effort just to have a bent bit of metal tube by Klarius sticking out the back!

Compared to other cars in as early as '88, the 480 was feeling a bit inadequate in this department compared to stock tailpipes of the Calibra, Corrado, CR-X....

With this in mind, I knew roughly what I wanted. Whilst I am not a modifications fan, I make a slight exception here. Not one for the purists, but I visioned an exhaust tailpipe that came out straight, and possibly through the redundant nearside fog lamp aperture. Redundant fog lamp for the UK (RHD) at least. I'm not the first here, it has been done before, and a few google images return this. As the fog aperture is rectangular, the tailpipe needs to be shaped accordingly.

Rewind 3 years ago and I actually purchased a donor rear silencer for this very task, by one of my favourite exhaust brands; Remus. I don't know what it was originally for, and neither did the eBay seller to my advantage. The first thing I did was cut it up...
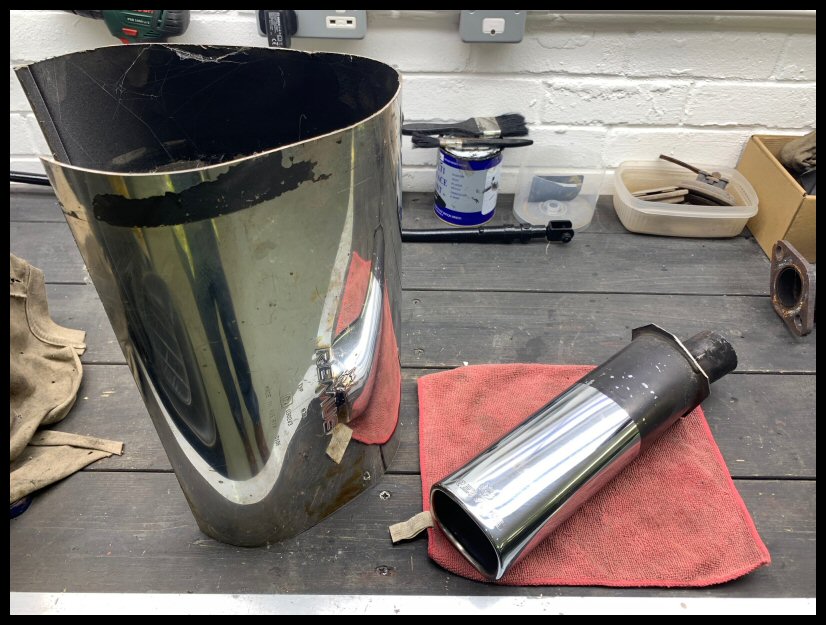
Image

I'd like to salvage the embossed case and type approval numbers...

Image

And, of course, that all important embossed tailpipe...
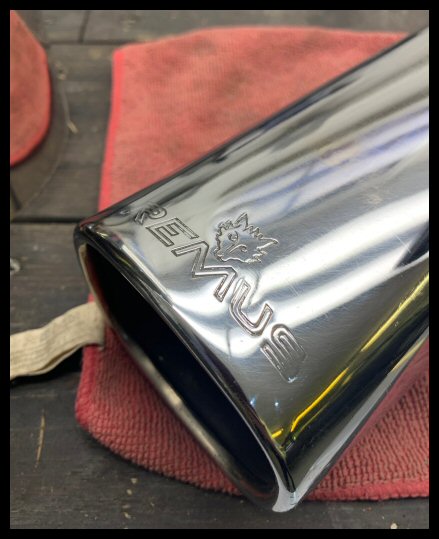
Image

If I could buy a genuine Remus system off the shelf - I would. But that option doesn't exist - so i'm forced to go through this! ;)

Shopping List

Step 1; plan, plan and plan!

Image

Make a shopping list considering the following objectives :

• Stainless T304 (1.5mm walls) for longevity.
• A reputable parts manufacturer with warranty.
• Noise levels controlled to maintain that 'turbo burble' that I love. I don't want loud!
• Diameter consistent throughout (mandrel bends to maintain bore)
• A de-cat option, with a time-limit to re-fit the cat in ten minutes as part of MoT prep. This can be achieved with drop-out flanges, rather than sliding joints or ball-and-cups.

Diameter wise, there is no point going bigger than the front pipe. You are also restricted for space where it passes over the rear Panhard beam. The front pipe (turbo down-pipe) is a surprisingly big bore item; it's near 2.25" (57mm) in places, so that will be the bore of my system throughout.

With that list, I went shopping...

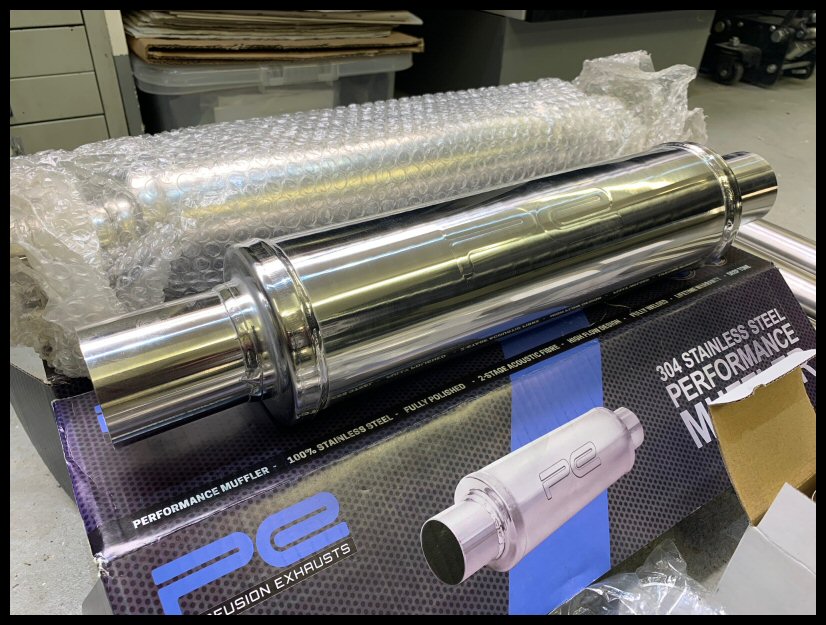
Image

Image

Image

I used Profusion Exhausts near Heathrow. They are the primary suppliers for most custom-exhaust shops around the U.K.

It all appears very good quality and has a guarantee. Some items are so beautifully polished its a shame to start cutting them up :lol:

Preparation

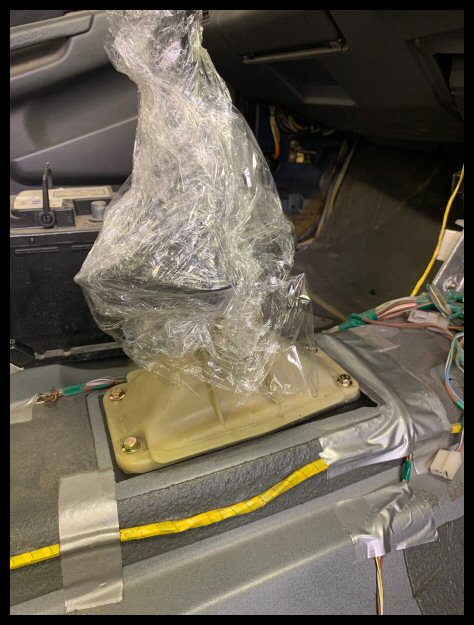
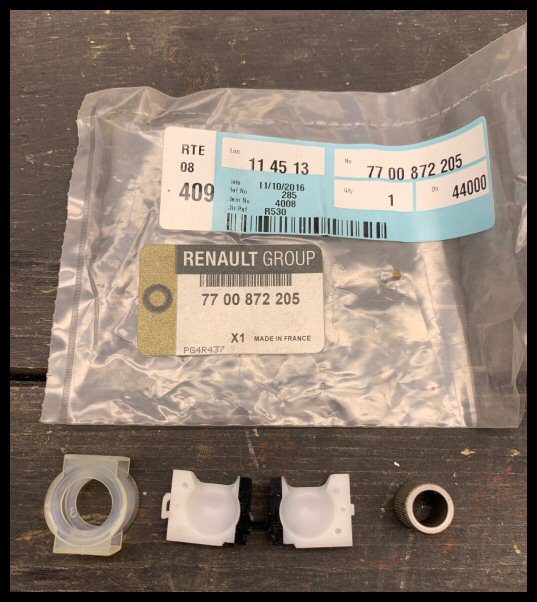
First of all I need to re-fit the gear lever and shift rod. This ensures clearance is all ok.

This uses the re-bush kit purchased from Renault 7700872205...
Image

Shifter all reinstalled...

Image

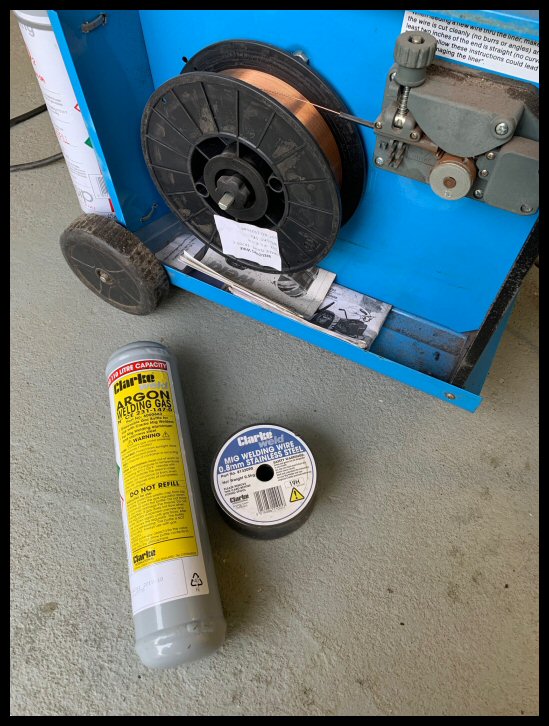
Then, I need to convert my MIG to stainless. I swapped to stainless wire and Argon (from cheaper CO2)...
Image

I made a 'tack clamp'. Essentially just a band clamp with two elongated holes cut in it. This enables you to butt two pipes together, position, clamp and tack weld on the vehicle. The position is then fixed with tack welds for future bench weld completion...

Image

Not overly pretty but doesn't have to be...

Image

Out comes the new purchase. The cost of which is completely justified for this task with my man-maths :roll:

Image

Also in preparation... 'pie-cuts'...

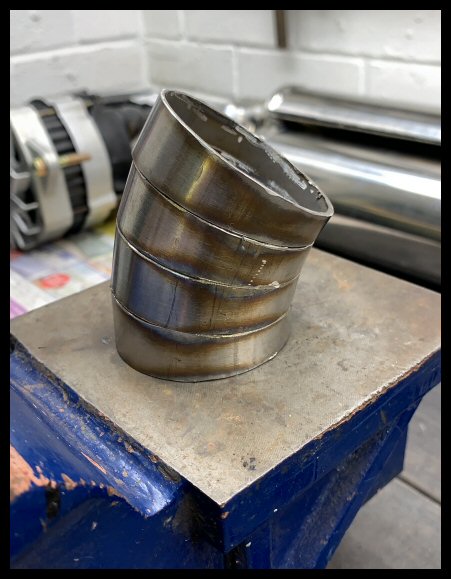
Image

Make a batch of these at 4.5° (on both sides) and keep them as reserve.

Tedious to cut and make, tedious to weld, but they can make any unique bend you need...
Image

Down Pipe & Catalytic Convertor

So, start with the front pipe that I plan to keep. First of all, some flange adjustment for something that used to be flat... :shock:

Image

Then a clean and coat of VHT silver...

Image

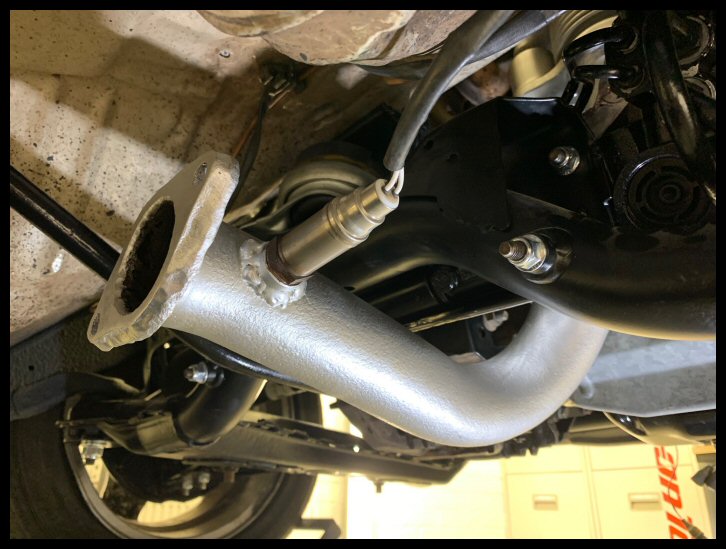
I want to make a de-cat pipe - but the cat is a nuisance to swap out quickly, as it has an integral O2 sensor.

Solution... move the O2 sensor slightly upstream to the turbo downpipe.

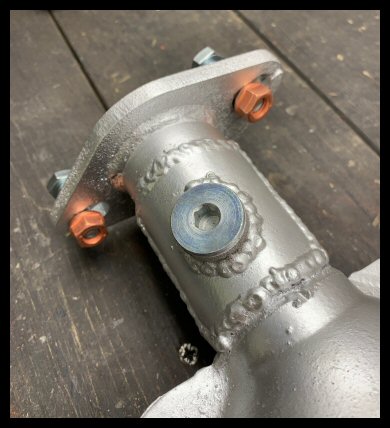
Boss welded to the downpipe upstream...

Image

All installed...

Image

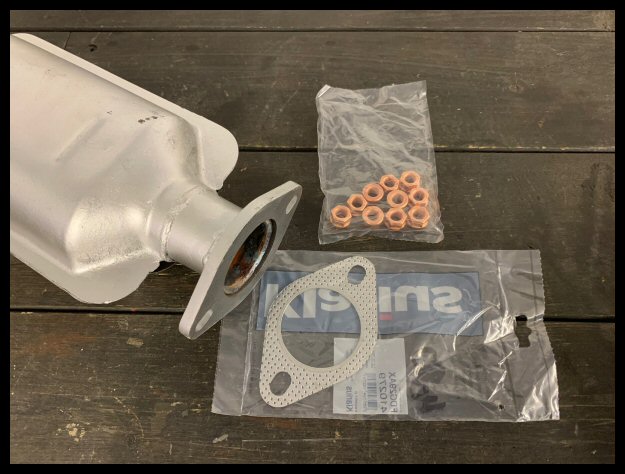
The cat has a ball and cup connection which is no good for my 57mm pipe - it is also more awkward to swap out come MoT time. I need to convert it to a flat flange so it drops straight out.

Cutting off the ball-and-cup...

Image

Flat flange installed...

Image

O2 blanking plug installed...

Image

That's the cat done. I can now swap it in and out for the MoT with ease.

De-Cat Pipe

Now I know my modified cat length (flat flange to flat flange) I can make a stainless de-cat pipe to suit...

Image

Gasket set obtained and new crimp-copper nuts...

Image

Front pipe and de-cat all installed, plus gearshift rod clearances all checked. Ready for system measurements...

Image


Rear Silencer Construction

I need the rear silencer in place first, so the system can be built to meet it.

I spent quite a bit of time researching an 'off-the-shelf' solution, for a 'same-side-in-and-out' silencer. Basically, I couldn't find one suitable. All were too big and cumbersome. To the drawing board...

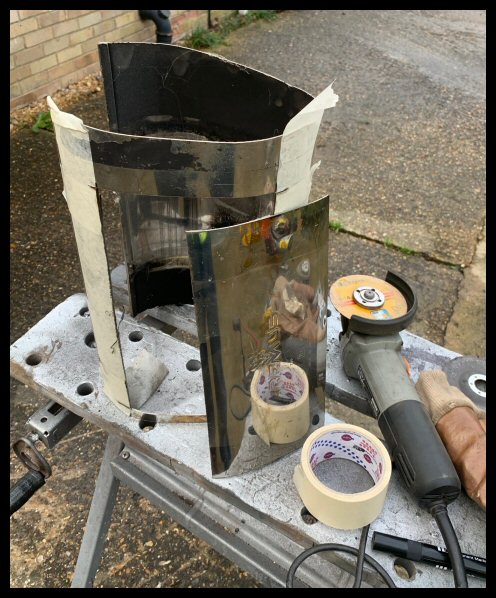
Time to cut up the Remus again... salvaging the flat panels...
Image

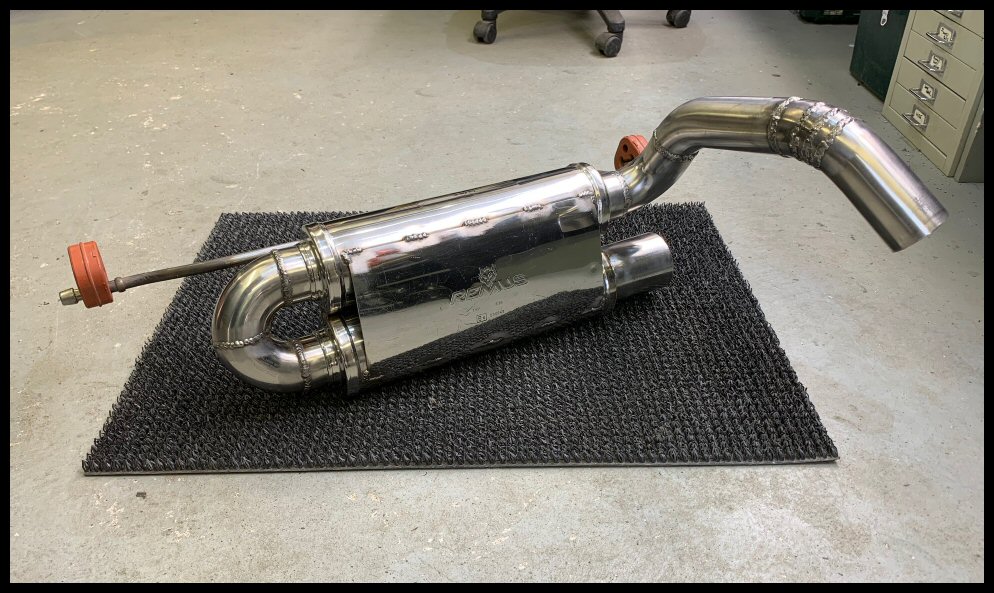
My rear silencer master plan... an inbound silencer, a pair of 90°s to make the tightest 180° possible, an outbound silencer. Then, capped off with Remus embossed fascades...

Image

Looking something like...

Image

Welding...

Image

Supported on axle stands and ratchet-strapped into a semi-permanent, representative position...

Image

Making the rear box joining section that goes over the rear beam. This part is critical as they are so famous for knocking. The clearances over the Panhard beam need to be just right...

Image

Bending the 0.5" stainless exhaust hanger rods...

Image

Working out where to attach the hangers (circled) before welding them...

Image

View from below, looking directly up, sculpting the hanger rod around the spare wheel well...

Image

View from the offside wheel house...

Image

The exhaust hangers are from an Iveco Daily. They are red as they are for the DPF (high temp). Should be well durable enough.

All finished, albeit minus a tailpipe at this stage...
Image


Centre Section Construction

Making the centre section, with a stainless flexi up front. A good example of pie-cuts...

Image

Working backwards, using large zip-ties to position...

Image

Example of the tack-clamp being used...

Image

Boxing Day 2020 and I should be with Family. Rules is rules. Instead, i'm welding with a Californian white as it's Christmas. Goes well with those metallic aromas...

Image

When all tacked in position, completing the welding process outside for ventilation...

Image

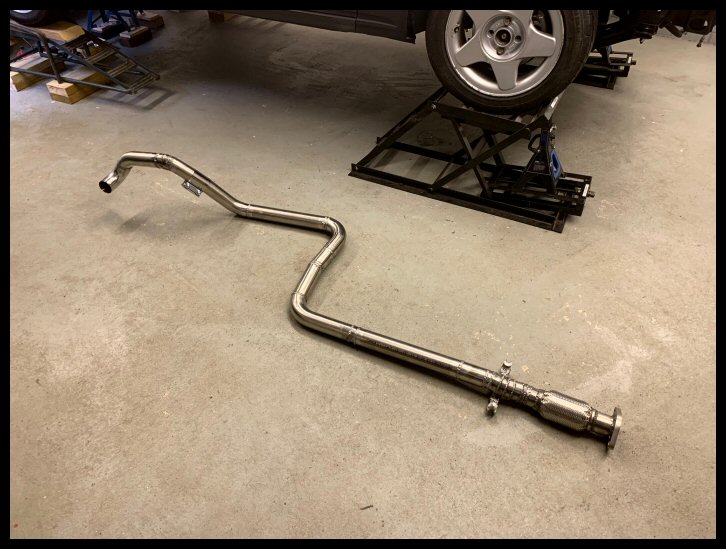
Centre section all done...

Image


Rear Bumper

Rear bumper modifications are integral to the exhaust plans.

This part isn't for the purists out there - I apologise - don't flame me too bad :cryhard:

January 2021 has been a bit of a non-original confessions box on here of late, so this is my guilty pleasure oh father.

First step, trim out the fog aperture... no turning back...

Image

I did some trials way back in the summer gone, and was happy with the look, but I didn't like that the exhaust was visible through the old aperture...

Image

Flip the bumper over to crack on with the next task; to block this up...

Image

I made a stainless steel brace bar...

Image

Not only does it brace things up to stop flex, it is a good weld base for stainless mesh. The mesh is a great bond for the filler to grab to.
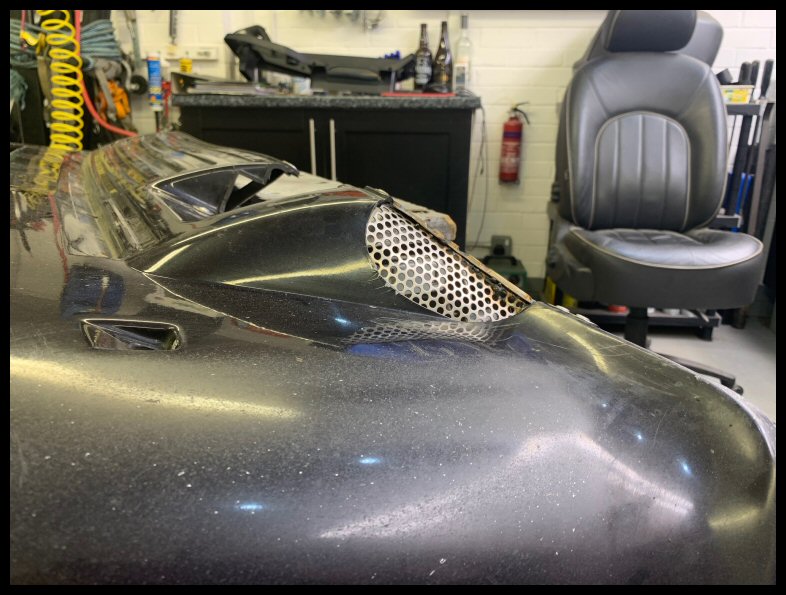
Image

I used ISOPON flexible bumper filler... looks like Nutella but I wouldn't eat it...

Image

Major sculpting finished, first coat of primer...

Image

I know its modified, but I sincerely hope I have something that looks as OE as possible.

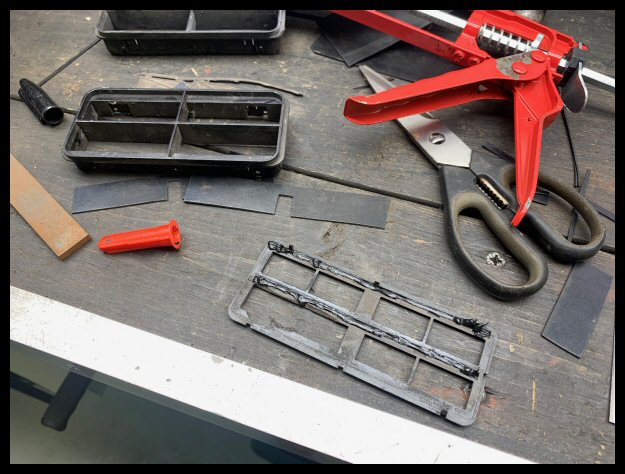
Due to the proximity of the tailpipe to surrounding plastic, I decided to make a small heatshield...

Image

Looking quite smart in brushed stainless...
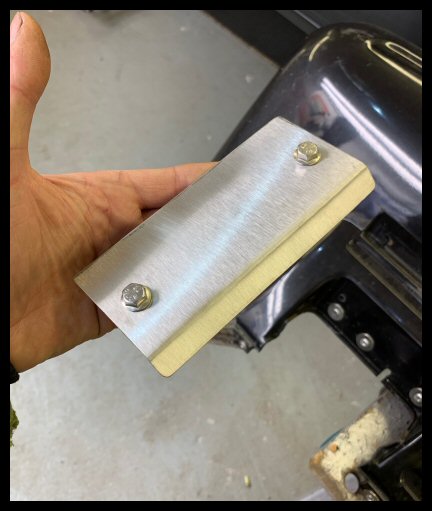
Image

Tailpipe Construction

Now that I have an aperture, I can now complete my tailpipe section.

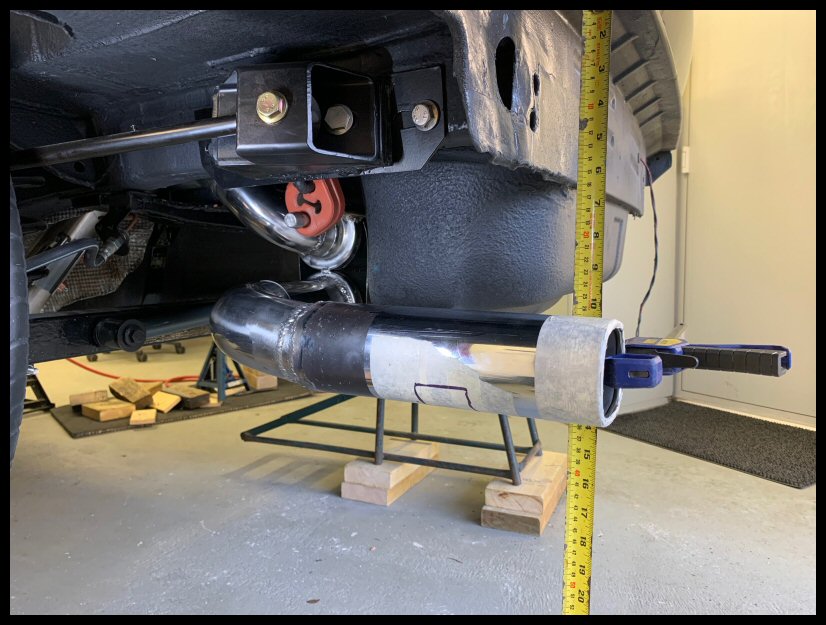
I temporarily fitted the bumper skin and positioned/marked the tailpipe.

Time to join this up...
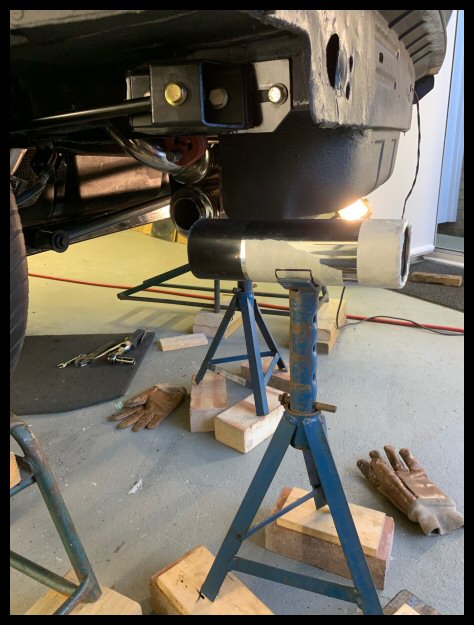
Image

Converting the tailpipe into round pipe...

Image

The last weld of a project is always your best weld... when you have worked out your amps, line feed and gas pressures on the hoof.

Image

Mounted to the silencer with the following sleeve clamp...

Image

... allowing for adjustment...

Image

Mounting the tailpipe with this sleeve clamp has the following benefits;

• Fine tuning of position within your bumper aperture.
• The internals of the rear silencer can still be accessed. This means I can add baffles, as required, to acheive a suitable volume to my preference.
• I can easily change tailpipe design.

I am keeping half an eye out for a stock rear bumper.... just in case I have second thoughts and want to go back to OE. My swappable tailpipe design would also allow this. I could, if I wanted, put a 100% stock tailpipe on my stainless system. When values are the same as the P1800ES, perhaps ;-)

Painting VHT black so it isn't visible through the wheel arch...
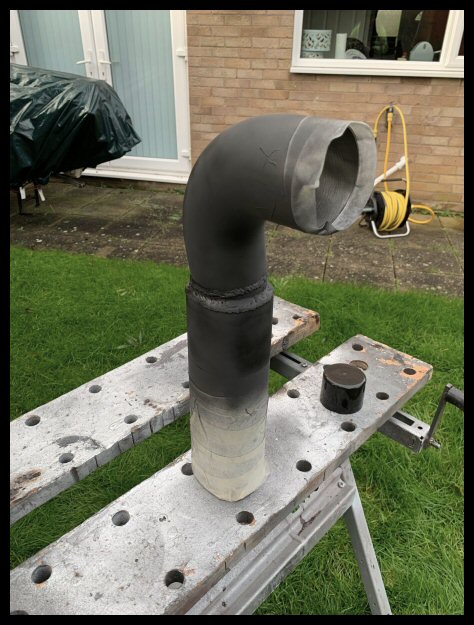
Image

Oven bake...

Image

All done....

Image

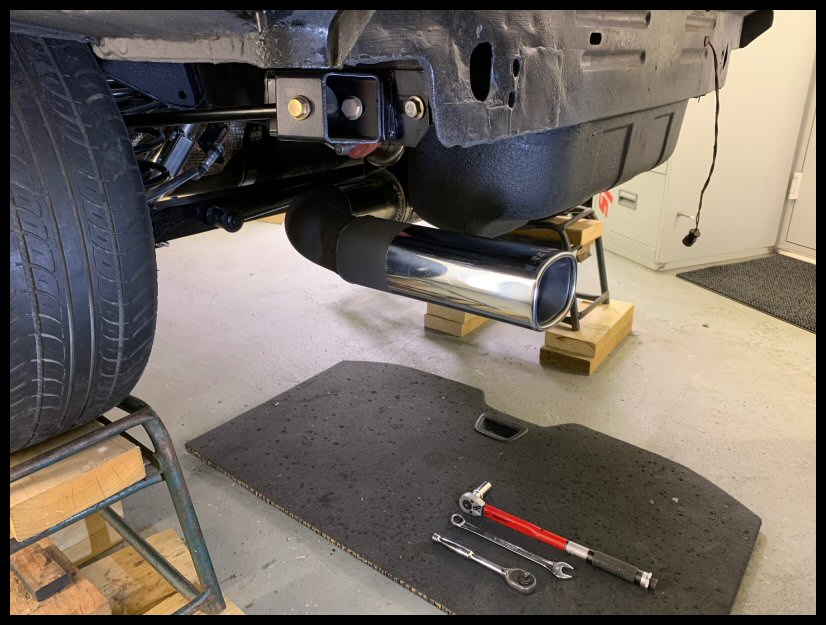
Fitted...

Image

Finite tailpipe adjustements to be made with a painted and fixed bumper...

Image


Conclusions

Image

Is it worth making an exhaust yourself? Ermmm, 100% NO!

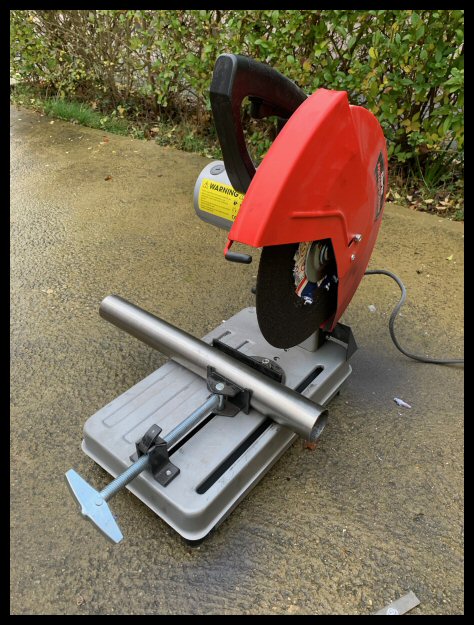
Like most things with this car, it took twice as long as I thought and cost twice as much. I used three hobby bottles of Argon, two spools of stainless wire, a chop saw disc, plus other consumables... that's £100 already and you haven't even started! These exhaust shops have the economy of scale - especially with the bigger 5ft gas bottles.

The numbers; £385 in stainless components. £100 in consumables. 23 hours exhaust construction. 8 hours bumper modifications. The only way I can get any comfort from those stupid numbers is if I can get ten years out of it.

Plus all that crawling under the car, then getting up out again, repeat.... my knees ! :cryhard:

AND, after all that, I have absolutely no idea what it sounds like. If it's too loud, I can add baffles as discussed and can even convert my de-cat pipe to another silencer. Who knows, there may be more exhaust work to come... :wall:

That all said, glad its all done and I am genuinely pleased with the result. I just hope it lasts to justify those costs!

It's easy stuff now, radiator... fill with coolant, fuel it up and get it to the paintshop, right?

I'll just leave this picture here...

Image

Probably best not to put that welder away just yet... :cryhard:
Jay-Kay-Em
-------------------------------------
Click here for My 480 Turbo Diary
Click here for My Cars

User avatar
MisterH
480 Is my middle name
Posts: 1175
Joined: Sat Nov 24, 2018 6:15 pm
Location: Stockbridge

Re: 1994 Volvo 480 Turbo Diary - Update January 2021

Post by MisterH » Sun Jan 24, 2021 3:54 pm

Wow Jay I think this is amazing, and I am a purist!

While OEM is my style, I love seeing OE-Modding as it is like what-if? history that I am also a fan of, what if they had just put that little bit more effort in?

So you didn't think to just have a fork in the pipe and have two pipes come out at an angle either side?

Love the idea of having it come through the fog light hole, didn't realise late cars had just one.

You had the right tools for bending the exhaust hanger, I remember being upside down on the drive with the exhaust fitted, and using a massive fulcrum to forcibly bend it :rofl:
Current Jobs to do (23/1/22):
Fix Central Locking
Fix drivers side speaker
Annoying Scratching Squeak
Water leaks
Complete Front O/S rebuild

User avatar
edie_fox
480 Rookie
Posts: 424
Joined: Wed Jun 29, 2005 9:05 pm
Location: Lincolnshire

Re: 1994 Volvo 480 Turbo Diary - Update January 2021

Post by edie_fox » Sun Jan 24, 2021 5:02 pm

Excellent work as always.

The modification is tidy and not ridiculous. A 10 from me. :lol:

Anadinolin
480 Newbie
Posts: 43
Joined: Fri Oct 04, 2013 8:34 am

Re: 1994 Volvo 480 Turbo Diary - Update January 2021

Post by Anadinolin » Sun Jan 24, 2021 8:38 pm

Nice work, wish I was as talented as you are!! Its looking great!! Not far off being finished?
What good music needs is full deep bass to give it warmth

100
Knows where Volvo is from
Posts: 178
Joined: Mon Mar 19, 2018 10:23 pm

Re: 1994 Volvo 480 Turbo Diary - Update January 2021

Post by 100 » Tue Jan 26, 2021 9:13 am

I don't think I've commented in this thread yet but the craftsmanship and attention to detail is amazing! This car is going to be seriously, seriously nice when finished.

As you might expect, I'm very intrigued to see how you get on with the stainless - the parts you are using are probably already miles ahead in terms of quality compared my debacle.

The exhaust through the redundant fog is a great idea, the position being such that on any other car it would have been the standard outlet!

User avatar
jamescarruthers
480 Is my middle name
Posts: 2540
Joined: Mon Jul 07, 2003 3:19 pm
Location: Cambridge

Re: 1994 Volvo 480 Turbo Diary - Update January 2021

Post by jamescarruthers » Wed Jan 27, 2021 11:11 am

Jay-Kay-Em wrote:
Sun Jan 24, 2021 3:35 pm

This uses the re-bush kit purchased from Renault 7700872205...

Image
Thanks very much for this replacement bushing part number! I am at Renault with the Avantime and have just ordered one for my car. £1.36... bargain!
Looking fantastic as usual; well done
1987 Volvo 480 ES, 507274, 217 - Red (Ness)
2006 Citroen C6 Exclusive 3.0 petrol/LPG
2008 Mini Cooper convertible (Mau)

Previous 480's:
J123 CFU -- ES
J449 MNL -- ES auto
D864 CPV -- ES
L691 JFC -- Turbo
F70 MNR -- ES
H858 FGV -- Turbo auto
E981 KHM -- ES (509849)

User avatar
Jay-Kay-Em
Advanced 480 rookie
Posts: 502
Joined: Tue Nov 27, 2012 10:42 pm
Location: Huntingdon
Contact:

Re: 1994 Volvo 480 Turbo Diary - Update January 2021

Post by Jay-Kay-Em » Wed Jan 27, 2021 10:18 pm

That's not so bad; I was expecting a roasting... normally Jeff picks me up on something :rofl:

Glad my ramblings could help an Avantime; one of the coolest cars ever made.
MisterH wrote:
Sun Jan 24, 2021 3:54 pm
So you didn't think to just have a fork in the pipe and have two pipes come out at an angle either side?
I went to rehab for my inner Max Power.. those days are behind me... :wink:
Like you say, just wanted that OEM+ kind of vibe. Saying that, I saw a fairly mundane looking 2016(ish) V40 the other day and that had two massive standard exhausts coming out either side! How times change for Volvo.
Anadinolin wrote:
Sun Jan 24, 2021 8:38 pm
Not far off being finished?
You'd think so but alas no, need to get this screen out (at the same time as the other windscreen thread on here) and possible welding / frame repair.

My painter isn't taking resprays until July... a good sign that he's busy I guess... but that does point to my completion spring 2022 :cry:

It might mean storage for April -> June with not a spanner turned waiting for that slot.

This is the elephant of gestations i'm afraid.

DVLA are being really obstructive with my original 'Volvo' SFC plate to the point that I don't think i'll get it back. Six months wait for a one paragraph letter saying no. Plus, a handy leaflet explaining what registration plates are :kill:

DVLA was in the news about COVID staffing levels so its probably the worst time ever to chase a request so obscure.

The next update will be getting it driveable and can I just say; the Turbo engine bay is a horrible horrible place. It is one of the worst cars I know for 'packaging'. By that I mean routing design. No matter how neat you try to make it, it still looks like a plate of spaghetti; coolant hoses, vacuum lines and wiring. That and the hose fret risk is high from any other hose clip you decided to use. An hour last night just trying to route my heater matrix hoses! For every one cable tie used, there are 6 on the floor cut off because they were wrong! :wall:
Jay-Kay-Em
-------------------------------------
Click here for My 480 Turbo Diary
Click here for My Cars

jifflemon
480 Is my middle name
Posts: 2568
Joined: Sat Dec 17, 2016 11:03 am

Re: 1994 Volvo 480 Turbo Diary - Update January 2021

Post by jifflemon » Thu Jan 28, 2021 8:00 am

Jay-Kay-Em wrote:
Wed Jan 27, 2021 10:18 pm
That's not so bad; I was expecting a roasting... normally Jeff picks me up on something :rofl:
OK.... the only thing that worries me is the lack of symmetry in the back end with a single fog lamp. However, it wasn't worth mentioning as:

a) its not my bloody car
b) you've already made provision for it by making the tailpipe detachable, so as you've already said, its reversible if needed.
Jay-Kay-Em wrote:
Wed Jan 27, 2021 10:18 pm
My painter isn't taking resprays until July... a good sign that he's busy I guess... but that does point to my completion spring 2022 :cry:
Sounds familiar story - however, mine was saying that 18 months ago! :eek:
Jay-Kay-Em wrote:
Wed Jan 27, 2021 10:18 pm
The next update will be getting it driveable and can I just say; the Turbo engine bay is a horrible horrible place. It is one of the worst cars I know for 'packaging'. By that I mean routing design. No matter how neat you try to make it, it still looks like a plate of spaghetti; coolant hoses, vacuum lines and wiring. That and the hose fret risk is high from any other hose clip you decided to use. An hour last night just trying to route my heater matrix hoses! For every one cable tie used, there are 6 on the floor cut off because they were wrong! :wall:
Amen to that! You don't have AC do you? because that takes the pain level one step further....

Alan 480
480 Is my middle name
Posts: 1522
Joined: Sun Aug 28, 2011 9:03 am
Location: Aberdeen

Re: 1994 Volvo 480 Turbo Diary - Update January 2021

Post by Alan 480 » Thu Jan 28, 2021 8:04 pm

jifflemon wrote:
Thu Jan 28, 2021 8:00 am
Jay-Kay-Em wrote:
Wed Jan 27, 2021 10:18 pm
That's not so bad; I was expecting a roasting... normally Jeff picks me up on something :rofl:
OK.... the only thing that worries me is the lack of symmetry in the back end with a single fog lamp. However, it wasn't worth mentioning as:

a) its not my bloody car
and given the attention to detail in every other area I'm sure a small transgression is permitted

I could not keep such keeness, I'd want to be using it :hopping:
Alan

480 ES 2litre 'Celebration' ? , C30 1.8ES, SS1

Post Reply