Page 3 of 3
Re: Sealing the rear lights
Posted: Fri Jun 28, 2019 5:03 pm
by Norm57

And NO it did not work!!
Re: Sealing the rear lights
Posted: Fri Jun 28, 2019 5:41 pm
by jamescarruthers
Definitely still coming in through the lights? The other likely culprits are the rear side reflector seals, the roof hinges (to car and to glass) and the hatch wiring conduit.
Re: Sealing the rear lights
Posted: Sat Jun 29, 2019 8:28 am
by Norm57
jamescarruthers wrote: ↑Fri Jun 28, 2019 5:41 pm
Definitely still coming in through the lights? The other likely culprits are the rear side reflector seals, the roof hinges (to car and to glass) and the hatch wiring conduit.
Thanks James, no it's definitely the rear lenses. The two small pools are in line and directly underneath both lights. Have water tested rear hatch and that's fine though may replace seal to be certain. The side reflector rubbers are not perished at all so I think they are not the culprits. Looks like along with all the other wedges I've had I will have to live with small leaks.
Re: Sealing the rear lights
Posted: Sat Jun 29, 2019 1:18 pm
by jifflemon
Until you’ve sat in boot with all the trim out whilst someone else is spraying the rear, you’ll not find it.
Mine leaked in a similar place but it was the rear “pocket” parts not draining. The water couldn’t drain fast enough, so ran along the seam, and escaping under the lights were there was gap in the seam.
Re: Sealing the rear lights
Posted: Sat Jun 29, 2019 1:59 pm
by Norm57
jifflemon wrote: ↑Sat Jun 29, 2019 1:18 pm
Until you’ve sat in boot with all the trim out whilst someone else is spraying the rear, you’ll not find it.
Mine leaked in a similar place but it was the rear “pocket” parts not draining. The water couldn’t drain fast enough, so ran along the seam, and escaping under the lights were there was gap in the seam.
]Thanks Jiff, how did you cure it?
Re: Sealing the rear lights
Posted: Sun Jun 30, 2019 10:26 am
by jifflemon
The cure to clear out the drain holes. The rear pockets drain into the rear of the rear wheel arch. Volvo in their infinite and unknown wisdom placed a sponge under the drain as part of the rear bumper assembly. Water will go through a sponge, dirt does not.
Cleaned out the hole, removed the sponges et voila!
Re: Sealing the rear lights
Posted: Wed Oct 21, 2020 11:14 am
by NillerGT
Good day all,
I have had a bit of a leak problem in the back and thought I would buy Joep's rear light seals and see whether that would help. The seals seem perfect, I got off almost all of the old seals' glue and residue with a stovetop scraper and Goo Gone.
Now I have just mounted the first "renovated" light and... it seems (very) warped, there is a huge gap between the edge of the seal and the car itself. I had not noticed this before. The cluster is not under any kind of stress, but seems oddly curved... Has anyone had this problem? Not sure the seals will be very effective.
Here are some pictures of my problem:
https://ibb.co/M9XCdQh
https://ibb.co/VtLSMRf


Thanks...
Re: Sealing the rear lights
Posted: Wed Oct 21, 2020 12:18 pm
by jamescarruthers
Originally these were in with butyl tape which doesn't set. You could install with this, nice and thick, and it would take up the shape of your warped light.
If you ordered the "seals" back in the day from Volvo you would receive a roll of this:
https://www.carbuilder.com/uk/butyl-sea ... ip-7-metre
Re: Sealing the rear lights
Posted: Sun Feb 27, 2022 5:59 pm
by Alan 480
jamesy12345 wrote: ↑Fri Oct 09, 2015 10:49 pm
Joep answered - he is still making the seals as below, also makes one for the part between the two rear clusters...
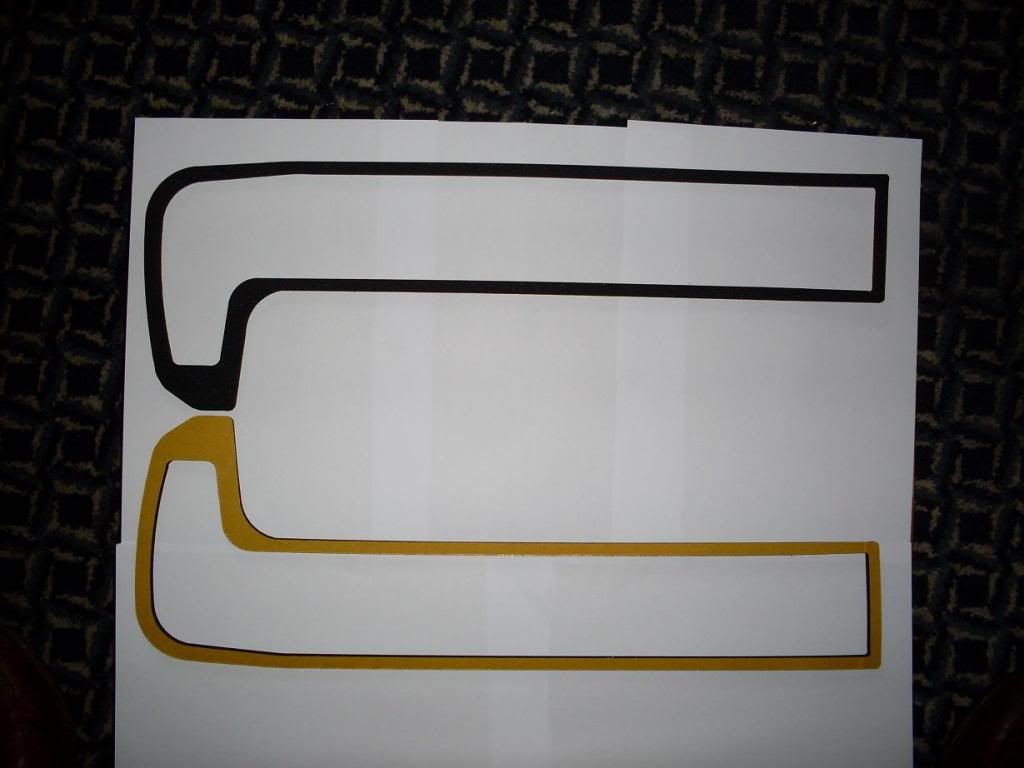
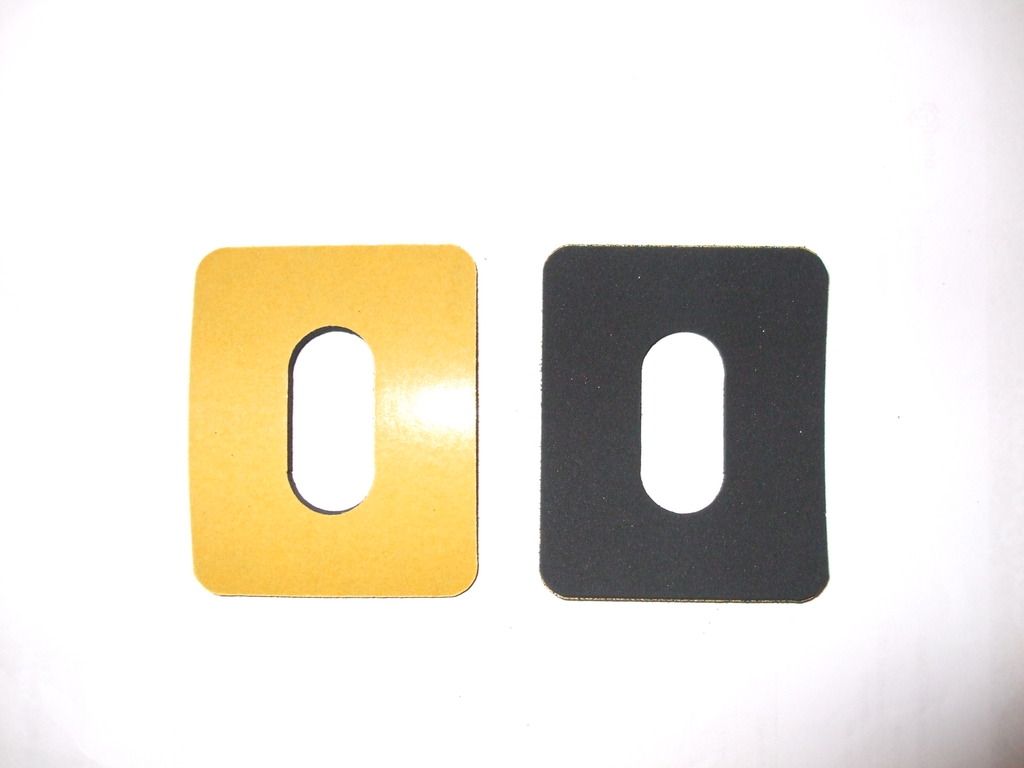
both photos are Joep's btw
so is that the ONLY seal, nothing vertically between the lenses?
mine have a large fresh air gap, mostly as I investigated the source of the leak with a watering can and I could get the penknife easily in the gap between the seal and body!!! BUT no sign of any real movement, even with all three nuts loose.....
pressed gently on the holders to see if any movement, a little, I suspect 'well held' at top edge of hockey stick, a little thin blade I reckon to wiggle around ??
tried even at the centre of the car (removed middle panel for better access) and pushed thin scraper into 'stop'

I've read al the hints!
Re: Sealing the rear lights
Posted: Mon Feb 28, 2022 10:38 am
by jifflemon
are you "unsealing" lights? there's nothing vertically between the cluster.
Central panel off first, then undo the three nuts, but don't remove them.
Cut out as much of the current sealing method as you can with a sharp knife - The problem here is that it depends what has been previously used.
Butyl responds well to a hair dryer, silicone sealant doesn't respond as well (but it's still worth warming them).
Re: Sealing the rear lights
Posted: Mon Feb 28, 2022 5:59 pm
by Alan 480
jifflemon wrote: ↑Mon Feb 28, 2022 10:38 am
are you "unsealing" lights? there's nothing vertically between the cluster.
Central panel off first, then undo the three nuts, but don't remove them.
Cut out as much of the current sealing method as you can with a sharp knife - The problem here is that it depends what has been previously used.
Butyl responds well to a hair dryer, silicone sealant doesn't respond as well (but it's still worth warming them).
Thanks, well 'removal' was the plan so I could re-seal them. Can I post sketches, assume I need to make it a jpg first?
picture paints thousand words.....
no way will the top edge of the light move even with ALL the foam lifted out, it wasn't really bonded, just some sticky stuff
well I think that the water is getting in where the arrow shows, maybe the 'bonding' has given up between the two halves of the light cluster?
I removed the foam seal (not glued in) and poured water into the void and NOTHING went into the car...
the lights seem 'well sealed' onto the steel work (black) with sealant (shown in green) not factory as seems like 'bathroom' and I have a receipt for 'repairs to rear light cluster'
so plan is to carefully apply some tape along the top edge and then any water that drips in will (hopefully) run along the new 'gutter' cos it did tonight


or try this link
https://photos.app.goo.gl/pXNkjiNkFzaLYKdk8
if image is not seen I'm sure Jeff will fix it....